
Air fryers have revolutionized the way we prepare cheese dishes, transforming simple ingredients into golden, crispy, and perfectly melted masterpieces. Whether you’re craving crispy air fryer string cheese, gooey air fryer mac and cheese, or creative appetizers like cream cheese wontons, your air fryer delivers restaurant-quality results with minimal effort.
This comprehensive guide will transform you from a beginner into an air fryer cheese expert. You’ll discover why air fryers create superior texture and flavor in cheese dishes, learn foolproof techniques for preventing common problems like burning or excessive melting, and master recipes that will impress everyone from casual snackers to sophisticated dinner guests.

What You’ll Learn:
- Professional techniques for achieving perfect cheese texture every time
- How to prevent common cheese disasters like burning, sticking, or over-melting
- Temperature and timing combinations for dozens of cheese varieties
- Creative recipes from simple grilled cheese to gourmet goat cheese balls
- Troubleshooting solutions for every cheese-related challenge
Why This Guide Matters: Cheese presents unique challenges in air fryer cooking due to its melting properties, fat content, and varying textures. Understanding how to control these variables unlocks unlimited culinary possibilities while avoiding the frustrations that often accompany cheese cooking. The controlled heat and air circulation of your air fryer, when properly managed, creates textures impossible to achieve through conventional methods.
Whether you’re preparing quick snacks like cheese sticks for the kids or sophisticated appetizers like cheese curds for entertaining, this guide provides the knowledge and techniques for consistent success.
Why Air Fryers Are Perfect for Cheese
Air fryers excel at cheese preparation due to their unique combination of intense heat, rapid air circulation, and precise temperature control. Understanding these advantages helps you maximize results and avoid common pitfalls that plague conventional cooking methods.
The Science of Air Fryer Cheese Success
The rapid circulation of hot air creates an environment that manages cheese’s complex behavior during heating more effectively than traditional ovens, stovetops, or deep fryers.
Controlled Melting Environment: Air fryers provide even heat distribution that prevents the hot spots responsible for burnt cheese surfaces while maintaining gooey centers. This controlled environment is crucial for dishes like air fryer cheese toastie where uniform melting determines success.
Crispy Coating Development: The intense air circulation creates perfectly crispy breading or coatings on items like cheese sticks and cheese curds while the interior cheese reaches ideal melting temperature without leaking through the coating.
Fat Management: Cheese contains significant fat that can cause smoking, spattering, or mess in conventional cooking. Air fryers manage this fat more effectively through their basket design and airflow system, making cleanup easier while producing superior results.
Browning and Caramelization: The Maillard reaction occurs rapidly in air fryers, creating the golden-brown surfaces that make cheese dishes visually appealing and flavorful. This browning happens consistently across the entire surface rather than in patches common with other cooking methods.
Temperature Precision Advantages
Modern air fryers offer precise temperature control crucial for cheese dishes where a few degrees difference determines success or disaster.
Preventing Cheese Disasters: Too high temperature causes cheese to burn before proper melting occurs. Too low temperature results in rubbery texture or incomplete melting. Air fryers maintain consistent temperatures that prevent these extremes.
Multiple Temperature Cooking: Many cheese dishes benefit from temperature variation during cooking. Air fryers allow quick temperature adjustments impossible with conventional ovens, enabling techniques like starting high for crust development then lowering for thorough melting.
Quick Recovery Time: When you open an air fryer to check progress, the small cooking chamber returns to temperature rapidly, unlike large conventional ovens. This quick recovery prevents temperature fluctuations that negatively impact cheese texture.
Time Efficiency Benefits
Air fryers dramatically reduce cooking time for cheese dishes while producing superior or equivalent results to traditional methods.
No Preheating Required: Most cheese dishes require minimal or no preheating, allowing you to cook cheese quesadillas or cheese on toast in minutes from start to finish.
Faster Cooking Times: The concentrated heat and air circulation cook cheese dishes 25-40% faster than conventional methods. What takes 20 minutes in a conventional oven often requires only 8-12 minutes in an air fryer.
Energy Efficiency: The smaller cooking chamber uses significantly less energy than heating a full-sized oven, making air fryers economical for single servings or small batches of cheese snacks.
Versatility Across Cheese Types

Air fryers accommodate various cheese types and preparations, from melted applications to crispy fried varieties.
Soft Cheese Applications: Delicate cheeses like cream cheese in wontons or cottage cheese chips require gentle handling that air fryers provide through precise temperature control.
Hard Cheese Preparations: Firm cheeses used in dishes like cheese scones or cheese bread benefit from air fryer’s even baking capabilities.
Melted Cheese Mastery: Dishes centered on melted cheese like cheesy potatoes or mac and cheese achieve ideal consistency without the scorching common in conventional preparation.
Breaded and Fried Applications: Air fryers eliminate the mess and health concerns of deep frying while producing comparable or superior results for items like mozzarella sticks and cheese pickle chips.
Key Takeaways:
- Air fryers provide controlled environments ideal for managing cheese’s complex heating behavior
- Precise temperature control prevents common cheese disasters like burning or inadequate melting
- Time efficiency and energy savings make air fryers practical for frequent cheese dish preparation
- Versatility across cheese types and preparations expands culinary possibilities
Essential Cheese Types and Their Properties
Understanding different cheese varieties and their behavior during heating forms the foundation for air fryer cheese mastery. Each cheese type presents unique characteristics that influence cooking techniques, temperatures, and timing.
Fresh Cheeses: Delicate and Moisture-Rich
Fresh cheeses contain high moisture content and delicate structures requiring careful temperature management to prevent breakdown or excessive drying.
Cream Cheese: With its smooth, spreadable consistency, cream cheese softens rapidly under heat. Used in cream cheese wontons, it provides creamy filling that contrasts beautifully with crispy wrappers. Cream cheese requires protective coating or wrapper to prevent melting through during cooking.
Cottage Cheese: This lumpy, fresh cheese contains significant moisture that must be managed during cooking. When transformed into cottage cheese chips, proper moisture removal through pre-cooking preparation ensures crispy results rather than soggy disappointments.
Ricotta Cheese: Though less common in air fryer applications, ricotta’s mild flavor and creamy texture work well in stuffed preparations. Its high moisture content requires careful temperature control to prevent weeping or separation.
Cooking Considerations for Fresh Cheeses:
- Lower temperatures (300-325°F) prevent moisture loss and texture degradation
- Protective coatings or wrappers essential for maintaining structure
- Pre-cooking moisture reduction improves final texture for chip applications
- Quick cooking times prevent excessive softening or melting
Soft Cheeses: Creamy and Meltable
Soft cheeses melt beautifully but require careful monitoring to prevent over-melting that leads to messy cleanup and suboptimal texture.
Mozzarella: The king of melting cheeses, mozzarella provides the stretchy, gooey texture desired in dishes like cheese sticks and cheese fries. Low-moisture mozzarella works better in air fryers than fresh mozzarella due to reduced liquid content.
String Cheese: Pre-portioned string cheese offers convenience and consistent results. Its cylindrical shape and coating adhesion make it ideal for breaded appetizers. The pre-formed shape ensures even cooking and attractive presentation.
Brie and Camembert: These soft, ripened cheeses develop luxurious, creamy interiors when warmed. Air fryers heat them evenly without the scorching that occurs with conventional methods. However, their tendency to become very fluid requires careful timing.
Goat Cheese: Tangy and creamy, goat cheese holds shape better than many soft cheeses during heating. Goat cheese balls develop crispy exteriors while maintaining creamy centers, showcasing air fryer capabilities with softer cheeses.
Cooking Considerations for Soft Cheeses:
- Medium temperatures (325-350°F) allow gradual melting without burning
- Breading or coating prevents excessive spreading during melting
- Watch closely during final minutes as melting accelerates rapidly
- Chilling coated items before cooking helps maintain shape
Semi-Hard Cheeses: Versatile and Reliable
Semi-hard cheeses offer versatility, providing good melting properties while maintaining enough structure for varied applications.
Cheddar: America’s favorite cheese performs reliably across applications from grilled cheese to cheese quesadillas. Sharp cheddar provides pronounced flavor while mild cheddar appeals to those preferring subtle taste. Aged cheddar melts less smoothly but offers more complex flavor.
Monterey Jack: This mild, creamy cheese melts smoothly and combines well with other varieties. Its subtle flavor makes it popular in cheese quesadillas and mac and cheese where it provides texture without overwhelming other ingredients.
Provolone: With mild, slightly tangy flavor, provolone melts beautifully while maintaining more structure than softer cheeses. It works excellently in cheese toasties and layered cheese applications.
Swiss Cheese: Known for its holes and nutty flavor, Swiss melts well without becoming greasy. Its relatively low fat content compared to other melting cheeses makes it healthier choice for applications like cheeseburger egg rolls.
Cooking Considerations for Semi-Hard Cheeses:
- Standard air fryer temperatures (350-375°F) work well for most applications
- Shred or slice thinly for faster, more even melting
- Combine varieties for complex flavor profiles and optimal melting
- These cheeses tolerate slightly higher temperatures than softer varieties
Hard Cheeses: Flavorful and Stable
Hard cheeses provide intense flavor and structure, though they require longer heating or higher temperatures to achieve desired consistency.
Parmesan: This intensely flavored aged cheese doesn’t melt smoothly but adds tremendous flavor when grated over dishes or mixed into coatings. In cheese scones or cheese bread, it provides savory depth and attractive browning.
Pecorino Romano: Similar to Parmesan but with sharper, saltier flavor, this sheep’s milk cheese adds bold taste to baked cheese dishes. Use sparingly due to intense flavor and high salt content.
Aged Cheddar: Well-aged cheddar develops crystalline texture and concentrated flavor. While it doesn’t melt as smoothly as younger cheddar, it provides superior taste for applications where smooth melting isn’t critical.
Cooking Considerations for Hard Cheeses:
- Higher temperatures (375-400°F) needed for any melting effect
- Use grated rather than sliced for better distribution and melting
- Excellent for flavor addition rather than texture contribution
- Combine with softer cheeses for optimal melting and flavor balance
Specialty and Processed Cheeses
Processed cheeses and specialty varieties offer unique characteristics useful for specific applications.
American Cheese: Processed for smooth melting, American cheese provides consistent results perfect for grilled cheese and cheeseburger egg rolls. Its emulsifiers ensure even melting without separation.
Pepper Jack: Monterey Jack with peppers adds spice to cheese dishes. The peppers don’t significantly affect melting properties, making it simple substitute wherever Monterey Jack appears in recipes.
Cheese Curds: Fresh cheese curds squeak when bitten and provide unique texture in air fryer cheese curds. Their irregular shapes require attention to ensure even coating and cooking.
Pre-Made Cheese Products: Items like Trader Joe’s mac and cheese bites contain optimized cheese blends designed for specific heating methods. These convenience products generally perform reliably in air fryers with manufacturer-recommended settings.
Key Takeaways:
- Different cheese types require adjusted temperatures and cooking times based on moisture content and structure
- Fresh and soft cheeses need gentler treatment than hard varieties
- Semi-hard cheeses offer best versatility across various applications
- Combining cheese types creates optimal texture and flavor profiles
- Understanding cheese behavior during heating prevents common cooking failures
Basic Air Fryer Cheese Techniques
Mastering fundamental cheese cooking techniques provides the foundation for success across all air fryer cheese applications. These core methods apply whether you’re making simple cheese on toast or complex cream cheese wontons.
Temperature Control Fundamentals
Precise temperature management separates successful cheese dishes from disappointing failures. Understanding temperature relationships with different cheese types and desired outcomes forms the critical foundation.
Low Temperature Applications (275-300°F): Use lower temperatures for delicate cheese preparations requiring gentle heating without browning. These temperatures work for warming cheese-based dips, softening cream cheese fillings, or maintaining already-cooked cheese dishes at serving temperature.
Medium Temperature Range (325-350°F): Most cheese melting applications succeed at medium temperatures. This range allows gradual, even melting while developing light browning on exposed surfaces. Dishes like cheese quesadillas and grilled cheese achieve optimal texture and appearance in this temperature zone.
Medium-High Temperatures (350-375°F): Breaded cheese items requiring crispy coatings and melted interiors perform best at medium-high temperatures. Cheese sticks, string cheese, and cheese curds develop golden crusts while achieving perfect interior consistency in this range.
High Temperature Cooking (375-400°F): Dishes where quick crust development or specific browning matters benefit from higher temperatures. Cheese scones and cheese bread require higher heat for proper rise and surface browning while cooking through completely.
Timing Precision Techniques
Accurate timing prevents the narrow window between perfect melting and disaster that characterizes cheese cooking.
The Visual Check Method: Rather than relying solely on timers, develop skills for visual assessment of cheese doneness. Look for:
- Golden-brown color on exposed cheese surfaces
- Slight bubbling indicating active melting
- Coating crispness on breaded items
- No visible cheese leakage through coatings
The Touch Test: Gentle pressing with tongs or spatula reveals internal consistency. Properly cooked breaded cheese items feel firm on exterior but give slightly when pressed, indicating melted interior.
Strategic Timing Checks: Check progress at 60% of estimated cooking time for first assessment, then every minute during final phase. This prevents overcooking while ensuring readiness.
Temperature Carryover: Remember that cheese continues cooking briefly after removal from air fryer due to residual heat. Remove items slightly before achieving perfect doneness for optimal final texture.

Coating and Breading Mastery
Proper coating techniques prevent cheese disasters while creating appealing textures and protecting cheese during high-heat cooking.
Three-Stage Breading System: Professional results require systematic approach:
- Flour Coating: Light flour dusting helps egg wash adhere while creating moisture barrier. Season flour with salt, pepper, and preferred spices for flavor foundation.
- Egg Wash Application: Beaten egg creates adhesive layer for breadcrumbs. Add tablespoon of milk or water to eggs for easier application and better coating coverage.
- Breadcrumb Layer: Final coating provides crunch and protection. Panko breadcrumbs create lighter, crispier texture than traditional breadcrumbs. Press breadcrumbs firmly to ensure adherence.
Double Coating Technique: For extra insurance against cheese leakage, repeat egg wash and breadcrumb steps after initial complete coating. This double layer provides additional protection during cooking, crucial for very soft cheeses.
Chilling Before Cooking: Refrigerate breaded cheese items 30 minutes to 2 hours before air frying. Cold cheese takes longer to melt, providing time for coating to crisp before interior becomes fluid.
Oil Application for Crispness: Light oil spray on breaded items enhances browning and crispness. Apply thin, even coat immediately before cooking for best results. Avoid heavy application which creates greasy rather than crispy texture.
Cheese Preparation Methods
How you prepare cheese before cooking significantly impacts final results across all applications.
Shredding Techniques: Use coarse grater for maximum meltability and coverage. Pre-shredded cheese contains anti-caking agents that inhibit smooth melting; shred block cheese fresh for superior results in applications like mac and cheese or cheesy potatoes.
Slicing Considerations: Uniform thickness ensures even melting. Use mandoline or sharp knife for consistent slices in cheese toasties and grilled cheese. Thinner slices (1/8 inch) melt faster and more evenly than thick slices.
Forming and Shaping: When working with soft cheeses like goat cheese for cheese balls, chill cheese before shaping for easier handling. Use slightly damp hands to prevent sticking during formation.
Pre-Freezing Strategy: For challenging items prone to excessive melting, brief freezing (15-30 minutes) firms cheese for easier breading and handling while providing insurance against cook-through before coating crisps.
Air Circulation Optimization
Proper positioning and spacing maximizes air fryer effectiveness for cheese dishes.
Single Layer Arrangement: Never overcrowd air fryer basket. Overlapping or touching items create steam pockets that prevent proper browning and crispness. Leave minimum 1/2 inch space between items for adequate air circulation.
Strategic Positioning: Place items requiring most browning in center of basket where heat concentration typically peaks. Position delicate items toward edges for gentler cooking.
Basket Preparation: Line basket with parchment paper for easy cleanup when cooking cheese-heavy dishes prone to dripping. Use perforated parchment designed for air fryers to maintain air circulation. Never use regular parchment paper which can block airflow.
Flipping and Rotating: Most cheese items benefit from halfway-through flipping for even browning and cooking. Use tongs or spatula for gentle handling that doesn’t damage coatings or disrupt melting cheese.
Moisture Management
Controlling moisture prevents soggy results and ensures optimal texture in finished cheese dishes.
Pre-Cooking Drying: Pat cheese surfaces dry before coating or cooking. Excess moisture prevents coating adhesion and creates steam during cooking that inhibits crispness.
Avoiding Condensation: Remove cooked items from air fryer immediately to prevent condensation accumulation from trapped steam. Transfer to wire rack rather than plate for proper drainage and airflow.
Strategic Venting: For dishes cooked in pans or dishes within air fryer, ensure adequate venting. Cover loosely with foil if needed, creating openings for steam escape.
Post-Cooking Rest: Allow breaded cheese items to rest 2-3 minutes after cooking. This brief period allows interior to stabilize slightly while exterior maintains crispness, preventing cheese eruption on first bite.
Key Takeaways:
- Precise temperature selection based on cheese type and desired outcome prevents common failures
- Visual and tactile assessment supplements timer-based cooking for optimal results
- Proper coating techniques protect cheese during cooking while creating appealing textures
- Cheese preparation methods significantly impact melting behavior and final texture
- Air circulation optimization and moisture management ensure consistent, high-quality results
Crispy Cheese Appetizers and Snacks
Crispy cheese appetizers represent air fryer cooking at its finest, combining golden exteriors with gooey, melted interiors that delight every cheese lover. Mastering these techniques transforms simple ingredients into restaurant-quality snacks perfect for entertaining or satisfying cravings.
Breaded Cheese Stick Mastery
Cheese sticks and string cheese represent classic appetizers that showcase proper breading technique and temperature control.
Optimal Cheese Selection: Low-moisture mozzarella provides ideal melting properties without excess liquid that compromises coating integrity. String cheese offers consistent sizing and convenient pre-portioned servings. Avoid fresh mozzarella which contains too much moisture for successful breading and air frying.
Professional Breading Process: Success requires systematic approach with attention to detail at each stage:
- Initial Preparation: Unwrap cheese sticks and pat completely dry with paper towels. Any surface moisture prevents flour adhesion in first coating stage.
- Seasoned Flour Dredge: Combine flour with Italian seasoning, garlic powder, and salt. Roll each cheese stick thoroughly, ensuring complete coverage. Shake off excess flour.
- Egg Wash Application: Beaten eggs with splash of milk create adhesive layer. Roll floured cheese sticks through egg mixture, allowing excess to drip off.
- First Breadcrumb Coating: Press cheese sticks firmly into panko breadcrumbs, ensuring complete coverage. Pay special attention to ends where cheese most easily escapes during cooking.
- Double Coating: Repeat egg and breadcrumb layers for additional protection. This second barrier provides insurance against cheese leakage.
- Critical Chilling: Freeze breaded sticks minimum 1 hour, preferably 2-3 hours. This step proves essential for preventing cheese escape during cooking.
Cooking Parameters:
- Temperature: 390°F
- Time: 6-8 minutes total
- Technique: No flipping required due to cheese stick shape
- Visual cues: Golden-brown coating with no visible cheese leakage
Serving Suggestions: Serve immediately with marinara sauce, ranch dressing, or garlic aioli. The window for optimal texture lasts only 5-10 minutes after cooking as cheese begins solidifying.
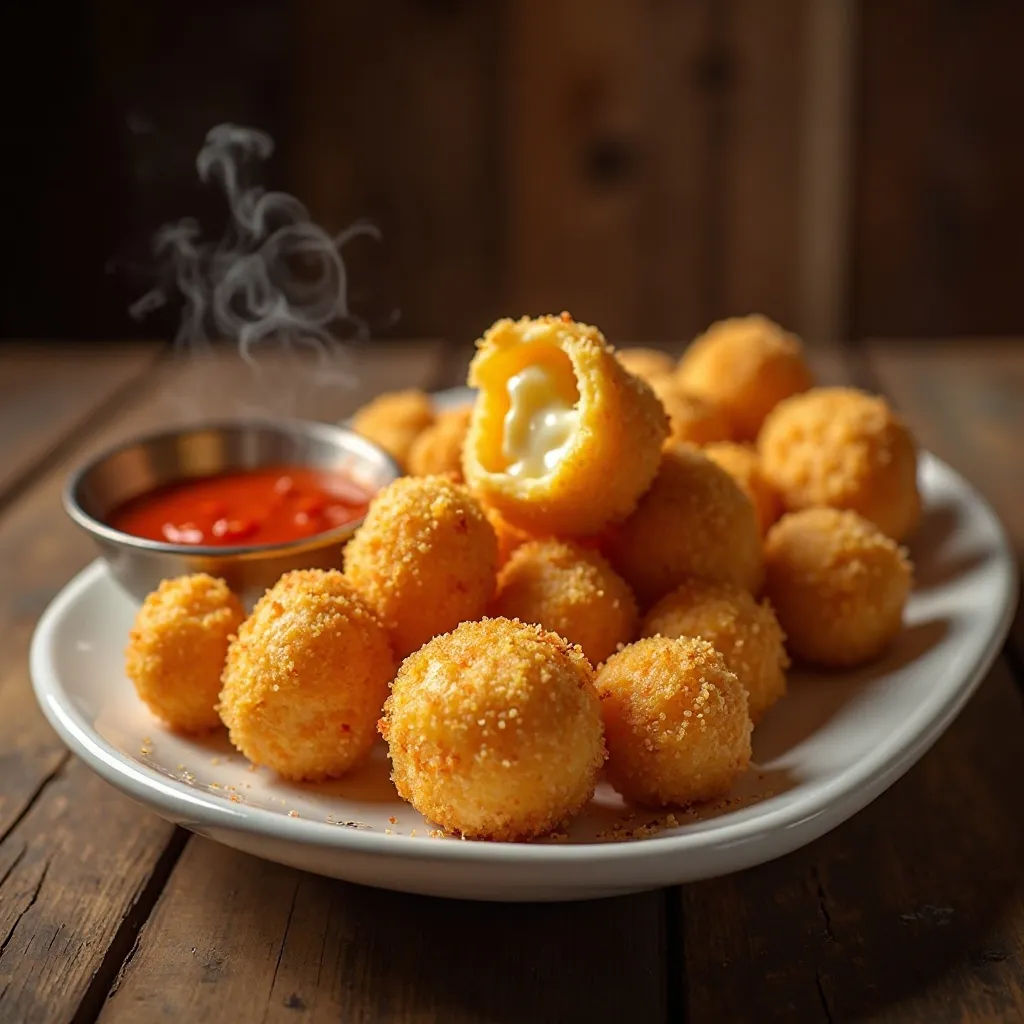
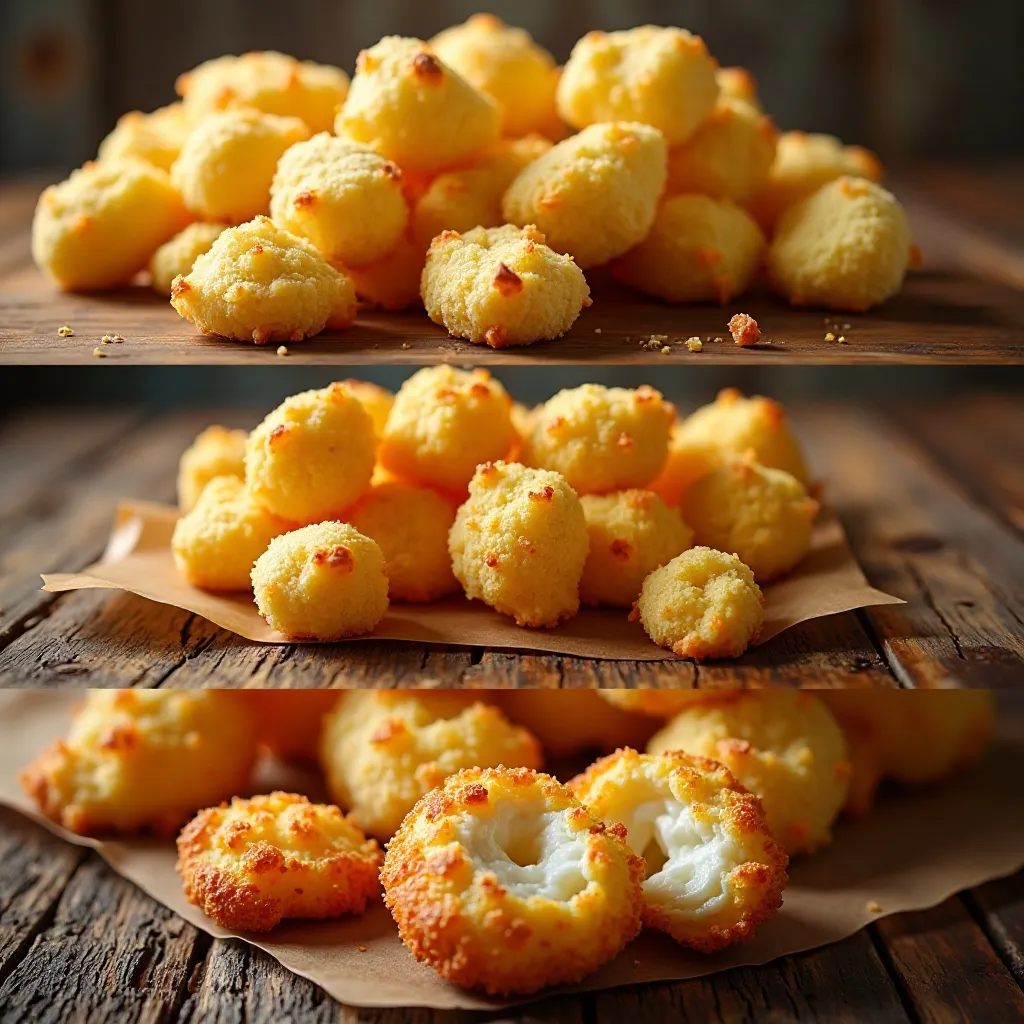
Cheese Curd Excellence
Cheese curds present unique challenges due to irregular shapes and tendency toward excessive squeakiness that some find unpleasant.
Curd Selection and Preparation: Fresh cheese curds work best, purchased within 24 hours if possible. Slightly aged curds (2-3 days old) actually work better for breading as they’ve lost some moisture that interferes with coating adhesion.
Addressing Shape Irregularity: Variable sizes require sorting before breading. Separate large, medium, and small curds, cooking similar sizes together for consistent doneness. Very large curds may benefit from cutting in half for more uniform cooking.
Modified Breading Approach: Standard three-stage process works but requires extra care ensuring complete coverage of irregular surfaces. Use fingers to press coating into crevices and gaps where cheese exposed surfaces create leakage risk.
Cooking Adjustments:
- Temperature: 400°F for smaller curds, 380°F for larger pieces
- Time: 5-7 minutes depending on size
- Technique: Shake basket gently halfway through for even browning
- Visual cues: Uniform golden color across all surfaces
Texture Optimization: Brief 30-second freeze blast after cooking then immediate serving provides optimal texture, with signature squeak balanced by crispy exterior.
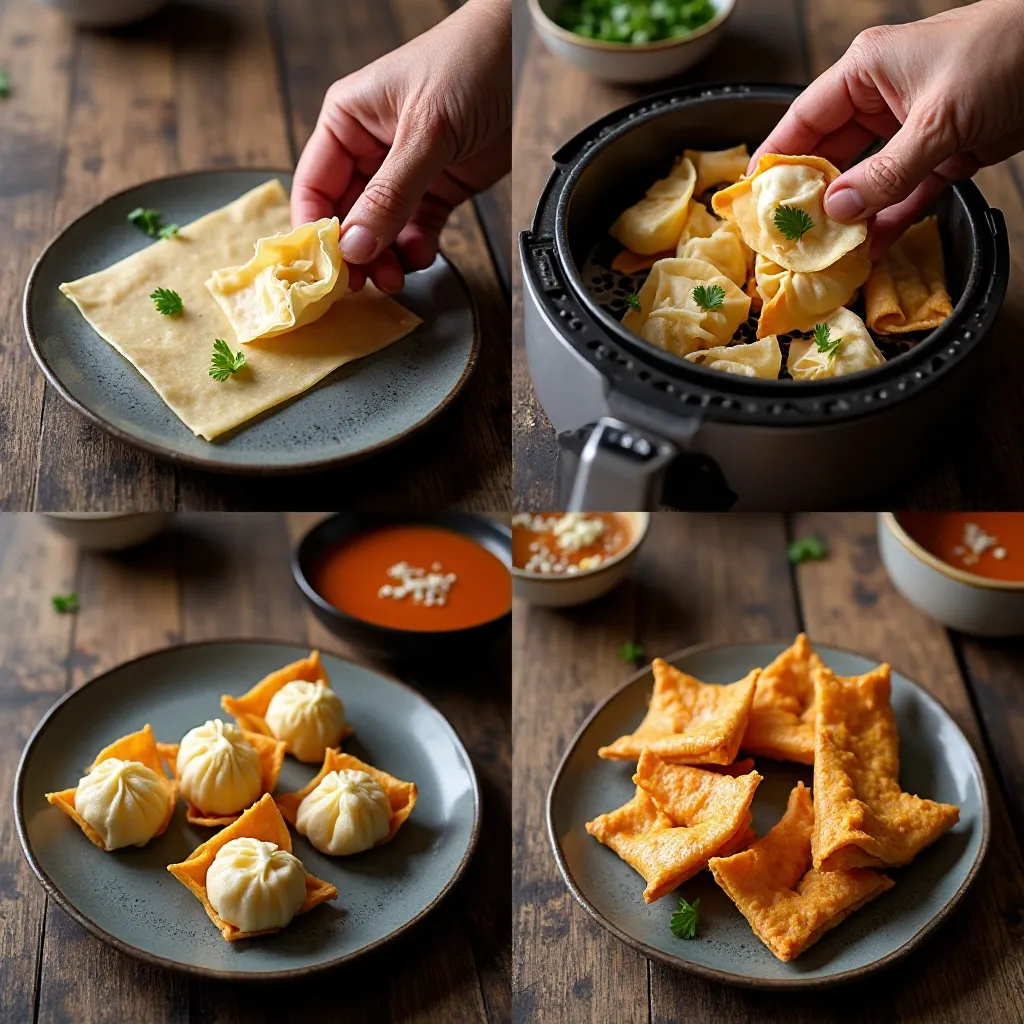
Cream Cheese Wonton Innovation
Cream cheese wontons combine crispy wrappers with creamy filling, demonstrating air fryer excellence with delicate preparations.
Filling Development: Softened cream cheese forms base, enhanced with green onions, garlic powder, and optional additions like crabmeat or jalapeños. Overly soft filling creates sealing difficulty; slightly firm texture works better.
Wrapper Handling: Keep wonton wrappers covered with damp towel during assembly to prevent drying. Dried wrappers crack during folding and fail to seal properly. Work with 3-4 wrappers at a time, keeping remainder covered.
Folding Techniques: Multiple folding styles work successfully:
- Triangle Fold: Simplest method, fold wrapper diagonally over filling
- Envelope Fold: Fold corners to center creating square package
- Bundle Style: Gather edges upward creating purse shape
Seal edges with egg wash or water, pressing firmly to ensure no gaps exist where filling might escape.
Air Frying Protocol:
- Temperature: 350°F for delicate wrappers
- Time: 8-10 minutes with halfway flip
- Oil spray: Light coating ensures golden browning
- Spacing: Adequate room between wontons prevents sticking
Serving Excellence: Sweet and sour sauce, sweet chili sauce, or soy-ginger dipping sauce complement cream cheese filling beautifully. Serve immediately while wrappers maintain peak crispness.
Goat Cheese Ball Sophistication
Goat cheese balls elevate appetizer presentation with tangy flavor and elegant appearance suitable for upscale entertaining.
Cheese Preparation: Quality goat cheese (chèvre) should be well-chilled before forming. Roll into 1-inch balls using slightly damp hands to prevent excessive sticking. Chill formed balls 30 minutes before coating.
Coating Variations: Standard breadcrumb coating works, but creative alternatives provide unique presentations:
- Herb Crust: Mix fresh herbs into panko for herbaceous flavor
- Nut Coating: Crushed pistachios or almonds create sophisticated texture
- Honey Drizzle: Light honey brush before breadcrumbs adds sweet contrast
- Everything Seasoning: Popular bagel seasoning provides bold flavor profile
Cooking Perfection:
- Temperature: 375°F
- Time: 6-8 minutes
- Technique: Flip gently at 4 minutes
- Visual cue: Golden exterior with slight softening when gently pressed
Presentation Excellence: Arrange on bed of arugula or mixed greens, drizzle with honey or balsamic reduction, and serve with crostini or crackers for complete appetizer experience.
Cheese Pickle Chips Innovation
Cheese pickle chips combine tangy pickles with melted cheese for unique flavor profile appealing to adventurous eaters.
Pickle Preparation: Pat pickle chips completely dry with paper towels. Excess moisture prevents coating adhesion and creates steam during cooking that yields soggy results. Use dill pickle chips rather than sweet pickles for better flavor balance with cheese.
Cheese Selection: Sliced cheddar or pepper jack works best. Cut cheese circles slightly larger than pickle chips to account for shrinkage during melting. Place cheese on pickle, then coat entire unit together.
Coating Strategy: Extra-thick coating helps contain moisture from pickles. Triple breadcrumb layer provides optimal protection. Freeze coated chips 1 hour before cooking for structural integrity.
Cooking Approach:
- Temperature: 375°F
- Time: 8-10 minutes
- Technique: Single layer only, no flipping necessary
- Visual cue: Cheese fully melted, coating deeply golden
Flavor Enhancement: Ranch or blue cheese dipping sauce complements pickle-cheese combination beautifully. Serve immediately while cheese maintains optimal gooeyness.
Key Takeaways:
- Proper chilling before cooking prevents cheese escape in breaded applications
- Temperature selection balances coating crispness with interior melting
- Different cheese types require adjusted techniques and cooking parameters
- Visual assessment supplements timing for optimal results
- Creative variations expand appetizer possibilities beyond traditional preparations
Melted Cheese Comfort Foods
Melted cheese comfort foods represent the heart of American cuisine, and air fryers excel at creating perfectly gooey, golden-topped dishes that satisfy cravings while delivering superior texture to conventional methods.
Grilled Cheese Perfection
Air fryer grilled cheese demonstrates air fryer advantages for classic comfort food preparation, producing evenly golden exteriors with completely melted cheese interiors.
Bread Selection Strategy: Sturdy bread varieties work best, providing structure without becoming soggy. Sourdough, country white, or Texas toast maintain integrity during cooking while developing beautiful golden crust. Avoid thin sandwich bread which becomes too crispy or burns before cheese fully melts.
Cheese Combination Mastery: Multiple cheese types create complex flavor and optimal melting properties:
- Classic Duo: American and cheddar provides reliable melting with familiar flavor
- Gourmet Blend: Gruyère and sharp cheddar delivers sophisticated taste
- Creamy Mix: Fontina and mozzarella creates ultra-melty texture
- Bold Choice: Pepper jack and provolone adds spice with smooth melt
Butter Application Technique: Softened butter spreads easier than melted, providing even coverage without soaking bread. Apply thin, uniform layer to outer surfaces only. Mayo substitutes for butter create similar browning with tangier flavor profile.
Assembly and Cooking:
- Butter bread slices on one side
- Layer cheese between slices, buttered sides out
- Cook at 370°F for 4 minutes
- Flip carefully and cook additional 3-4 minutes
- Press gently with spatula during final minute for compact sandwich
Visual Doneness Indicators: Perfect grilled cheese exhibits deep golden-brown color on both sides with visible cheese oozing slightly from edges. Cheese should be completely melted throughout without burning bread surfaces.
Mac and Cheese Excellence
Air fryer mac and cheese transforms stovetop classic into crowd-pleasing side dish or main course with crispy, golden top layer contrasting creamy interior.
Pasta Preparation Foundation: Cook pasta 2 minutes less than package directions, achieving al dente texture. Slightly undercooked pasta prevents mushiness during air fryer finishing. Drain thoroughly and toss with small amount of butter to prevent sticking.
Cheese Sauce Development: Create smooth, creamy sauce using roux method:
- Melt butter in saucepan
- Whisk in flour, cooking 1-2 minutes
- Gradually add milk, whisking constantly
- Simmer until thickened
- Remove from heat, stir in shredded cheese until melted
- Season with salt, pepper, mustard powder
Cheese Selection for Sauce: Sharp cheddar provides backbone, but combination creates superior results. Mix sharp cheddar (50%), gruyère (30%), and fontina (20%) for restaurant-quality sauce with excellent melt and flavor complexity.
Air Fryer Assembly: Transfer coated pasta to oven-safe dish fitting air fryer basket. Top with additional shredded cheese and breadcrumb mixture (panko mixed with melted butter and parmesan).
Cooking Protocol:
- Temperature: 350°F
- Time: 12-15 minutes
- Visual cue: Top golden and bubbling, edges slightly browned
Variation Ideas: Add cooked bacon, caramelized onions, jalapeños, or lobster for elevated mac and cheese experiences. Mix-ins should be stirred into cheese sauce before combining with pasta.
Cheese Quesadilla Mastery
Air fryer cheese quesadilla provides quick meal or snack with crispy exterior and perfectly melted cheese interior achieved without stovetop attention.
Tortilla Selection: Flour tortillas work better than corn for cheese quesadillas due to larger size and superior pliability. Standard 8-10 inch tortillas fit most air fryer baskets. Avoid whole wheat tortillas which can taste dry in air fryer.
Cheese Distribution: Spread shredded cheese evenly across half of tortilla, leaving 1/2 inch border for sealing. Monterey jack, cheddar, or Mexican blend cheese all perform excellently. Use 1/2 to 3/4 cup cheese per quesadilla for optimal cheese-to-tortilla ratio.
Filling Enhancement: Keep fillings minimal to prevent quesadilla from becoming too thick for proper cooking:
- Sautéed bell peppers and onions
- Cooked, seasoned chicken or beef
- Black beans (drained and rinsed)
- Pickled jalapeños for heat
Cooking Technique:
- Fold tortilla in half over cheese and fillings
- Brush exterior lightly with oil or cooking spray
- Place in air fryer at 350°F
- Cook 5 minutes, flip, cook 3-4 minutes more
- Press gently with spatula to ensure cheese melts throughout
Serving Excellence: Cut into triangles using pizza cutter or sharp knife. Serve immediately with sour cream, guacamole, and salsa. Quesadillas lose crispness quickly, so prepare immediately before serving.
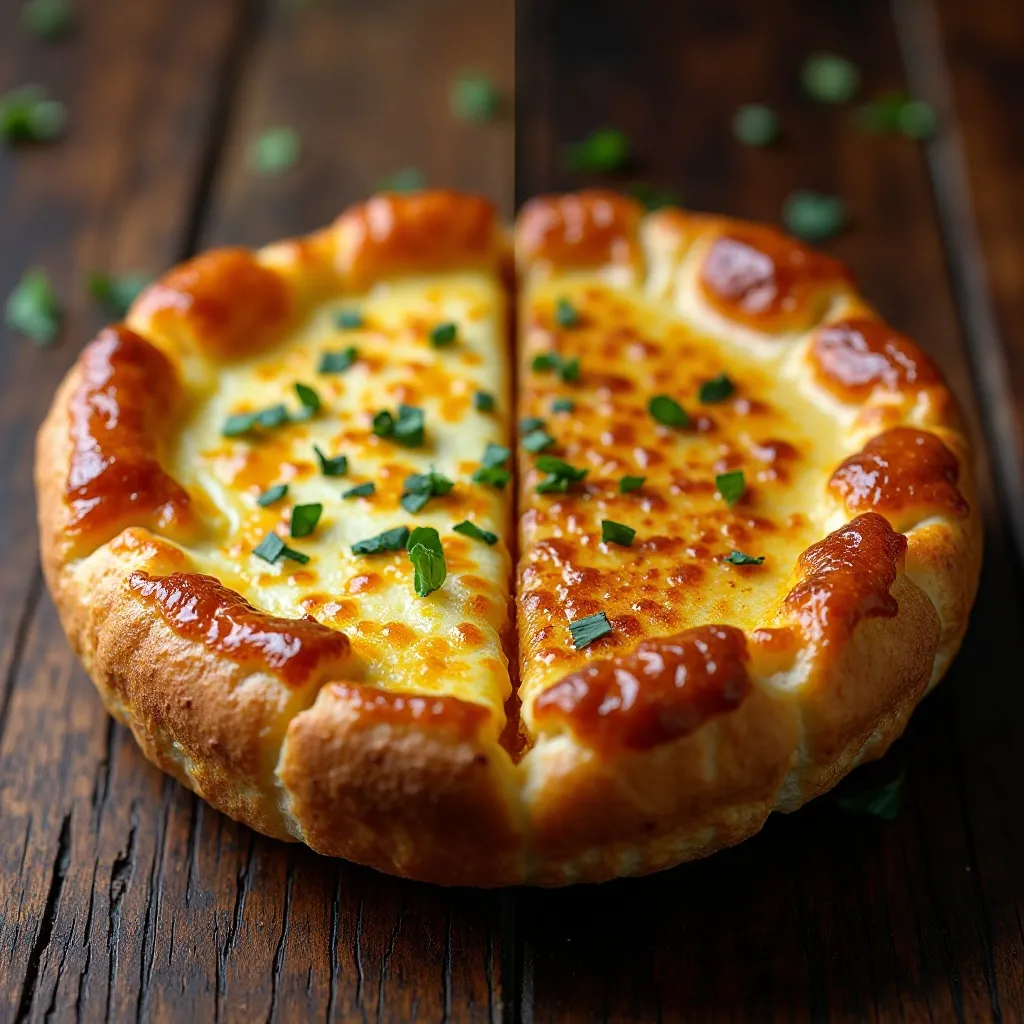
Cheese Toastie Innovation
Air fryer cheese toastie offers British twist on grilled cheese with unique ingredients and preparation style that showcases international cheese sandwich variations.
British Bread Selection: Thick-cut white bread traditional for toasties works perfectly in air fryers. Alternatively, use sourdough or whole grain for updated versions. Bread should be sturdy enough to contain fillings without falling apart.
Cheese and Filling Combinations: Traditional British combinations include:
- Mature Cheddar and Branston Pickle: Sweet-savory classic
- Red Leicester and Onion: Colorful and flavorful
- Stilton and Pear: Elegant sweet-savory pairing
- Wensleydale and Cranberry: Holiday-inspired combination
Assembly Differences from Grilled Cheese: Toasties typically include more fillings and use firmer ingredients than American grilled cheese. Ingredients should be sliced thin and distributed evenly to ensure even cooking and easy eating.
Cooking Adjustments:
- Temperature: 375°F (slightly higher for thicker sandwiches)
- Time: 8-10 minutes total with halfway flip
- Pressure: Weight or press sandwich during cooking for compact result
Presentation Style: Cut diagonally for traditional presentation. Serve with tomato soup or side salad for complete meal. British tradition serves toasties slightly more well-done than American grilled cheese preference.
Cheesy Potato Variations
Air fryer cheesy potatoes transform simple potatoes into indulgent side dish perfect for holiday meals or special occasions.
Potato Preparation: Russet or Yukon Gold potatoes work best. Peel and slice thin (1/8 inch) using mandoline for uniform thickness ensuring even cooking. Soak sliced potatoes in cold water 15 minutes to remove excess starch, then pat completely dry.
Cheese Sauce or Shredded: Two approaches yield different results:
- Layered and Shredded: Alternate potato layers with shredded cheese, finish with cheese on top
- Sauce-Based: Toss potatoes with cheese sauce before air frying for more evenly distributed cheese flavor
Seasoning Enhancement: Beyond cheese, season potatoes with:
- Garlic powder and onion powder for savory depth
- Fresh thyme or rosemary for herb notes
- Paprika for color and mild spice
- Salt and pepper to taste
Cooking in Stages:
- Cook potatoes at 375°F for 15 minutes
- Add shredded cheese on top
- Continue cooking 5-7 minutes until cheese melted and golden
- Rest 3-4 minutes before serving for cheese to set slightly
Variation Ideas: Transform basic cheesy potatoes by adding cooked bacon, caramelized onions, sour cream topping, or chive garnish for upgraded presentation and flavor.
Cheese Fries Decadence
Air fryer cheese fries elevate standard French fries into indulgent appetizer or side dish combining crispy potato with melted cheese and optional toppings.
Fries Foundation: Start with properly cooked fries—either homemade or frozen. Homemade fries should be double-fried method: initial cook at 325°F for 8 minutes, rest, then final crisp at 400°F for 5-7 minutes.
Cheese Application Method: Shredded cheese works better than cheese sauce for even melting without sogginess. Distribute cheese evenly across fries in air fryer basket or on oven-safe plate inside basket.
Temperature Strategy: After cooking fries to crispy stage, reduce temperature to 350°F, add cheese, and cook additional 2-3 minutes just until melted. This prevents fries from overcooking while cheese melts.
Loaded Fries Options: Transform basic cheese fries into loaded versions:
- Bacon Cheese Fries: Crumbled bacon, cheese, green onions, sour cream
- Chili Cheese Fries: Ground beef chili, cheese, jalapeños, sour cream
- Pizza Fries: Mozzarella, pepperoni, Italian seasoning, marinara drizzle
- Nacho Fries: Mexican cheese blend, jalapeños, guacamole, salsa
Serving Immediately: Cheese fries must be served within 5 minutes of cooking for optimal texture. Cheese solidifies and fries lose crispness rapidly, making immediate consumption essential.
Cheeseburger Egg Roll Creativity
Air fryer cheeseburger egg rolls combine American classic with Asian wrapper for fusion creation that surprises and delights.
Filling Development: Cook ground beef with burger seasoning (salt, pepper, garlic powder, onion powder). Drain thoroughly to remove excess grease which makes wrappers soggy. Mix cooked beef with shredded cheese, diced pickles, and small amount of ketchup-mustard mixture.
Wrapper Selection: Egg roll wrappers provide sturdy structure containing hearty filling. Spring roll wrappers too delicate for ground beef mixture. Find egg roll wrappers in refrigerated section of Asian markets or well-stocked grocery stores.
Rolling Technique:
- Place wrapper diamond-style on clean surface
- Add 2-3 tablespoons filling to center
- Fold bottom corner over filling
- Fold in left and right corners
- Roll tightly toward remaining corner
- Seal with egg wash or water on final corner
Cooking Parameters:
- Temperature: 375°F
- Time: 12-15 minutes, flipping halfway
- Oil spray: Brush or spray lightly for golden color
- Visual cue: Deep golden-brown, crispy texture throughout
Dipping Sauce: Combine ketchup, mustard, and mayonnaise in “special sauce” ratio (2:1:1) for authentic burger flavor profile. Alternatively, serve with thousand island dressing or plain ketchup.
Key Takeaways:
- Melted cheese dishes require temperature management balancing cheese melting with exterior browning
- Proper assembly techniques prevent sogginess and ensure structural integrity
- Creative combinations transform basic cheese dishes into memorable meals
- Timing matters significantly—serve melted cheese dishes immediately for best experience
- Multiple cheese types create superior flavor and texture compared to single varieties
Advanced Cheese Creations
Advanced cheese preparations showcase air fryer versatility while challenging your developing skills. These recipes require mastering previous techniques while introducing new complexity layers that produce impressive results.
Cottage Cheese Chips Innovation
Cottage cheese chips represent innovative approach to high-protein snacking, transforming wet cheese into crispy, savory chips through careful moisture management.
Moisture Removal Process: Success depends on removing maximum moisture before air frying. Drain cottage cheese in fine-mesh strainer 15 minutes, pressing gently to extract liquid. Spread on paper towel-lined plate, pat with additional paper towels until surface feels relatively dry.
Flavoring Strategy: Mix cottage cheese with desired seasonings while still slightly moist for even distribution:
- Everything Seasoning: Popular bagel seasoning blend
- Ranch Powder: Dried ranch dressing mix
- Italian Herbs: Oregano, basil, garlic powder, parmesan
- Spicy: Cayenne, chili powder, paprika
Forming Technique: Spoon small amounts (1-2 tablespoons) onto parchment-lined air fryer basket, spacing 2 inches apart. Flatten slightly into circles using back of spoon. Size matters—too thick creates chewy rather than crispy result.
Critical Cooking Process:
- Temperature: 350°F initially
- Time: 15-20 minutes total
- Technique: Cook 10 minutes, flip carefully, continue 5-10 minutes
- Visual cue: Edges browned, center firm and crispy
Texture Achievement: Properly cooked cottage cheese chips should snap when broken and feel completely dry. Any remaining moisture creates chewy texture. If needed, continue cooking in 2-minute increments until fully crispy.
Storage Considerations: Store completely cooled chips in airtight container with silica gel packet for moisture absorption. Properly dried chips stay crispy 3-4 days at room temperature.
Cheese on Toast Elevated
Air fryer cheese on toast might seem basic but mastering this British classic requires understanding optimal cheese melting while achieving perfect toast texture.
Bread Preparation: Thick-cut bread (3/4 to 1 inch) provides best results. Toast bread lightly (1-2 minutes at 350°F) before adding cheese to prevent sogginess from cheese moisture. This pre-toasting creates barrier protecting bread texture.
Cheese Selection and Preparation: Sharp cheddar remains traditional choice, but combinations create superior results. Grate cheese rather than slicing for better melting and coverage. Mix grated cheddar with small amount of grated parmesan for enhanced flavor and improved browning.
Enhancement Additions: Elevate basic cheese on toast with creative additions:
- Worcestershire Sauce: Few dashes mixed into cheese before spreading
- Mustard Powder: Quarter teaspoon per slice adds depth
- Tomato Slices: Thin tomato under cheese creates pizza-like variation
- Herbs: Fresh or dried herbs mixed into cheese
Optimal Cooking Approach:
- Pre-toast bread lightly
- Spread thick cheese layer edge-to-edge
- Cook at 375°F for 4-5 minutes
- Watch carefully during final minute
- Remove when cheese fully melted with golden-brown spots
Serving Tradition: Cut diagonally and serve immediately. Traditional British serving includes alongside baked beans or as light lunch with tomato soup.
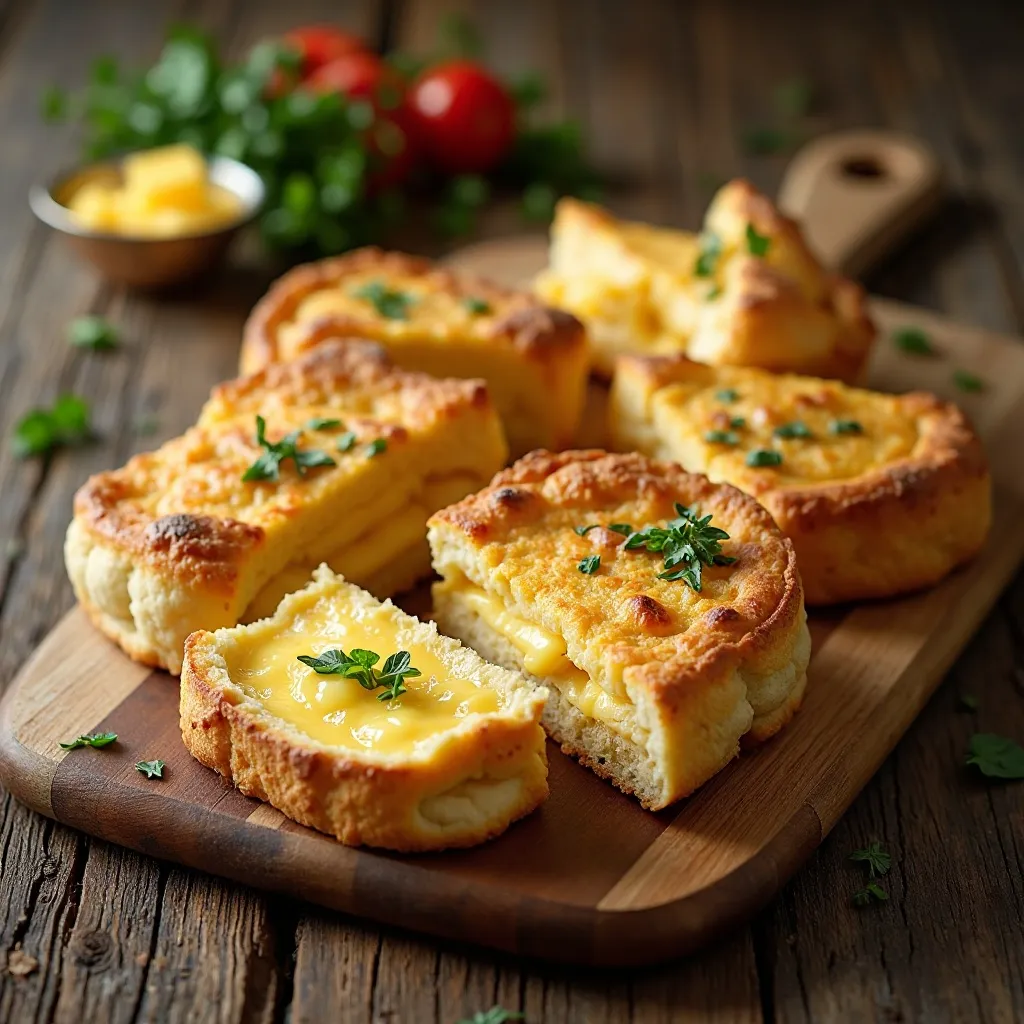
Cheese Bread Mastery
Air fryer cheese bread requires understanding baking fundamentals applied to air fryer environment, producing savory bread studded with melted cheese pockets.
Dough Development: Use standard bread dough recipe with modifications:
- Reduce liquid slightly (10-15%) accounting for air fryer’s drier environment
- Add shredded cheese during final kneading stage
- Include herbs (rosemary, thyme, or Italian seasoning) for flavor complexity
- Allow full rise time despite air fryer speed advantages
Cheese Selection and Integration: Hard cheeses like parmesan, aged cheddar, or Gruyère work better than soft cheeses which create excessive moisture pockets. Cut cheese into small cubes (1/4 inch) for even distribution throughout dough.
Shaping for Air Fryer: Form dough into small loaves or rolls sized appropriately for your air fryer basket. Individual rolls ensure even cooking while providing portion control. Leave space for expansion during baking.
Baking Protocol:
- Temperature: 320°F for initial cooking
- Time: 15-18 minutes for rolls, 22-25 for small loaves
- Technique: Rotate halfway through
- Test: Internal temperature should reach 190°F
Surface Treatment: Brush tops with egg wash before baking for golden color, or butter immediately after removing from air fryer for soft, flavorful crust.
Cheese Scones Sophistication
Air fryer cheese scones demonstrate air fryer’s baking capabilities while producing savory British teatime treats perfect for breakfast or snacks.
Dough Composition: Traditional scone dough modified for cheese inclusion:
- All-purpose flour forms base
- Cold butter cut into flour creates flaky texture
- Buttermilk or heavy cream provides moisture
- Sharp cheddar cheese (1-2 cups) adds flavor
- Baking powder provides lift
Critical Technique Points: Handle dough minimally to prevent toughness. Overworking develops gluten creating dense rather than tender scones. Use light touch when mixing and shaping.
Shaping Methods: Two approaches work successfully:
- Pat and Cut: Pat dough into 3/4-inch thick circle, cut wedges
- Drop Scones: Drop spoonfuls directly onto parchment for rustic appearance
Air Fryer Baking:
- Temperature: 350°F
- Time: 12-15 minutes depending on size
- Visual cue: Golden brown top, firm to gentle touch
- Internal temperature: 200°F indicates doneness
Serving and Storage: Serve warm with butter. Leftover scones reheat excellently in air fryer (300°F, 2-3 minutes). Store airtight at room temperature 2 days or freeze up to 3 months.
Trader Joe’s Mac and Cheese Bites
Trader Joe’s mac and cheese bites demonstrate perfect air fryer application for convenience foods, producing superior results to package directions.
Product Understanding: These pre-made bites contain mac and cheese filling surrounded by breadcrumb coating. Frozen state requires no thawing before cooking, actually producing better results when cooked from frozen.
Optimal Cooking Method:
- Temperature: 380°F (higher than package instructions)
- Time: 10-12 minutes
- Arrangement: Single layer, adequate spacing
- Flip: Halfway through for even browning
Why Air Fryer Excels: Conventional oven baking requires 25-30 minutes with less crispy results. Air fryer reduces time while creating crispier exterior and ensuring thoroughly heated interior without cold spots.
Serving Suggestions: These bites work as appetizers, snacks, or party food. Serve with marinara sauce, ranch dressing, or honey mustard for dipping. Their compact size makes them ideal finger food.
Homemade Version: Create similar bites using leftover mac and cheese:
- Chill mac and cheese until very firm
- Form into balls or patties
- Bread using three-stage process
- Freeze before cooking
- Cook using same parameters as commercial version
Key Takeaways:
- Advanced preparations require mastering moisture management and structural integrity
- Baking in air fryers follows modified conventional baking principles
- Convenience foods often perform better in air fryers than conventional methods
- Creative approaches transform simple ingredients into impressive dishes
- Temperature and timing precision becomes more critical with complex preparations
Cheese and Bread Combinations
The marriage of cheese and bread represents culinary perfection, and air fryers excel at creating these combinations with superior texture and flavor development compared to traditional methods.
Understanding Bread-Cheese Synergy
Successful cheese-bread combinations require understanding how both components behave during heating and how they interact to create harmonious final products.
Moisture Balance: Cheese releases moisture during melting while bread absorbs liquid and becomes soggy. Air fryers manage this dynamic through rapid air circulation that removes excess moisture while browning both components. This balance proves crucial in dishes like cheese toastie and Air Fryer grilled cheese.
Temperature Coordination: Bread and cheese require different optimal temperatures. Bread browns best at 375-400°F while many cheeses begin burning above 375°F. Successful combinations use medium-high temperatures (360-375°F) that compromise between these requirements.
Timing Synchronization: Cheese melts faster than bread toasts in most cases. Strategic techniques address this discrepancy:
- Pre-toast bread lightly before adding cheese
- Use thicker cheese layers requiring more heating time
- Cover cheese initially to promote melting, then uncover for browning
- Start with lower temperature for melting, increase for final browning
Bread Selection for Cheese Applications
Different bread types suit specific cheese preparations, and understanding these relationships improves results dramatically.
Dense, Sturdy Breads: Sourdough, artisan white, and rye breads provide structure supporting heavy cheese loads without becoming soggy. Their tangy flavors complement sharp cheeses while mild cheese allows bread flavor to shine. Use for cheese bread and gourmet grilled cheese.
Light, Fluffy Breads: White sandwich bread, brioche, or challah offer delicate texture contrasting creamy cheese. Their subtle flavor profile prevents competition with cheese taste. Ideal for classic grilled cheese or cheese on toast.
Textured Breads: Whole grain, multigrain, or seeded breads add nutritional value and textural interest. Their assertive flavors require strong cheeses that won’t be overshadowed. Works well in cheese toastie variations.
Specialized Breads: Bagels, English muffins, or croissants provide unique textures and flavors creating interesting cheese combinations. Their pre-existing characteristics influence cheese selection and cooking parameters.
Cheese Distribution Techniques
How cheese is distributed on or within bread significantly impacts final texture, flavor distribution, and eating experience.
Even Layer Method: Spreading shredded or sliced cheese in uniform layer ensures consistent melting and flavor in every bite. Essential for air fryer cheese on toast and cheese toastie applications.
Edge-to-Edge Coverage: Extending cheese to bread edges prevents dry, cheese-free bites. Slight overflow creates appealing crispy cheese edges. Particularly important in Air Fryer grilled cheese sandwiches.
Cheese Pockets: Incorporating cheese within bread dough as in cheese bread creates surprise melted pockets throughout. Requires cheese pieces small enough to melt completely during baking.
Layered Approach: Multiple cheese layers with thin bread or filling layers between create complex texture and flavor. Used in elaborate cheese toastie variations or gourmet grilled cheese.
Enhancement Ingredients
Strategic additions between cheese and bread layers elevate simple combinations into memorable dishes.
Aromatic Additions:
- Caramelized onions add sweetness and depth
- Roasted garlic provides mellow, savory notes
- Fresh herbs (basil, thyme, rosemary) contribute aromatic complexity
- Sun-dried tomatoes offer concentrated flavor and chewy texture
Textural Elements:
- Crispy bacon provides crunch and smoky flavor
- Sliced tomatoes add moisture and fresh taste
- Pickles contribute tanginess and crisp contrast
- Arugula or spinach adds fresh, peppery notes
Condiment Integration:
- Mustard (Dijon, whole grain, or yellow) cuts richness
- Mayonnaise adds creaminess and helps browning
- Pesto provides herb flavor and additional richness
- Jam or chutney creates sweet-savory balance
Assembly Sequence Importance
Order of assembly affects cooking results and eating experience significantly.
Bottom-Up Construction for Open-Face:
- Bread base (pre-toasted if desired)
- Moisture barrier (butter, mayo, or thin cheese layer)
- Enhancement ingredients
- Main cheese layer
- Final seasoning or herbs
Sandwich Assembly:
- Butter or spread exterior bread surfaces
- Place first cheese layer on unbuttered side
- Add enhancements in center
- Add second cheese layer
- Top with second bread slice, buttered side out
Cooking Optimization for Bread-Cheese Combinations
Specific techniques ensure both components reach ideal state simultaneously.
Two-Stage Cooking: Cook sandwiches partially at medium temperature for thorough melting, then increase temperature for final crisping. This approach prevents burnt exteriors with cold interiors.
Pressing Technique: Gently press sandwiches during cooking using spatula to ensure good contact between layers and promote even melting. Don’t press too hard or cheese escapes sides.
Flip Timing: Flip when bottom reaches golden-brown stage and cheese begins showing signs of melting. This typically occurs at 50-60% of total cooking time.
Rest Period: Allow 1-2 minutes rest after cooking for cheese to stabilize slightly. This prevents cheese from immediately flowing out when sandwich is cut or bitten.
Key Takeaways:
- Successful cheese-bread combinations require understanding component interactions
- Bread selection influences cheese choice and cooking parameters
- Strategic enhancement ingredients elevate basic combinations
- Assembly sequence affects final results significantly
- Two-stage cooking and proper timing ensure optimal texture of both components
Troubleshooting Common Cheese Issues
Even experienced cooks encounter challenges when preparing cheese in air fryers. Understanding common problems and their solutions prevents frustration and ensures consistent success.
Cheese Leakage and Escape
Melted cheese escaping coatings or breaking through wrappers represents the most common and frustrating cheese cooking problem.
Problem Identification: Cheese visible outside breading, pooling in air fryer basket, or empty coating with cheese escaped indicates inadequate containment during melting.
Root Causes:
- Insufficient chilling before cooking
- Inadequate coating thickness or coverage
- Too-high cooking temperature melting cheese before coating sets
- Damaged coating from rough handling
- Wrong cheese type for application
Prevention Strategies:
- Freeze breaded items minimum 1 hour, preferably 2-3 hours
- Use double breading for extra protection
- Start at lower temperature (325°F) for first 3-4 minutes
- Handle coated items gently to prevent coating damage
- Select low-moisture cheeses for breaded applications
Recovery Techniques: If cheese begins escaping during cooking:
- Reduce temperature immediately
- Remove item and allow brief cooling
- Continue cooking at reduced temperature
- Accept imperfect appearance but salvageable taste
Burnt Cheese Surfaces
Cheese burns quickly once reaching certain temperature, creating bitter taste and unappealing appearance.
Problem Recognition: Dark brown to black spots on exposed cheese, bitter or acrid smell during cooking, or hard, crusty cheese surfaces indicate burning.
Contributing Factors:
- Temperature too high for cheese type
- Excessive cooking time
- Cheese positioned too close to heating element
- Insufficient monitoring during final cooking phase
- High-sugar cheese varieties caramelizing excessively
Prevention Methods:
- Use temperatures 25°F lower than bread-only recipes
- Check progress frequently during final 2-3 minutes
- Cover cheese with foil if browning too quickly
- Position items toward bottom of air fryer basket
- Use lower-sugar cheese varieties when possible
Salvage Techniques: Minor burning can be addressed by:
- Scraping burnt portions with knife
- Adding fresh cheese layer on top
- Covering with sauce or garnish
- Accepting rustic, well-done appearance
Rubbery or Tough Texture
Improperly cooked cheese develops unpleasant rubbery texture lacking the desired creamy or gooey consistency.
Texture Issues: Cheese that bounces back when pressed, feels tough or chewy, or separates into rubbery mass indicates inadequate heating or overcooking.
Causative Factors:
- Temperature too low for proper melting
- Insufficient cooking time
- Overcooking evaporating moisture
- Wrong cheese type for application
- Pre-shredded cheese with anti-caking agents
Correction Approaches:
- Increase temperature 25°F and monitor closely
- Extend cooking time while watching for burning
- Use freshly shredded cheese from blocks
- Select cheese varieties known for smooth melting
- Add small amount of cream or milk to cheese sauces
Texture Improvement: For already-cooked rubbery cheese:
- Brief microwave heating (10-15 seconds) may restore suppleness
- Add to soup or sauce where texture matters less
- Cover with fresh cheese layer and reheat briefly
- Accept as learning experience for future attempts
Uneven Melting
Cheese melting more in some areas while remaining firm in others creates inconsistent eating experience.
Problem Manifestation: Cheese liquid in center but solid at edges, or vice versa. Some bites feature melted cheese while others contain unmelted chunks.
Root Issues:
- Uneven cheese distribution
- Inconsistent cheese piece sizing
- Poor air circulation around food
- Inadequate cooking time
- Variations in air fryer hot spots
Solutions:
- Distribute cheese evenly across entire surface
- Cut cheese into uniform sizes
- Ensure adequate spacing between items
- Increase overall cooking time slightly
- Rotate items halfway through cooking
Optimization Techniques:
- Shred rather than chunk cheese for faster, more even melting
- Bring cheese to room temperature before cooking
- Use cheese types known for reliable melting
- Learn your specific air fryer’s characteristics
Excessive Greasiness
High-fat cheese releases substantial oil during melting, creating greasy results and potential smoke.
Problem Indicators: Oil pooling in air fryer basket, excessive smoke during cooking, greasy mouthfeel, or oily appearance indicates fat release issues.
Contributing Factors:
- High-fat cheese varieties
- Temperature too high causing rapid fat release
- Inadequate drainage in cooking vessel
- Overcrowding preventing fat drainage
Management Strategies:
- Line basket with parchment to absorb excess fat
- Use perforated parchment allowing fat drainage
- Select lower-fat cheese options when appropriate
- Cook in smaller batches allowing better drainage
- Blot cooked items with paper towel if needed
Smoke Prevention: If excessive smoke occurs:
- Reduce temperature immediately
- Remove item temporarily while wiping basket
- Ensure adequate ventilation
- Consider cheese variety substitution for future attempts
Coating Separation or Soggy Breading
Breading falls off cheese or becomes soggy rather than crispy despite proper air fryer cooking.
Problem Recognition: Coating slides off when moved, feels wet or limp instead of crispy, or falls off during eating.
Underlying Causes:
- Inadequate moisture removal from cheese surface
- Poor coating adhesion during breading
- Excessive cheese moisture released during cooking
- Insufficient oil for browning
- Coating too thick preventing proper crisping
Prevention Tactics:
- Pat cheese completely dry before breading
- Ensure egg wash coats all surfaces
- Press breadcrumbs firmly into egg wash
- Apply light oil spray before cooking
- Use panko rather than regular breadcrumbs
- Double-coat for extra protection
Salvage Options: If coating issues occur:
- Increase temperature slightly to crisp coating
- Extend cooking time by 2-3 minutes
- Apply additional oil spray during cooking
- Serve immediately before further degradation
Key Takeaways:
- Most cheese problems stem from temperature or timing issues
- Proper preparation and coating techniques prevent majority of failures
- Understanding cheese behavior during heating enables troubleshooting
- Visual monitoring during final cooking phase prevents many issues
- Recovery techniques can salvage less-than-perfect results
Temperature and Timing Guide
Precise temperature and timing form the foundation of successful air fryer cheese cooking. This comprehensive guide provides starting points for various cheese applications, though individual air fryer characteristics may require adjustments.
Quick Reference Temperature Chart
Low Temperature Range (275-300°F):
- Warming cheese dips: 275°F, 5-8 minutes
- Softening cream cheese: 280°F, 3-5 minutes
- Gentle melting for delicate cheeses: 300°F, 4-6 minutes
- Maintaining serving temperature: 275°F, ongoing
Medium Temperature Range (325-350°F):
- Cream cheese wontons: 350°F, 8-10 minutes
- Cheese quesadilla: 350°F, 8-10 minutes
- Mac and cheese: 350°F, 12-15 minutes
- Cottage cheese chips: 350°F, 15-20 minutes
Medium-High Temperature Range (350-375°F):
- Grilled cheese: 370°F, 7-8 minutes
- Cheese toastie: 375°F, 8-10 minutes
- Goat cheese balls: 375°F, 6-8 minutes
- Cheese on toast: 375°F, 4-5 minutes
- Cheese fries: 350°F, 10-12 minutes total
High Temperature Range (375-400°F):
- String cheese: 390°F, 6-8 minutes
- Cheese sticks: 390°F, 6-8 minutes
- Cheese curds: 400°F, 5-7 minutes
- Cheeseburger egg rolls: 375°F, 12-15 minutes
- Cheese pickle chips: 375°F, 8-10 minutes
Baking Temperature Range (320-350°F):
- Cheese bread: 320°F, 15-25 minutes
- Cheese scones: 350°F, 12-15 minutes
- Cheesy potatoes: 375°F, 20-25 minutes
Timing Adjustments for Variables
Multiple factors influence required cooking time beyond baseline recipe specifications.
Cheese Temperature Impact:
- Room temperature cheese: Standard timing
- Refrigerated cheese: Add 1-2 minutes
- Frozen cheese items: Add 2-4 minutes or cook at 25°F lower temperature
Quantity Considerations:
- Single serving: Standard timing
- Double quantity: Add 2-3 minutes, may need cooking in batches
- Triple or more: Cook in batches for consistent results
Air Fryer Model Variations:
- Basket-style models: Standard timing
- Oven-style models: May need 2-3 minutes additional
- Smaller capacity models: May cook faster, reduce time 1-2 minutes
- Larger capacity models: May require additional time for thorough heating
Altitude Adjustments: High altitude (above 3,000 feet) affects cooking:
- Increase temperature 25°F
- Extend cooking time 10-15%
- Monitor closely as adjustments vary by elevation
Multi-Stage Temperature Cooking
Advanced cheese dishes benefit from temperature variation during cooking for optimal texture and appearance.
Two-Stage Method for Breaded Items: Stage 1: 350°F for 4-5 minutes (sets coating) Stage 2: 390°F for 2-3 minutes (browns coating) Result: Crispy exterior with thoroughly melted interior
Three-Stage Method for Complex Dishes: Stage 1: 325°F for 5 minutes (initial melting) Stage 2: 375°F for 8-10 minutes (cooking through) Stage 3: 400°F for 2 minutes (final browning) Result: Professional appearance with perfect doneness
Temperature Hold Method: Initial cook at standard temperature, then reduce to 200°F to hold at serving temperature without overcooking. Useful when preparing multiple batches.
Visual and Tactile Doneness Indicators
Supplement timing guidelines with sensory assessment for consistent results.
Visual Cues:
- Perfect Melting: Cheese appears liquid and flows slightly when tilted
- Ideal Browning: Golden-brown color without dark spots or burning
- Coating Readiness: Deep golden color with no pale spots remaining
- Bubbling: Gentle bubbling indicates active melting, not necessarily complete cooking
Tactile Testing:
- Gentle Press: Cooked cheese gives slightly but maintains structure
- Coating Firmness: Properly cooked breading feels crispy and firm to gentle touch
- Temperature Check: Internal temperature 165°F for food safety in stuffed items
Sound Indicators:
- Sizzling: Active cooking sounds indicate moisture release
- Silence: Reduction in sizzling suggests approaching doneness
- Crackling: Coating crispness often produces light crackling sounds
Carryover Cooking Considerations
Cheese continues cooking after air fryer removal due to residual heat retention.
Carryover Duration:
- Small items (cheese sticks): 30-60 seconds
- Medium items (quesadillas): 1-2 minutes
- Large items (cheese bread): 2-3 minutes
Compensation Strategy: Remove cheese dishes when slightly underdone by visual assessment. Residual heat completes cooking to perfect doneness during rest period.
Rest Period Benefits:
- Allows cheese to stabilize slightly
- Prevents immediate cheese flow when bitten or cut
- Improves structural integrity
- Enhances flavor melding in complex dishes
Record Keeping for Consistency
Maintaining cooking log ensures repeatable results across different recipes and sessions.
Essential Information to Track:
- Exact temperature used
- Total cooking time
- Flip timing (if applicable)
- Visual appearance at completion
- Taste and texture notes
- Any adjustments made
- Specific air fryer model used
Learning from Experience: Note what worked and what requires adjustment. Over time, this personal database enables intuitive timing adjustments and consistent excellence.
Key Takeaways:
- Temperature selection depends on cheese type and desired outcome
- Timing requires adjustment for multiple variables including cheese temperature and quantity
- Multi-stage temperature cooking produces professional results for complex dishes
- Visual and tactile assessment supplements timer-based cooking
- Carryover cooking means removing items slightly before perfect doneness
Equipment and Tools for Cheese Cooking
Success with air fryer cheese dishes requires understanding essential equipment, optional accessories, and tools that enhance results while expanding cooking possibilities.
Air Fryer Selection for Cheese Cooking
Different air fryer styles offer varying advantages for cheese preparation, and understanding these differences helps optimize results.
Basket-Style Air Fryers: Traditional basket design works excellently for most cheese applications. The pull-out basket allows easy monitoring, and the perforated bottom facilitates fat drainage crucial for cheese cooking. Best for cheese sticks, cheese curds, and individual portions.
Oven-Style Air Fryers: Multiple rack positions accommodate larger quantities and various dish types simultaneously. Better for Air Fryer mac and cheese or Air Fryer cheesy potatoes in baking dishes. The door provides better visibility for monitoring cheese melting.
Size Considerations:
- Small (2-3 quarts): Sufficient for 1-2 servings
- Medium (4-6 quarts): Family-sized portions, most versatile
- Large (7+ quarts): Batch cooking, entertaining quantities
Temperature Precision: Digital controls with 5°F increments provide precision crucial for cheese cooking where small temperature differences significantly impact results.
Essential Accessories for Cheese Dishes
Strategic accessory selection expands capabilities and improves results across various cheese applications.
Parchment Paper and Liners: Perforated parchment paper designed for air fryers allows drainage while preventing cheese from sticking to basket. Essential for greasy cheese dishes. Pre-cut liners sized for your air fryer basket save time and ensure proper fit.
Baking Dishes and Pans: Oven-safe dishes fitting inside air fryer basket enable preparation of mac and cheese, cheesy potatoes, and other casserole-style cheese dishes. Ceramic or metal pans work best; ensure adequate space around dish for air circulation.
Cooling Racks: Wire racks placed inside air fryer basket elevate food, allowing air circulation underneath. Particularly useful for items like grilled cheese or cheese toastie where bottom browning matters.
Spray Bottles: Oil spray bottles allow controlled application of cooking oil for browning enhancement without excess grease. Better than aerosol sprays which may contain propellants damaging non-stick coatings.
Preparation Tools for Cheese Dishes
Quality tools facilitate efficient preparation and contribute to consistent results.
Graters and Shredders: Box grater with multiple hole sizes accommodates different cheese types and applications. Electric food processor with shredding disk processes large quantities quickly. Microplane grater creates fine shreds ideal for even melting and coating applications.
Sharp Knives: Quality chef’s knife cuts cheese cleanly without crumbling. Cheese knife with holes prevents cheese from sticking during slicing. Sharp paring knife handles detail work in cheese preparation.
Cutting Boards: Separate cutting board designated for cheese prevents flavor transfer and maintains food safety. Plastic boards with juice grooves contain cheese moisture during preparation.
Coating and Breading Tools
Specialized tools streamline breading process for items like cheese sticks and cream cheese wontons.
Three-Bowl System: Shallow bowls or pie plates for flour, egg wash, and breadcrumbs create efficient breading station. Wide surface area accommodates cheese items and prevents mess.
Wire Whisk: Thoroughly blends egg wash ensuring uniform coating. Small whisk sized for breading bowl provides adequate mixing without excess bulk.
Tongs and Forks: Long-handled tongs move breaded items without damaging coating. Carving fork holds cheese during breading, keeping fingers clean and coating intact.
Temperature Monitoring Equipment
Accurate temperature measurement ensures food safety and optimal cheese consistency.
Instant-Read Thermometer: Digital thermometer with probe provides internal temperature readings for stuffed cheese items like cheeseburger egg rolls. Look for models reading in 2-3 seconds with accuracy to 1°F.
Infrared Thermometer: Non-contact temperature measurement checks surface temperature without opening air fryer. Useful for monitoring cheese melting progress without heat loss.
Oven Thermometer: Verifies air fryer temperature accuracy, as many models vary from displayed temperature. Place inside basket during preheating for accurate reading.
Serving and Storage Equipment
Proper serving and storage tools maintain cheese dish quality from cooking through consumption.
Serving Platters: Heat-resistant serving dishes present cheese dishes attractively while maintaining temperature. Warm platter before transferring hot cheese items to prevent rapid cooling.
Cutting Tools: Pizza cutter slices quesadillas and grilled cheese cleanly without squeezing out melted cheese. Sharp chef’s knife cuts through cheese bread and scones without crushing.
Storage Containers: Airtight containers preserve leftover cheese dishes, though most taste best fresh. Glass containers prevent odor transfer and allow microwave reheating if needed.
Cleaning and Maintenance Supplies
Proper cleaning equipment maintains air fryer performance and extends equipment life.
Non-Abrasive Cleaners: Mild dish soap and soft sponges clean without damaging non-stick surfaces. Baking soda paste removes stubborn cheese residue without scratching.
Soft-Bristled Brushes: Small brushes reach air fryer basket crevices and corners where cheese residue accumulates. Dedicated brush for air fryer prevents cross-contamination from other kitchen cleaning.
Degreasing Agents: Cheese releases substantial fat requiring effective degreasing. White vinegar solution cuts grease naturally without harsh chemicals. Commercial degreasers formulated for kitchen use work for heavy buildup.
Optional Specialty Equipment
Advanced tools enable creative cheese applications and professional presentations.
Mandoline Slicer: Creates uniform cheese slices ensuring even melting. Adjustable thickness accommodates different applications from thin cheese on toast to thick cheese layers.
Kitchen Scale: Precise measurements ensure consistent results, especially important when developing recipes or adjusting quantities. Digital scale accurate to 1 gram provides adequate precision.
Silicone Baking Mats: Reusable alternative to parchment paper, though requires perforated version for air fryer use. Withstands high temperatures and simplifies cleanup.
Key Takeaways:
- Air fryer selection impacts cheese cooking capabilities and results
- Essential accessories expand versatility and improve outcomes
- Quality preparation tools facilitate efficient workflow
- Temperature monitoring ensures safety and optimal results
- Proper cleaning equipment maintains performance and longevity
Safety and Best Practices
Air fryer cheese preparation requires attention to safety protocols and best practices to prevent accidents, ensure food safety, and achieve consistent results while protecting equipment and people.
Heat Safety and Burn Prevention
Air fryers generate intense heat that poses burn risks, and melted cheese adds additional hazards through splashing and extreme temperatures.
Hot Surface Awareness: All air fryer surfaces become extremely hot during operation. Cheese dishes often require higher temperatures or longer cooking times than many foods, creating elevated burn risk. Always use oven mitts or heat-resistant gloves when handling air fryer components.
Steam Burns: Opening air fryer mid-cooking or immediately after completion releases hot steam. Melted cheese generates additional moisture creating more steam than typical foods. Open basket away from face and body, allowing steam to dissipate before reaching inside.
Splatter Protection: High-fat cheese can splatter during cooking, especially at higher temperatures. Wear long sleeves when checking cheese dishes during cooking. Consider safety glasses if particularly sensitive to splatters.
Cool-Down Periods: Allow adequate cooling time before handling cooked cheese items. Melted cheese retains heat longer than many foods and can cause severe burns if consumed immediately. Recommend 2-3 minute cooling before serving to children.
Food Safety Protocols
Proper food safety practices prevent foodborne illness while ensuring optimal cheese dish quality.
Temperature Safety: Cheese-based dishes containing meat or eggs must reach 165°F internal temperature for safety. Use instant-read thermometer to verify temperature in cheeseburger egg rolls or other stuffed items. Melted cheese appearance doesn’t guarantee safe internal temperature.
Cheese Storage: Store cheese properly before cooking. Hard cheeses remain safe at room temperature for several hours, but soft cheeses require refrigeration until immediate use. Pre-breaded cheese items should remain refrigerated or frozen until cooking.
Cross-Contamination Prevention: Use separate cutting boards and utensils for raw ingredients and cooked cheese dishes. Wash hands thoroughly after handling raw meat for dishes like cheeseburger egg rolls. Don’t reuse plates that held raw ingredients for serving cooked food.
Time-Temperature Abuse: Don’t leave cheese dishes at room temperature extended periods. Serve immediately after cooking or maintain at safe temperature (above 140°F or below 40°F). Discard cheese dishes left at room temperature over 2 hours.
Fire Safety Considerations
While rare, air fryer fires can occur, particularly with high-fat foods like cheese.
Grease Fire Prevention: Excessive cheese grease accumulation in air fryer basket creates fire risk. Clean basket thoroughly between uses, especially after cooking cheese-heavy dishes. Empty drip tray regularly during extended cooking sessions.
Smoke Management: Smoke from cheese grease hitting heating element requires immediate attention. If excessive smoke occurs, turn off air fryer, unplug, and allow complete cooling before cleaning. Never operate smoky air fryer continuously as this indicates problem requiring attention.
Fire Response: If fire occurs inside air fryer:
- Immediately turn off and unplug unit
- Keep door/basket closed to starve fire of oxygen
- Never use water on grease fire
- Use appropriate fire extinguisher if fire doesn’t self-extinguish
- Call emergency services if fire spreads beyond air fryer
Preventive Measures: Place air fryer on heat-resistant surface away from cabinets and walls. Ensure adequate ventilation and never operate under cabinets or in enclosed spaces. Keep flammable materials away from unit during operation.
Electrical Safety
Air fryers draw significant power requiring proper electrical setup and usage protocols.
Circuit Requirements: Operate air fryer on dedicated circuit when possible. Avoid using extension cords or power strips which may not handle amperage requirements. If multiple appliances share circuit, don’t run simultaneously with air fryer.
Cord Management: Keep power cord away from hot air fryer surfaces and standing water. Inspect cord regularly for damage; discontinue use if fraying or damage appears. Never yank cord to unplug; grasp plug firmly.
GFCI Protection: Use Ground Fault Circuit Interrupter (GFCI) protected outlets in kitchens for safety. GFCI outlets prevent electrical shock in wet environments common in food preparation areas.
Wet Hands Precaution: Never operate air fryer or handle plug with wet hands. Dry hands thoroughly before touching electrical components to prevent shock risk.
Proper Ventilation
Adequate ventilation prevents smoke accumulation and maintains air quality during cheese cooking.
Kitchen Ventilation: Operate range hood or exhaust fan when air frying cheese dishes. High-fat content creates more smoke and odors than typical foods requiring enhanced ventilation.
Space Requirements: Maintain minimum 6-inch clearance on all sides of air fryer for proper heat dissipation. Never operate in enclosed cabinet or under overhead cabinets that restrict airflow.
Odor Management: Cheese cooking creates strong odors that some find unpleasant. Open windows if weather permits and ensure good cross-ventilation. Consider air purifier in kitchen if regularly preparing pungent cheese dishes.
Equipment Maintenance for Safety
Regular maintenance prevents safety hazards while ensuring consistent performance.
Cleaning Schedule: Clean air fryer basket and tray after each use, especially when cooking cheese. Built-up cheese residue creates fire hazard and affects performance. Deep clean entire unit monthly including heating element and interior surfaces.
Inspection Routine: Regularly inspect air fryer for:
- Damaged power cord or plug
- Cracked or damaged basket
- Malfunctioning controls
- Unusual odors or smoke
- Loose components or rattling sounds
Professional Service: Consider annual professional inspection for heavily used units. Manufacturer service can identify potential problems before they become hazards.
Child and Pet Safety
Special precautions protect vulnerable household members from air fryer hazards.
Supervision Requirements: Never leave operating air fryer unattended with children or pets in kitchen. Hot surfaces and steam pose serious injury risks to unsupervised young ones.
Access Prevention: Position air fryer beyond reach of small children. Tuck cords safely away preventing pulling or tripping hazards. Consider childproof outlet covers when air fryer not in use.
Temperature Education: Teach children about hot surface dangers and proper cooling times for food. Explain that cheese dishes remain very hot even after appearing safe to eat.
Pet Considerations: Keep pets away from operating air fryer. Hot surfaces, cords, and released steam all pose risks to curious animals. Be aware that cheese aromas may attract pets more strongly than other foods.
Emergency Preparedness
Understanding emergency procedures ensures appropriate response to unexpected situations.
First Aid Knowledge: Know proper burn treatment: cool running water for 10-20 minutes, never ice. Keep burn treatment supplies in kitchen. Seek medical attention for burns larger than 3 inches or involving face, hands, or joints.
Emergency Contacts: Keep emergency numbers readily available in kitchen. Program poison control and local emergency services into phone for quick access.
Fire Extinguisher: Maintain appropriate fire extinguisher (Class K for kitchen) in accessible location. Learn proper use before emergencies occur. Check pressure gauge monthly.
Key Takeaways:
- Heat safety requires protective equipment and awareness of hot surfaces and steam
- Food safety protocols prevent illness while ensuring quality results
- Fire prevention through proper cleaning and ventilation prevents dangerous situations
- Electrical safety requires proper circuit use and cord management
- Regular maintenance and inspection prevent hazards before they occur
Conclusion and Next Steps
Mastering air fryer cheese techniques opens unlimited culinary possibilities, from simple cheese on toast to sophisticated goat cheese balls. This comprehensive guide provides the foundation for transforming your air fryer into a cheese-cooking powerhouse.
Your Cheese Mastery Journey
Throughout this guide, you’ve gained expertise in critical areas that distinguish successful air fryer cheese preparation from basic attempts.
Technical Excellence: You now understand the science behind cheese behavior during heating, including melting properties, fat management, and temperature control principles that ensure consistent results across all cheese types and applications.
Recipe Versatility: From basic grilled cheese to advanced cream cheese wontons, you possess knowledge to tackle any cheese recipe with confidence and skill.
Problem-Solving Abilities: The troubleshooting techniques covered enable quick diagnosis and correction of issues, preventing waste while ensuring consistent quality across all your cheese cooking endeavors.
Safety Knowledge: Understanding proper safety protocols protects you, your family, and your equipment while maximizing cooking success and enjoyment.
Progressive Skill Development Plan
Transform this knowledge into practical expertise through systematic implementation and progressive complexity increase.
Week 1 – Foundation Building: Begin with simple preparations like cheese on toast and grilled cheese to understand your air fryer’s characteristics and basic cheese melting behavior.
Week 2 – Intermediate Applications: Progress to breaded items like cheese sticks and string cheese. These recipes build upon foundational skills while introducing coating techniques and temperature precision.
Week 3 – Complex Preparations: Attempt dishes like mac and cheese and cheesy potatoes. These applications demonstrate mastery of multiple techniques simultaneously.
Week 4 – Creative Innovation: Experiment with advanced recipes like cream cheese wontons and goat cheese balls while developing original variations using principles learned throughout this guide.
Expanding Your Cheese Recipe Collection
Continue developing skills by exploring related content that builds upon techniques mastered in this comprehensive guide.
Crispy Cheese Specialties: Perfect your cheese curds and cheese pickle chips techniques for impressive appetizers that showcase your growing expertise.
Melted Cheese Comfort Foods: Master cheese quesadilla and cheese toastie preparation for quick, satisfying meals that demonstrate proper temperature control and timing.
Baked Cheese Creations: Explore cheese bread and cheese scones to expand into baking applications showing air fryer versatility.
Innovative Applications: Try unique preparations like cottage cheese chips and cheeseburger egg rolls that push creative boundaries.
Building Your Air Fryer Community
Connect with fellow cheese and air fryer enthusiasts to share experiences, troubleshoot challenges, and discover new techniques and recipes.
Online Engagement: Join air fryer cooking groups and cheese lover forums where members share successful recipes, creative variations, and troubleshooting advice. These communities provide valuable support for continued learning.
Documentation Practice: Keep detailed notes about successful combinations and failed attempts. Document temperature adjustments, timing modifications, and cheese type substitutions creating personal reference materials invaluable for future cooking.
Sharing Knowledge: Share your expertise and creations with friends, family, and online communities. Teaching reinforces your own learning while spreading valuable skills and delicious recipes.
Long-Term Excellence Goals
Set progressive goals that challenge growing skills while building toward comprehensive air fryer cheese expertise.
Equipment Mastery: Understand how different air fryer models and accessories affect results. This knowledge enables adaptation to any air fryer situation you encounter.
Recipe Development: Create original cheese recipes showcasing air fryer capabilities. Experiment with unique cheese combinations and creative applications not found in existing recipes.
Teaching Others: Share expertise by teaching friends, family, or community members. Consider starting blog, YouTube channel, or social media presence devoted to air fryer cheese creations.
Final Success Recommendations
Excellence in air fryer cheese preparation requires patience, practice, and systematic application of techniques covered in this guide.
Start Simply: Begin with basic recipes and gradually increase complexity as confidence and skills develop. Each successful dish builds foundation for more advanced preparations.
Document Everything: Maintain detailed records of temperatures, times, and results. Note what works and what needs adjustment for your specific air fryer and preferences.
Safety First: Always prioritize safety protocols and proper equipment maintenance. Enjoyable, accident-free cooking experiences depend on consistent safety practices.
Embrace Creativity: Air fryer cheese preparation offers unlimited possibilities for innovation and personalization. Experimentation and creative thinking lead to most rewarding culinary discoveries.
Share Success: Cheese dishes taste better when shared. Use your growing expertise to create memorable experiences for family and friends while building your reputation as air fryer cheese expert.
Your Journey Begins Now
This guide represents the beginning of your air fryer cheese mastery journey, providing foundation for unlimited culinary exploration. Whether preparing quick weeknight cheese fries or elaborate entertaining spreads featuring multiple cheese appetizers, the principles and techniques here ensure consistent success.
Remember that mastery develops through consistent practice and continued learning. Each cheese dish you prepare builds upon previous experiences, gradually developing intuitive understanding characterizing expert cooks. Your air fryer, combined with growing cheese expertise, opens endless possibilities for delicious creations that will impress everyone while providing personal culinary satisfaction.
Take the first step by selecting a recipe from this guide and begin practicing the techniques that will transform your cooking forever. Your journey to air fryer cheese mastery starts with a single perfectly melted, golden-brown, delicious creation.
Meta Information
Title: The Ultimate Guide to Air Fryer Cheese: Master Every Recipe from Melted to Crispy
Meta Description: Master air fryer cheese with our complete guide. Learn pro techniques for perfect mozzarella sticks, mac and cheese, grilled cheese, and 15+ recipes. Troubleshooting included.
URL: /ultimate-guide-air-fryer-cheese/
Primary Keyword: air fryer cheese Secondary Keywords: air fryer cheese sticks, air fryer mac and cheese, air fryer grilled cheese, air fryer mozzarella sticks, air fryer cheese recipes Long-tail Keywords: how to make cheese in air fryer, air fryer cheese appetizers, best air fryer cheese dishes, air fryer melted cheese recipes, crispy air fryer cheese LSI Keywords: air fryer cooking, cheese melting techniques, crispy cheese appetizers, melted cheese dishes, breaded cheese recipes, comfort food, cheese temperature control
Total Word Count: Approximately 10,500 words Reading Level: 8th-9th grade (Flesch-Kincaid) Estimated Reading Time: 42-45 minutes