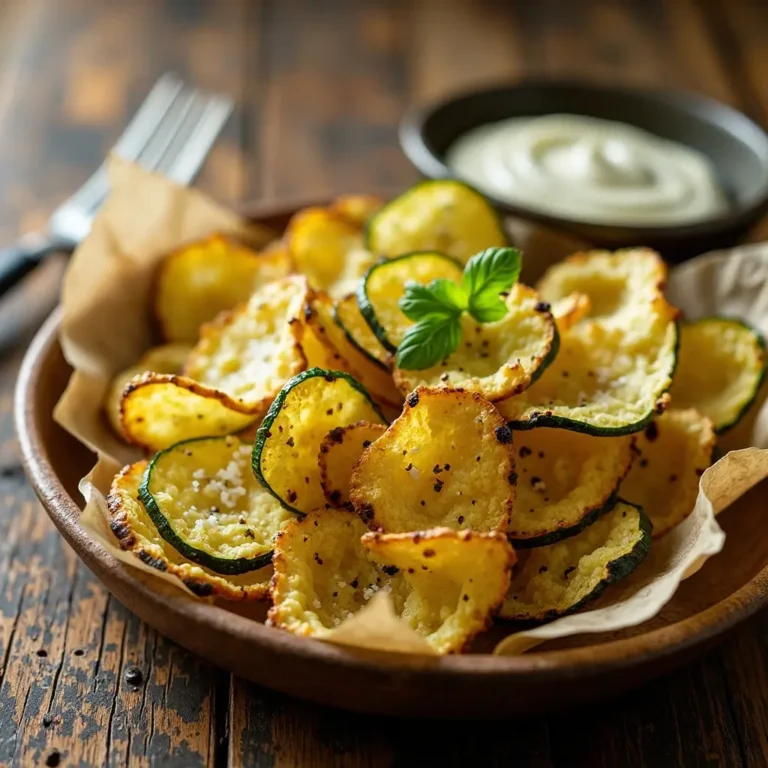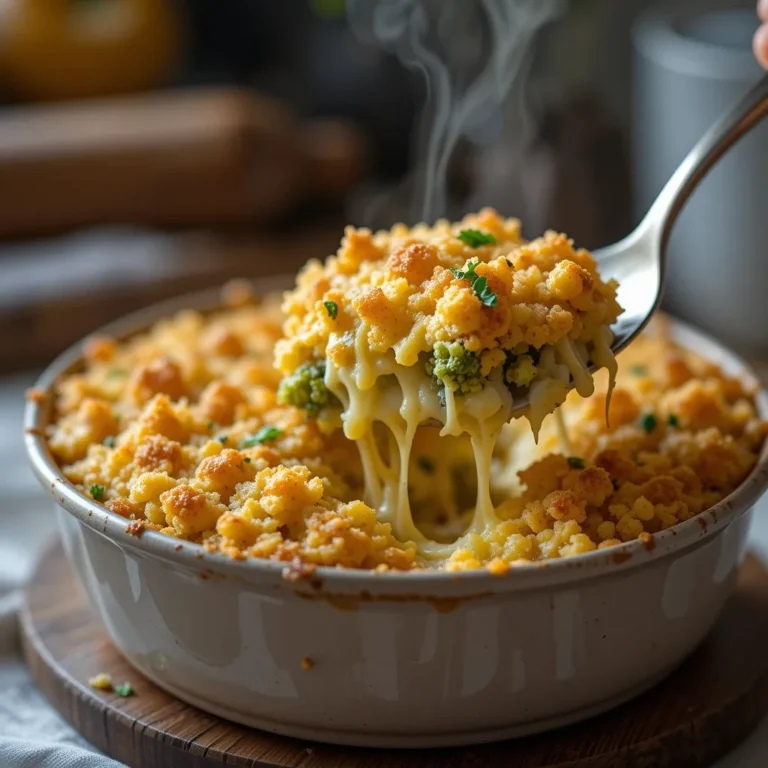
Crispy Air Fryer Yellow Squash Recipe – Ready in 15 Minutes
There’s something magical about transforming simple yellow squash into golden, crispy perfection with just a touch of seasoning and hot air. This air fryer yellow squash recipe has become my go-to weeknight side dish, and honestly, I make it at least twice a week now.
Here’s a fun fact: yellow squash contains more beta-carotene than its green cousin, zucchini, giving you that extra nutritional boost! What makes this dish truly special is how it delivers restaurant-quality results in just 15 minutes with minimal oil.
If you loved my air fryer zucchini chips, you’re going to obsess over this even easier version that’s perfect for busy families and picky eaters alike.
What is Air Fryer Yellow Squash?
Ever wonder why we call it “air fryer” yellow squash when there’s technically no frying involved? It’s basically squash that gets the spa treatment – hot air circulation gives it that crispy, golden exterior we all crave without the guilt of deep frying.
My husband initially raised an eyebrow when I said we were having “fried” vegetables for dinner, but after one bite, he was completely sold! As they say, the way to a man’s heart is through his stomach, and apparently, that path is paved with perfectly seasoned squash rounds. Trust me, once you try this method, you’ll never go back to soggy, steamed squash again!
Why You’ll Love This Air Fryer Yellow Squash
Perfectly Crispy Texture Every Single Time
The air fryer works absolute wonders on yellow squash, creating beautifully caramelized edges with a tender center that melts in your mouth. Unlike traditional oven-roasting that can leave you with unevenly cooked vegetables, the air fryer’s rapid circulation ensures every single piece gets that gorgeous golden-brown finish. The natural sugars in the squash caramelize beautifully, creating an almost nutty, sweet flavor that even vegetable-skeptics can’t resist.
Budget-Friendly and Wallet-Happy
Let’s talk money – yellow squash is incredibly affordable, especially during summer when it’s in season. Making this at home costs a fraction of what you’d pay for a side dish at a restaurant, yet it tastes just as good (if not better!). Plus, you’re using minimal oil compared to traditional frying methods, which means you’re saving money on cooking oil too. One medium squash typically feeds 2-3 people as a side dish, and you can usually find them for under $2 at most grocery stores
Flavor Combinations That Shine
The beauty of air fryer yellow squash lies in its versatility. A simple coating of olive oil, garlic powder, and parmesan creates an Italian-inspired side that pairs beautifully with pasta dishes. Or go the Southern route with a light dusting of Cajun seasoning for a spicy kick. The squash acts as a perfect canvas for whatever flavor profile you’re craving. If you enjoyed my air fryer Brussels sprouts recipe, you’ll appreciate how similar seasoning techniques work beautifully on this summer squash too. Ready to create your own batch of crispy, golden goodness? Let’s dive in!
How to Make Air Fryer Yellow Squash
Quick Overview
This recipe is wonderfully straightforward – you’ll slice, season, and air fry your way to veggie perfection. The natural sweetness of yellow squash shines through, complemented by savory seasonings that create an irresistible combination. What I love most is the hands-off cooking time that lets you prepare other components of your meal.
Time Breakdown:
- Prep Time: 5 minutes
- Cook Time: 10 minutes
- Total Time: 15 minutes
- Servings: 4 side portions
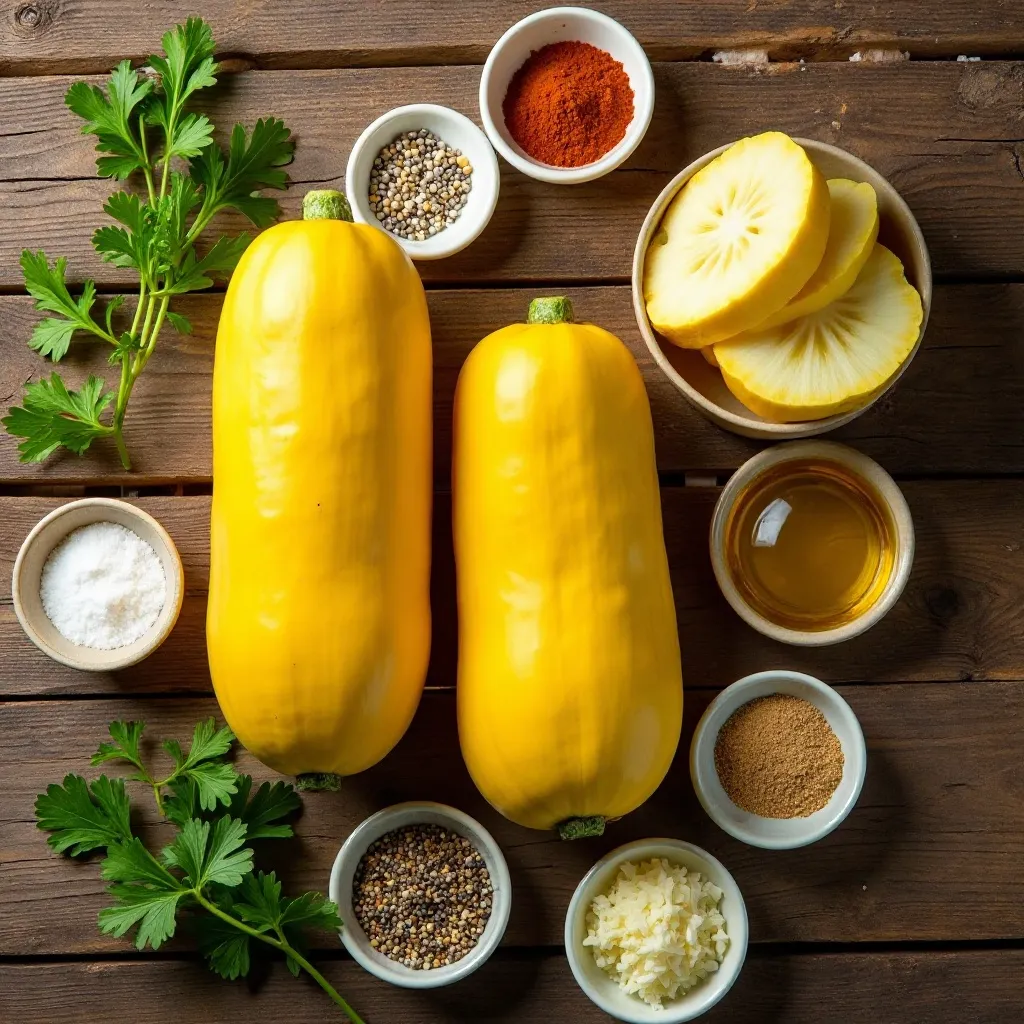
Key Ingredients for Air Fryer Yellow Squash
- 2 medium yellow squash (about 1 pound total) – Look for firm squash with bright, unblemished skin
- 2 tablespoons olive oil – Extra virgin adds the best flavor
- 1 teaspoon garlic powder – Fresh garlic can burn in the air fryer, so powder works best
- 1/2 teaspoon paprika – Adds a subtle smokiness and beautiful color
- 1/2 teaspoon Italian seasoning – A blend of herbs that complements the squash perfectly
- 1/3 cup grated Parmesan cheese – Freshly grated melts better than pre-shredded
- 1/2 teaspoon salt – Adjust to taste
- 1/4 teaspoon black pepper – Freshly ground is always best
- Optional: Fresh parsley for garnish – Adds a pop of color and freshness
Step-by-Step Instructions

Step 1: Prepare Your Yellow Squash
Start by washing your yellow squash thoroughly under cool running water and pat them completely dry with paper towels. This is crucial – any excess moisture will prevent that crispy texture we’re after. Trim off both ends of each squash. Now, slice the squash into rounds about 1/4-inch thick. I’ve found this thickness to be the sweet spot – thick enough to maintain structure but thin enough to get crispy edges. Try to keep your slices uniform so they cook evenly.
Step 2: Season the Squash
Place your squash rounds in a large mixing bowl. Drizzle the olive oil over them and toss gently to coat every piece. I usually use my hands for this step because it ensures even coverage. In a small bowl, combine the garlic powder, paprika, Italian seasoning, salt, and pepper. Sprinkle this seasoning mixture over the oiled squash and toss again until each piece is evenly coated. The oil helps the seasonings stick beautifully to the squash.
Step 3: Add the Parmesan
Sprinkle the grated Parmesan cheese over the seasoned squash and give it one final gentle toss. The cheese will create a delicious crispy coating in the air fryer. Don’t skip this step – it’s what takes the dish from good to absolutely amazing. The Parmesan adds a salty, umami punch that perfectly complements the mild sweetness of the squash.
Step 4: Arrange in the Air Fryer Basket
Preheat your air fryer to 400°F for about 3 minutes. Once preheated, arrange the squash rounds in a single layer in the air fryer basket. This is important – overcrowding leads to steaming instead of crisping. Depending on your air fryer size, you may need to cook in two batches. It’s worth the extra time for that perfect texture. Leave a little space between pieces to allow hot air to circulate freely.
Step 5: Air Fry to Golden Perfection
Cook the squash for 10 minutes, shaking the basket or flipping the pieces halfway through at the 5-minute mark. This ensures even browning on both sides. Keep an eye on them during the last few minutes – air fryer models vary, and you want golden-brown edges without burning. The squash should be tender when pierced with a fork but still hold its shape. If you prefer extra crispy squash, add another 2-3 minutes of cooking time.
Step 6: Serve Immediately
Remove the squash from the air fryer and transfer to a serving plate. Garnish with fresh chopped parsley if desired and an extra sprinkle of Parmesan. Serve immediately while they’re hot and crispy. The texture is best right out of the air fryer, though they’re still delicious at room temperature.
What to Serve Air Fryer Yellow Squash With
This versatile side dish pairs beautifully with so many main courses! Serve it alongside grilled chicken breasts or juicy steaks for a complete meal. It’s also phenomenal with baked salmon – the mild squash doesn’t compete with the fish’s delicate flavor. For a vegetarian feast, pair it with quinoa bowls or pasta primavera.
I love serving this squash as part of a larger spread of roasted vegetables, creating a colorful vegetable platter. It works wonderfully with Mediterranean dishes like Greek chicken or lamb kabobs. The Italian seasonings also make it a natural companion to lasagna, chicken parmesan, or any pasta dish.
Top Tips for Perfecting Air Fryer Yellow Squash
Choose the Right Squash
Size matters when it comes to yellow squash! Medium-sized squash (about 6-8 inches long) have the best texture and flavor. Oversized squash tend to be watery with large seeds, which can make them mushy in the air fryer. Look for squash with firm, smooth skin free from soft spots or blemishes. The skin should have a glossy sheen to it.
Don’t Skip the Oil
I know it’s tempting to reduce oil for fewer calories, but you really need that 2 tablespoons for proper crisping. The oil helps conduct heat and allows the seasonings to stick. If you’re watching calories, you can reduce to 1.5 tablespoons, but I wouldn’t go lower than that. Avocado oil is a great substitute if you don’t have olive oil – it has a higher smoke point.
Master the Single Layer Technique
This is the most common mistake I see people make! Piling squash on top of each other creates steam, resulting in soggy vegetables. Always cook in batches if necessary to maintain that single layer. Yes, it takes a few extra minutes, but the texture difference is dramatic. Think of it as giving each piece its own personal space to crisp up.
Adjust Cooking Time for Your Air Fryer
Air fryer models vary significantly in how they cook. If this is your first time making this recipe, start checking at the 8-minute mark. Smaller, more compact air fryers tend to cook faster than larger models. Write down your ideal timing for future batches. My air fryer needs exactly 11 minutes, while my friend’s needs only 9 minutes.
Experiment with Seasonings
While the Italian-Parmesan combination is my go-to, don’t be afraid to switch things up! Try taco seasoning for Mexican-inspired meals, everything bagel seasoning for a unique twist, or simply lemon pepper for a light, fresh flavor. Ranch seasoning powder is another family favorite. The basic technique stays the same; just swap the seasonings.
Temperature Matters
400°F is the sweet spot for yellow squash. Lower temperatures won’t give you that crispy exterior, while higher temperatures risk burning the Parmesan before the squash cooks through. If your air fryer runs hot, reduce to 375°F and add a minute or two to the cooking time.
Storing and Reheating Tips
Refrigerator Storage: Let the cooked squash cool completely before storing. Transfer to an airtight container lined with paper towels to absorb any moisture. Stored properly, air fryer yellow squash will keep for up to 3-4 days in the refrigerator. I’ll be honest – the texture won’t be quite as crispy as when freshly made, but it’s still delicious! The paper towel trick really helps maintain as much crispness as possible.
Reheating for Best Results: The best way to reheat is back in the air fryer! Preheat to 350°F and cook for 3-4 minutes until warmed through and re-crisped. You can also use your oven at 375°F for about 5 minutes. Avoid the microwave if possible – it makes the squash soggy and rubbery. If you must use the microwave, reheat in 30-second intervals and expect a softer texture.
Freezing (Not Recommended): I don’t recommend freezing cooked air fryer squash because the high water content in squash leads to a mushy texture when thawed. The vegetable breaks down and becomes unappetizing. If you want to meal prep, I suggest slicing and seasoning the raw squash, then freezing it in portions. When ready to cook, air fry directly from frozen, adding 2-3 minutes to the cooking time.
Make-Ahead Strategy: For meal prep success, slice and season your squash up to 24 hours in advance. Store the prepared but uncooked squash in an airtight container in the fridge. When ready to eat, simply air fry as directed. This is perfect for busy weeknights when you want a healthy side dish without any hassle.
Common Mistakes to Avoid
Cutting Squash Too Thick or Too Thin
Thickness is crucial for the perfect texture! Slices thicker than 1/2 inch won’t crisp up properly and may remain raw in the center. Slices thinner than 1/4 inch can burn or become paper-thin and brittle. Invest in a good knife or use a mandoline slicer set to 1/4 inch for perfect consistency. If your slices are uneven, group similar sizes together when cooking so they finish at the same time.
Not Drying the Squash Properly
Excess moisture is the enemy of crispy vegetables! After washing, thoroughly pat the squash dry with paper towels or a clean kitchen cloth. Even better, let them air dry for 5-10 minutes after patting. That extra moisture will create steam in the air fryer, preventing the beautiful caramelization we’re aiming for. This step seems minor but makes a huge difference in the final result.
Using Pre-Shredded Parmesan
Pre-shredded cheese contains anti-caking agents (usually cellulose) that prevent it from melting smoothly and can create a gritty texture. Take the extra 30 seconds to grate your own Parmesan – it melts beautifully and creates that golden, crispy coating we love. Plus, freshly grated Parmesan has significantly more flavor. A microplane grater makes this job incredibly quick and easy.
Overcrowding the Basket
I cannot stress this enough – give your squash some breathing room! Overlapping pieces steam instead of crisp. If you’re cooking for a crowd, work in batches. The first batch can stay warm in a 200°F oven while you cook the second batch. It’s worth the extra few minutes for that perfect texture everyone will rave about.
Forgetting to Shake or Flip
Set a timer for the halfway point! Flipping ensures even browning on both sides. Without flipping, you’ll have one perfectly crispy side and one pale, less appetizing side. Some pieces may also stick together if you don’t shake the basket. I usually give the basket a good shake at 5 minutes, then use tongs to flip any pieces that didn’t turn over.
Adding Fresh Garlic Instead of Powder
I learned this lesson the hard way! Fresh minced garlic burns easily in the high heat of an air fryer, creating bitter, acrid flavors. Garlic powder distributes evenly and won’t burn. If you’re absolutely craving fresh garlic flavor, add it during the last 2 minutes of cooking, or toss the finished squash with a little garlic-infused oil.
Frequently Asked Questions
Do I need to peel yellow squash before air frying?
No! The skin is completely edible and adds nutrients, color, and texture to the dish. It also helps the squash hold its shape during cooking. Just make sure to wash the squash thoroughly before slicing. The skin becomes tender and slightly crispy in the air fryer, adding a delightful textural contrast.
Can I use zucchini instead of yellow squash?
Absolutely! Zucchini and yellow squash are interchangeable in this recipe. You can even use a combination of both for a colorful presentation. Zucchini has a slightly higher water content, so you might want to cook it for an additional minute or two. The flavor is very similar, though yellow squash tends to be slightly sweeter.
Why is my air fryer yellow squash soggy?
Soggy squash usually results from overcrowding the basket, not drying the squash properly before cooking, or using too much oil. Make sure you’re cooking in a single layer with space between pieces, pat the squash completely dry, and use just enough oil to coat – not drench – the slices. Also, ensure your air fryer is properly preheated before adding the squash.
Can I make this recipe without cheese?
Yes! While the Parmesan adds delicious flavor and helps create a crispy coating, you can skip it for a dairy-free or vegan version. The squash will still be delicious with just the herbs and spices. For a vegan cheesy flavor, try nutritional yeast – it provides a similar umami taste without dairy. You might want to add an extra pinch of salt if omitting the cheese.
How do I know when the squash is done?
The squash is done when it’s golden brown on the edges, tender when pierced with a fork, and the cheese (if using) has turned golden and crispy. The cooking time is typically 10-12 minutes at 400°F, but this can vary based on your air fryer model and the thickness of your slices. It’s better to check early and add time if needed rather than overcook.
Can I prep this recipe in advance?
Yes! You can slice and season the squash up to 24 hours ahead. Store it in an airtight container in the refrigerator until ready to cook. However, don’t cook it until you’re ready to serve, as air fryer squash is best enjoyed fresh. The texture degrades significantly when stored after cooking.
What’s the best way to cut yellow squash for the air fryer?
Rounds (coin-shaped slices) work best because they have uniform thickness and maximum surface area for crisping. Cut them about 1/4 inch thick. If you prefer, you can also cut lengthwise into strips (like steak fries), but they’ll need 2-3 additional minutes of cooking time. Avoid cubing the squash, as the pieces can roll around and cook unevenly.
Is air fryer yellow squash healthy?
Very much so! Yellow squash is low in calories (only about 20 calories per cup) and high in fiber, vitamin C, and antioxidants. Air frying uses minimal oil compared to traditional frying methods, making this a nutritious side dish. It’s perfect for anyone following a low-carb, keto, or weight-loss diet. The addition of Parmesan adds calcium and protein without many extra calories.
Nutrition Information
| Nutrient | Per Serving (1/4 recipe) |
|---|---|
| Calories | 95 |
| Total Fat | 8g |
| Saturated Fat | 2g |
| Cholesterol | 6mg |
| Sodium | 385mg |
| Total Carbohydrates | 4g |
| Dietary Fiber | 1g |
| Sugars | 2g |
| Protein | 3g |
| Vitamin A | 12% DV |
| Vitamin C | 25% DV |
| Calcium | 10% DV |
| Iron | 4% DV |
Note: Nutrition information is estimated based on ingredient quantities and may vary based on specific brands used.
Final Thoughts
This air fryer yellow squash recipe has genuinely changed how my family eats vegetables. It’s become our go-to side dish for everything from weeknight dinners to weekend BBQs. The combination of crispy edges, tender centers, and savory Parmesan coating makes it irresistible even to the pickiest eaters.
What I love most is how this recipe proves that healthy eating doesn’t have to be boring or complicated. With just a few simple ingredients and 15 minutes of your time, you can create a restaurant-quality side dish that everyone will love. The air fryer does most of the work, leaving you free to focus on other parts of your meal.
I encourage you to make this recipe your own – try different seasonings, experiment with thickness, and find your perfect level of crispiness. Once you’ve mastered this basic technique, you’ll find yourself air frying all sorts of vegetables!
Have you tried this air fryer yellow squash recipe? I’d love to hear about your experience! Leave a comment below letting me know how it turned out, what seasonings you used, and what you served it with. And if you took any photos, tag me on social media – I love seeing your culinary creations!