Air Fryer Vanilla Cake Recipe – Better Than Bakery
Imagine biting into a cloud of vanilla heaven that’s perfectly moist, golden, and irresistibly tender. This air fryer vanilla cake delivers all that magic in just 25 minutes! Did you know the first vanilla cakes were served to European royalty in the 1700s? Now, you can create bakery-quality results right in your kitchen without turning on the oven.
This foolproof recipe is perfect for busy weeknights, last-minute celebrations, or whenever that sweet tooth strikes. Just like our popular air fryer chocolate brownies, this cake proves your air fryer is secretly a baking superstar waiting to shine!
What is Air Fryer Vanilla Cake?
Ever wondered why we call it “cake” when it feels like eating a sweet fluffy hug? This air fryer vanilla cake is simply a classic vanilla sponge that gets its perfect rise and golden crust from hot circulating air instead of a traditional oven. It’s like giving your favorite childhood cake recipe a modern, speedy makeover!
They say the way to anyone’s heart is through their stomach, and this buttery, vanilla-scented masterpiece proves it every single time. Ready to become the dessert hero in your household? Let’s get baking!
Why You’ll Love This Air Fryer Vanilla Cake
Incredibly Quick and Easy
This air fryer vanilla cake comes together faster than driving to the bakery. Mix your batter in one bowl, pour it into your pan, and let your air fryer work its magic. No preheating ovens, no waiting around, no complicated techniques. The circulating hot air creates an evenly baked cake with a tender crumb that melts in your mouth. Even baking beginners will feel like professional pastry chefs with this straightforward method.
Budget-Friendly Baking
Why spend money on expensive bakery cakes when you can whip up this beauty for just a few dollars? You probably have most ingredients already sitting in your pantry—flour, sugar, eggs, butter, and vanilla extract. Making cake at home means you control the quality of ingredients and save significantly compared to store-bought options. Plus, your air fryer uses less energy than heating a full-size oven, adding even more savings to your wallet.
Customizable and Versatile
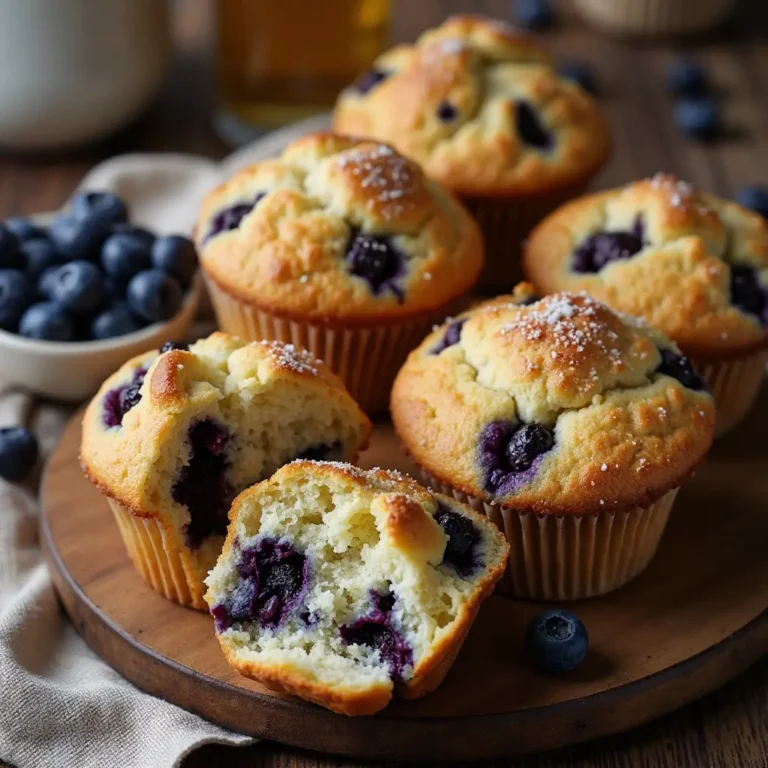
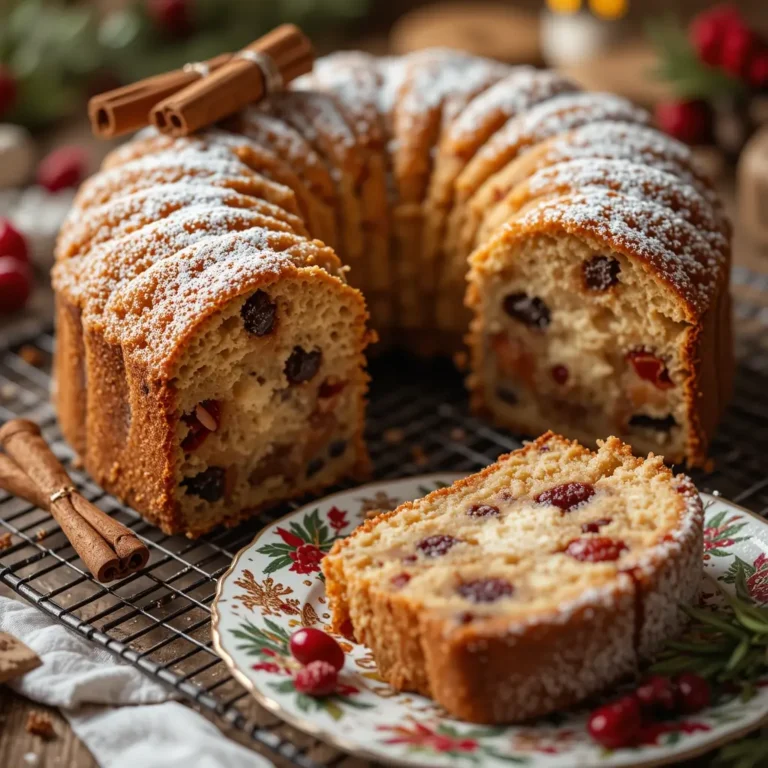
The beauty of this vanilla cake lies in its blank canvas potential. Top it with fresh berries and whipped cream for an elegant dessert, drizzle it with chocolate ganache for extra indulgence, or dust it with powdered sugar for simple perfection. Add chocolate chips, swirl in jam, or fold in citrus zest to create your signature variation. Similar to our air fryer cinnamon rolls, this recipe welcomes your creative touches. Don’t wait another day—grab your air fryer and treat yourself to homemade happiness!
How to Make Air Fryer Vanilla Cake
Quick Overview
This air fryer vanilla cake delivers soft, fluffy perfection with minimal effort. The secret lies in the proper creaming method that creates tiny air bubbles for a light texture, combined with the air fryer’s efficient heat circulation. You’ll love the golden exterior that gives way to a tender, moist interior bursting with pure vanilla flavor.
Time Breakdown:
- Prep Time: 10 minutes
- Cook Time: 25 minutes
- Cooling Time: 15 minutes
- Total Time: 50 minutes
- Servings: 6-8 slices
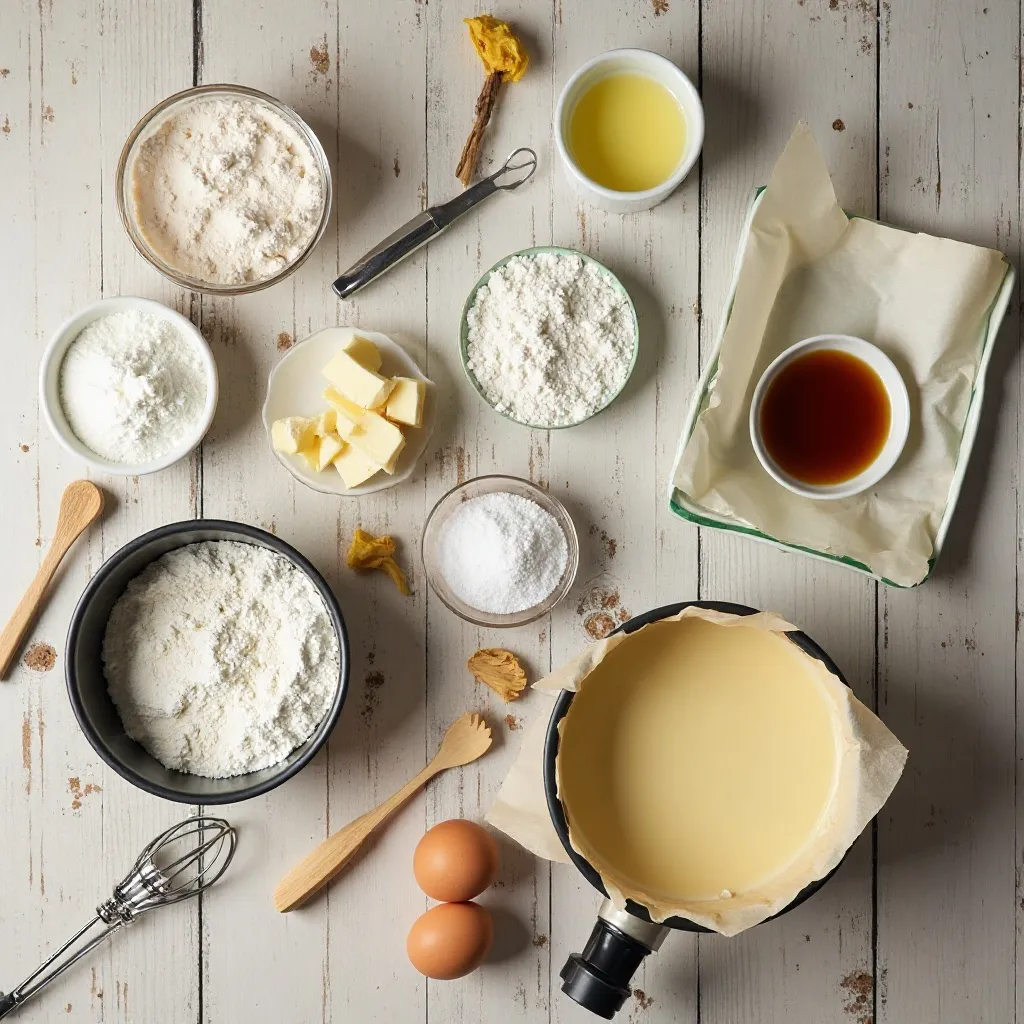
Key Ingredients for Air Fryer Vanilla Cake
Dry Ingredients:
- 1 cup (125g) all-purpose flour
- 1 teaspoon baking powder
- ¼ teaspoon salt
Wet Ingredients:
- ½ cup (100g) granulated sugar
- 6 tablespoons (85g) unsalted butter, softened
- 2 large eggs, room temperature
- 2 teaspoons pure vanilla extract
- ¼ cup (60ml) whole milk, room temperature
Equipment Needed:
- 6-inch or 7-inch round cake pan (must fit in your air fryer)
- Parchment paper
- Mixing bowls
- Electric mixer or whisk
- Toothpick for testing
Step-by-Step Instructions
Step 1: Prepare Your Pan and Ingrediens
Line your 6-inch or 7-inch round cake pan with parchment paper, making sure it covers the bottom completely. Lightly grease the sides with butter or cooking spray to ensure easy removal later. Bring your eggs and milk to room temperature by leaving them on the counter for 30 minutes—this crucial step helps create a smoother batter and better cake texture.
Step 2: Mix the Dry Ingredients
In a medium bowl, whisk together the all-purpose flour, baking powder, and salt until evenly combined. This ensures your leavening agent distributes evenly throughout the flour, giving you consistent rise. Set this bowl aside while you work on the wet ingredients. Sifting isn’t necessary, but whisking thoroughly prevents lumps.
Step 3: Cream Butter and Sugar
In a large mixing bowl, beat the softened butter and sugar together using an electric mixer on medium-high speed for 3-4 minutes. The mixture should become light, fluffy, and pale in color. This creaming process incorporates air into your batter, which is essential for creating that tender, cake-like texture. Don’t rush this step—proper creaming makes all the difference.
Step 4: Add Eggs and Vanilla
Add the eggs one at a time, beating well after each addition until fully incorporated. Scrape down the sides of the bowl between additions to ensure even mixing. Pour in the vanilla extract and mix until the batter looks smooth and glossy. The mixture might look slightly curdled—this is perfectly normal and will smooth out when you add the flour.
Step 5: Combine Wet and Dry Ingredients
Add half of your flour mixture to the butter mixture and gently fold it in with a spatula or mix on low speed just until combined. Pour in the milk and mix gently. Add the remaining flour mixture and fold until just incorporated with no visible flour streaks. Be careful not to overmix—stop as soon as everything comes together. Overmixing develops too much gluten, resulting in a tough, dense cake.
Step 6: Pour Batter into Pan
Transfer the smooth batter into your prepared cake pan, using a spatula to scrape every last bit from the bowl. Gently tap the pan on the counter 2-3 times to release any air bubbles trapped in the batter. Use your spatula to smooth the top surface for even baking. The batter should fill the pan about halfway to two-thirds full, leaving room for rising.
Step 7: Air Fry the Cake
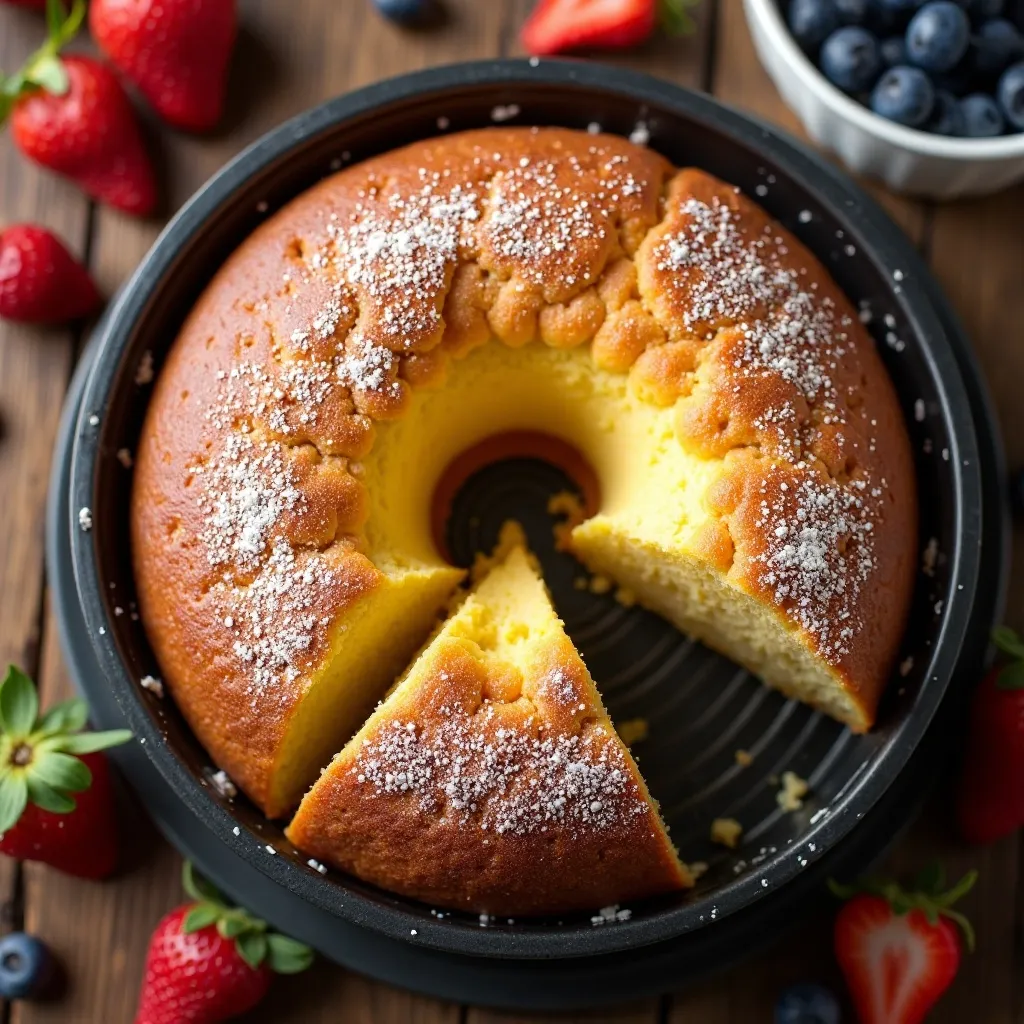
Preheat your air fryer to 320°F (160°C) for 3 minutes. Carefully place the cake pan into the air fryer basket. Cook for 22-25 minutes, checking after 20 minutes. The cake is done when the top turns golden brown, the edges pull away slightly from the pan, and a toothpick inserted into the center comes out clean or with just a few moist crumbs. If the top browns too quickly, loosely tent it with aluminum foil.
Step 8: Cool and Serve
Once done, carefully remove the hot pan from the air fryer using oven mitts. Let the cake cool in the pan for 10 minutes—this allows it to set properly. Run a knife around the edges, then invert onto a cooling rack. Peel off the parchment paper gently. Let it cool completely before frosting, or serve it warm with a scoop of ice cream for pure comfort food bliss.
What to Serve Air Fryer Vanilla Cake With
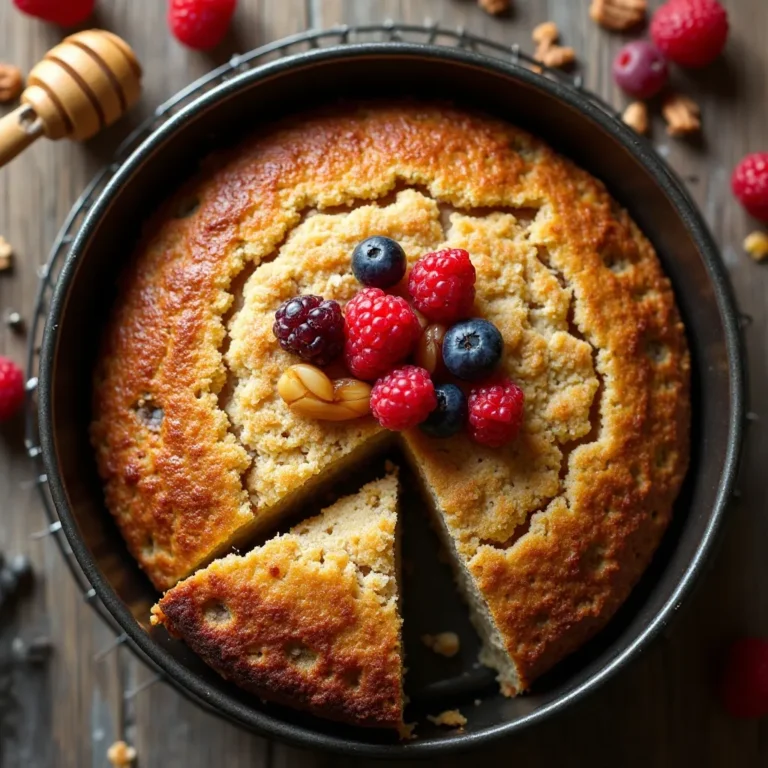
This versatile cake pairs beautifully with countless accompaniments. Serve it with fresh berries like strawberries, raspberries, or blueberries for a fruity contrast to the sweet vanilla. A dollop of whipped cream or vanilla ice cream adds luxurious creaminess. For coffee lovers, pair it with a hot cappuccino or cold brew for an afternoon treat.
Try drizzling it with salted caramel sauce, chocolate ganache, or lemon glaze for extra flavor dimension. Make it breakfast-worthy by serving alongside Greek yogurt and honey. For special occasions, layer it with buttercream frosting and decorative sprinkles. A simple dusting of powdered sugar and fresh mint leaves creates an elegant presentation for dinner parties.
Top Tips for Perfecting Air Fryer Vanilla Cake
Use Room Temperature Ingredients
Cold ingredients don’t mix properly and can create a dense, uneven cake. Take your eggs, milk, and butter out of the refrigerator 30-45 minutes before baking. If you’re short on time, place eggs in warm water for 5 minutes and microwave milk for 10 seconds.
Don’t Overmix the Batter
Mix until just combined once you add flour. Overmixing develops gluten strands that make your cake tough and chewy instead of tender and fluffy. Use gentle folding motions and stop when you no longer see flour streaks.
Check Your Cake Early
Every air fryer model heats differently. Start checking your cake at the 20-minute mark to prevent overbaking. Look for golden edges and a toothpick that comes out with just a few moist crumbs—not wet batter.
Choose the Right Pan
Metal or aluminum pans work best in air fryers because they conduct heat efficiently. Avoid glass pans as they may crack under intense heat. Ensure your pan fits comfortably in the basket with at least an inch of clearance for air circulation.
Prevent Dry Cake
Measure flour correctly by spooning it into your measuring cup and leveling it off—don’t pack it down. Overbaking is the number one cause of dry cake, so watch your timing carefully and remove it as soon as that toothpick comes out clean.
Adjust Temperature if Needed
If your cake top browns too fast but the center remains raw, reduce the temperature to 300°F and extend cooking time slightly. If it’s not browning enough, increase to 330°F for the last 5 minutes.
Storing and Reheating Tips
Room Temperature Storage: Once completely cooled, wrap your unfrosted air fryer vanilla cake tightly in plastic wrap or store in an airtight container at room temperature for up to 3 days. Keep it away from direct sunlight or heat sources to maintain moisture.
Refrigerator Storage: If you’ve added frosting, cream cheese topping, or fresh fruit, refrigerate the cake in an airtight container for up to 5 days. Bring it to room temperature 30 minutes before serving for the best flavor and texture.
Freezer Storage: Wrap individual slices or the whole cake tightly in plastic wrap, then aluminum foil, and freeze for up to 3 months. Thaw overnight in the refrigerator or at room temperature for 2-3 hours before serving.
Reheating Instructions: For leftover cake, microwave individual slices for 10-15 seconds to restore that fresh-baked warmth. Alternatively, warm in the air fryer at 300°F for 2-3 minutes for a slightly crispy exterior. Avoid reheating multiple times as it dries out the cake.
Common Baking Mistakes to Avoid
Mistake #1: Using Cold Ingredients Cold butter won’t cream properly, and cold eggs cause the batter to curdle. Always bring ingredients to room temperature for the smoothest batter and best texture.
Mistake #2: Incorrect Pan Size Using a pan that’s too small causes overflow and uneven cooking. Using one too large creates a flat, dry cake. Stick to the recommended 6-7 inch pan for perfect results.
Mistake #3: Opening the Air Fryer Too Often Each time you open the basket, you release heat and disrupt the cooking process. Resist peeking until at least 20 minutes have passed.
Mistake #4: Skipping the Parchment Paper Without parchment, your cake may stick stubbornly to the pan. Always line the bottom, even if you’ve greased it well.
Mistake #5: Not Testing for Doneness Visual cues can be deceiving. Always use a toothpick test in the center of your cake. It should come out clean or with just a few moist crumbs attached.
Mistake #6: Cutting Too Soon Slicing into a warm cake causes it to crumble and fall apart. Practice patience and let it cool for at least 10 minutes in the pan, then completely on a wire rack.
Frequently Asked Questions
Can I make this air fryer vanilla cake without eggs?
Yes! Replace each egg with ¼ cup unsweetened applesauce, mashed banana, or a flax egg (1 tablespoon ground flaxseed mixed with 3 tablespoons water, let sit 5 minutes). The texture will be slightly denser but still delicious.
Why did my cake sink in the middle?
A sunken center usually means underbaking, opening the air fryer too early, or too much leavening agent. Ensure you measure baking powder accurately and don’t open the basket until at least 20 minutes of cooking time has passed.
Can I double this recipe?
It’s better to make two separate cakes rather than doubling in one pan. Doubled batter in a single pan won’t cook evenly in an air fryer. You can bake them back-to-back or layer them for a taller cake.
What if I don’t have vanilla extract?
Substitute with vanilla bean paste (same amount), almond extract (use half the amount), or even maple syrup for a different flavor profile. In a pinch, skip it entirely—the cake will still be tasty, just less aromatic.
How do I know when my cake is done?
Look for golden-brown edges, a spring-back texture when gently pressed, and a toothpick inserted in the center that comes out clean or with a few moist crumbs. The cake should also pull away slightly from the pan sides.
Can I use self-rising flour instead?
Yes, but omit the baking powder and salt since self-rising flour already contains both. Use 1 cup self-rising flour as a direct replacement for the flour, baking powder, and salt combination.
Why is my cake dry?
Overbaking is the most common culprit. Other causes include too much flour (measure by spooning and leveling), overmixing, or using low-fat milk instead of whole milk. Check doneness a few minutes early next time.
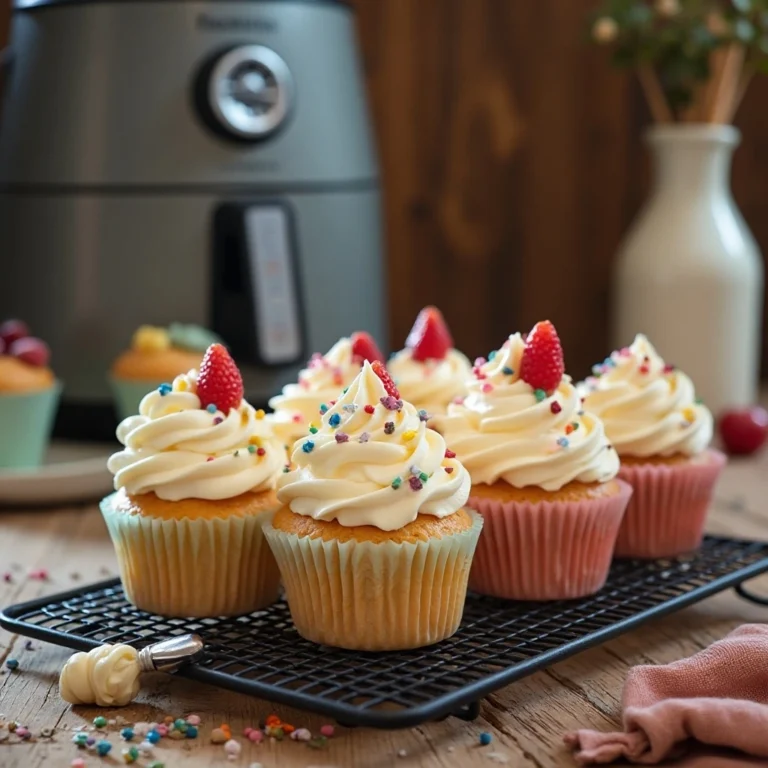
Can I make this into cupcakes?
Absolutely! Use silicone cupcake liners and reduce cooking time to 12-15 minutes at 320°F. This recipe makes about 6 cupcakes. Check them at 10 minutes to prevent overbaking.
What’s the best frosting for this cake?
Classic vanilla buttercream, cream cheese frosting, chocolate ganache, or whipped cream all pair beautifully. For a lighter option, dust with powdered sugar or serve with fresh fruit compote.
Can I add mix-ins like chocolate chips?
Yes! Fold in ½ cup of chocolate chips, berries, or chopped nuts after combining wet and dry ingredients. Toss them in a bit of flour first to prevent sinking to the bottom.
Nutrition Information
| Nutrient | Per Slice (1/8 of cake) |
|---|---|
| Calories | 245 |
| Total Fat | 11g |
| Saturated Fat | 7g |
| Cholesterol | 75mg |
| Sodium | 145mg |
| Total Carbohydrates | 33g |
| Dietary Fiber | 0.5g |
| Sugars | 19g |
| Protein | 4g |
Nutritional values are approximate and based on one slice without frosting or toppings
Final Thoughts
This air fryer vanilla cake proves that incredible homemade desserts don’t require complicated techniques or hours in the kitchen. With simple pantry ingredients and your trusty air fryer, you can create bakery-quality cake that’s perfect for any occasion—from casual weeknight treats to birthday celebrations.
The beauty of this recipe lies in its versatility and foolproof method. Once you master this basic vanilla cake, you’ll find yourself making it again and again, each time adding your own creative twist. Whether you keep it classic with a dusting of powdered sugar or dress it up with elaborate frosting and decorations, this cake delivers consistent, delicious results.
Don’t let your air fryer sit idle on the counter—it’s capable of so much more than reheating leftovers! Give this air fryer vanilla cake a try this weekend, and discover just how easy and rewarding homemade baking can be. Your family and friends will be amazed when you tell them this gorgeous cake came from your air fryer.
Ready to start baking? Grab your ingredients and let’s make some magic happen. Don’t forget to share your beautiful creations with us in the comments below—we love seeing how your air fryer vanilla cake turns out! Happy baking!