Juicy Air Fryer Thin Chicken Breast Quick 15 Minute Recipe
Craving juicy, golden-brown chicken that’s ready in minutes? This air fryer thin chicken breast recipe delivers restaurant-quality results with minimal effort! Here’s a fun fact: thin chicken breasts cook 40% faster than regular cuts, making them perfect for busy weeknights.
This dish is incredibly simple, requiring just five basic ingredients and about 12 minutes of your time. It’s a family favorite that even picky eaters devour! Similar to our popular air fryer chicken thighs recipe, this version is lighter but equally flavorful.
Whether you’re meal prepping for the week or need a quick protein fix, this recipe will become your go-to solution. Get ready to say goodbye to dry, rubbery chicken forever!
What is Air Fryer Thin Chicken Breast?
Ever wondered why “thin” makes all the difference? Air fryer thin chicken breast is simply chicken breast that’s been butterflied or pounded to about half-inch thickness. Why the special treatment? Thinner cuts cook evenly, stay incredibly juicy, and develop that coveted crispy exterior we all crave.
As the saying goes, “the way to a man’s heart is through his stomach,” and this tender, perfectly seasoned chicken definitely paves that path! Ready to transform your weeknight dinners? Let’s get cooking!
Why You’ll Love This Air Fryer Thin Chicken Breast
Golden, Crispy Perfection Every Time
The air fryer creates an irresistibly crispy exterior while sealing in all the natural juices. Unlike traditional oven baking, the circulating hot air cooks your chicken evenly from all sides, giving you that beautiful golden color without any oil splatters or mess. Each bite delivers a satisfying crunch followed by tender, succulent meat.
Budget-Friendly Family Dinner
Making air fryer thin chicken breast at home costs about $3-4 per serving compared to $12-15 at restaurants. You control the ingredients, avoiding hidden sodium and preservatives while saving serious money. Buy chicken breasts in bulk, butterfly them yourself, and freeze portions for even more savings!
Endless Flavor Possibilities
This recipe serves as a blank canvas for your favorite seasonings. From Italian herbs to spicy Cajun rubs, from honey garlic to lemon pepper – the options are limitless. Top with fresh herbs, squeeze lemon juice, or drizzle with garlic butter for restaurant-worthy presentation. If you love our air fryer BBQ chicken recipe, you’ll adore how versatile this method is. Ready to create your signature chicken dish? Let’s dive into the recipe!
How to Make Air Fryer Thin Chicken Breast
Quick Overview
This recipe delivers perfectly cooked, juicy chicken with minimal effort.
The secret lies in the thin cut and proper seasoning that creates a flavorful crust.
The air fryer’s rapid circulation ensures even cooking without drying out the meat.
Prep Time: 5 minutes
Cook Time: 12 minutes
Total Time: 17 minutes
Servings: 4
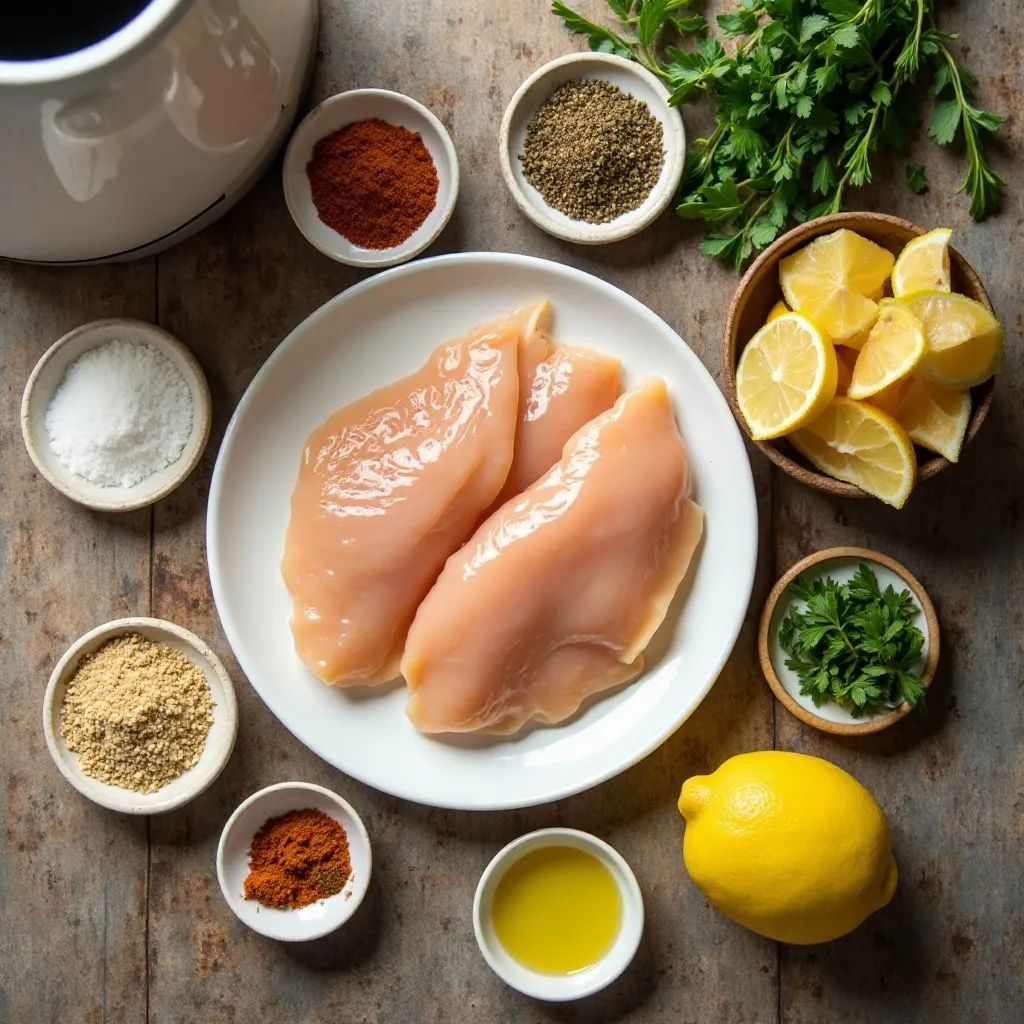
Key Ingredients for Air Fryer Thin Chicken Breast
For the Chicken:
- 4 thin chicken breast cutlets (about 1/2 inch thick, 4-6 oz each)
- 2 tablespoons olive oil or avocado oil
- 1 teaspoon garlic powder
- 1 teaspoon onion powder
- 1 teaspoon paprika (smoked or regular)
- 1 teaspoon Italian seasoning
- 1/2 teaspoon black pepper
- 1 teaspoon salt (or to taste)
- 1/2 teaspoon dried parsley
Optional Additions:
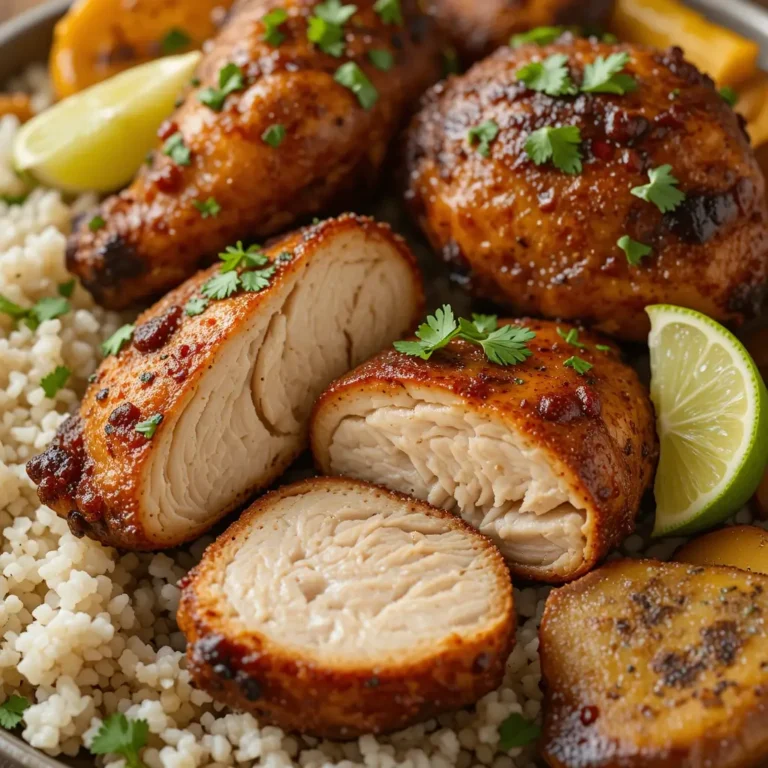
- Fresh lemon wedges for serving
- Melted butter with minced garlic
- Fresh herbs for garnish
Step-by-Step Instructions
Prepare Your Chicken Breasts
Start by patting the chicken breasts completely dry with paper towels. This crucial step removes excess moisture, allowing the seasonings to adhere better and helping achieve that crispy exterior. If your chicken breasts are thick, place them between two sheets of plastic wrap and gently pound them to an even 1/2-inch thickness using a meat mallet. Even thickness ensures uniform cooking.
Create the Seasoning Blend
In a small bowl, combine the garlic powder, onion powder, paprika, Italian seasoning, black pepper, salt, and dried parsley. Mix thoroughly with a spoon until all spices are evenly distributed. This custom blend creates a flavorful crust that’s far superior to pre-made seasonings.
Season the Chicken
Brush both sides of each chicken breast with olive oil, ensuring complete coverage. The oil helps the seasonings stick and promotes browning. Generously sprinkle the seasoning mixture on both sides of the chicken, pressing gently with your fingers to help it adhere. Don’t be shy with the seasonings – they create that delicious crust!
Preheat Your Air Fryer
Set your air fryer to 380°F (193°C) and let it preheat for 3-5 minutes. Preheating is essential for achieving that immediate sear when the chicken hits the basket. A hot air fryer mimics a hot pan, creating the perfect cooking environment.
Arrange Chicken in the Basket
Lightly spray the air fryer basket with cooking spray to prevent sticking. Place the seasoned chicken breasts in a single layer, ensuring they don’t overlap. Leave space between each piece for proper air circulation. Depending on your air fryer size, you may need to cook in batches.
Air Fry to Perfection
Cook the chicken at 380°F for 6 minutes. After 6 minutes, flip each piece using tongs to ensure even browning on both sides. Continue cooking for another 5-6 minutes until the internal temperature reaches 165°F when checked with a meat thermometer inserted into the thickest part.
Rest Before Serving
Remove the chicken from the air fryer and let it rest on a plate for 3-5 minutes. This resting period allows the juices to redistribute throughout the meat, ensuring every bite is moist and tender. Resist the urge to cut immediately – patience pays off!
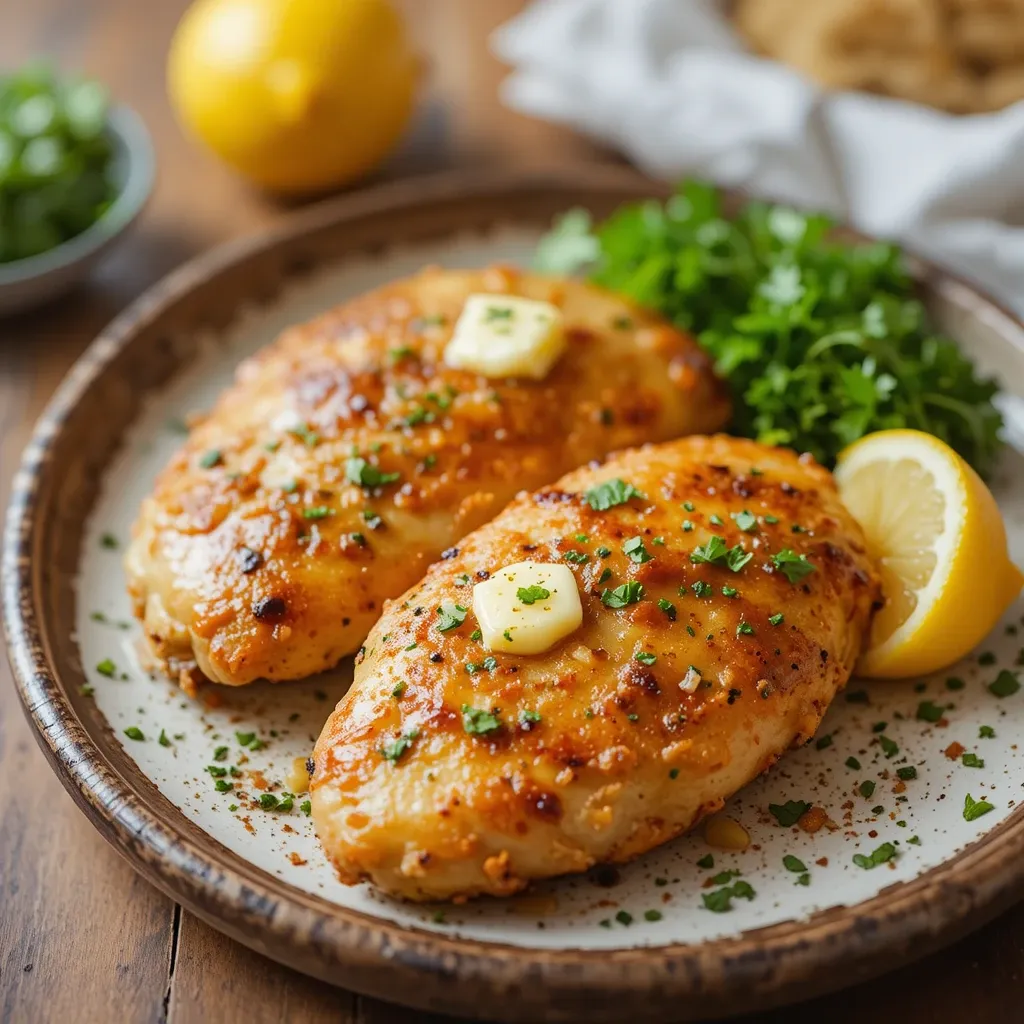
Garnish and Serve
Transfer the rested chicken to a serving platter. Squeeze fresh lemon juice over the top, brush with garlic butter if desired, and garnish with fresh parsley or your favorite herbs. Serve immediately while hot and enjoy the fruits of your labor!
What to Serve Air Fryer Thin Chicken Breast With
Pair your perfectly cooked chicken with these delicious sides:
Light and Fresh Options:
- Caesar salad with homemade croutons
- Roasted vegetables (asparagus, broccoli, Brussels sprouts)
- Quinoa pilaf with herbs
- Greek salad with feta and olives
- Caprese salad with balsamic glaze
Hearty Comfort Sides:
- Garlic mashed potatoes
- Creamy mac and cheese
- Air fryer sweet potato fries
- Buttered egg noodles
- Rice pilaf with toasted almonds
Low-Carb Alternatives:
- Cauliflower rice
- Zucchini noodles
- Sautéed spinach with garlic
- Cucumber tomato salad
- Steamed green beans
Top Tips for Perfecting Air Fryer Thin Chicken Breast
Master the Thickness
The key to success is uniform thickness. If your chicken pieces vary in size, they’ll cook unevenly. Always aim for 1/2 inch thickness throughout. Use a meat thermometer to verify doneness rather than relying on time alone, as air fryer models vary.
Don’t Skip the Oil
Even though it’s an air fryer, a light coating of oil is essential. It helps achieve that golden, crispy exterior and prevents the chicken from drying out. Use olive oil, avocado oil, or melted butter for best results.
Avoid Overcrowding
Air needs to circulate freely around each piece. Overcrowding leads to steaming instead of crisping. Cook in batches if necessary – it’s worth the extra few minutes for perfect results.
Adjust Temperature for Your Model
Air fryers vary in power. If your chicken is browning too quickly on the outside but not cooking through, reduce the temperature to 360°F and cook a bit longer. Conversely, if it’s not browning enough, increase to 400°F but watch carefully.
Marinate for Extra Flavor
For even more flavor, marinate your chicken for 30 minutes to 4 hours before cooking. Try buttermilk marinade, Italian dressing, teriyaki sauce, or lemon herb mixture. Pat dry before seasoning and air frying.
Use a Meat Thermometer
This is non-negotiable! Chicken is safe to eat at 165°F. Insert the thermometer into the thickest part without touching the basket. This ensures food safety while preventing overcooking.
Try Different Seasonings
Once you master the basic recipe, experiment with different flavor profiles. Try Cajun spices, taco seasoning, curry powder, ranch seasoning, or honey mustard coating. Each creates a completely different dish!
Storing and Reheating Tips
Refrigerator Storage:
Allow cooked chicken to cool completely before storing. Place in an airtight container lined with paper towels to absorb excess moisture. Properly stored chicken stays fresh for 3-4 days in the refrigerator. Label the container with the date to track freshness.
Freezer Storage:
For longer storage, freeze cooked chicken for up to 3 months. Wrap each piece individually in plastic wrap, then place in a freezer-safe bag with excess air removed. This prevents freezer burn and makes it easy to grab single portions. Thaw overnight in the refrigerator before reheating.
Reheating Methods:
The best way to reheat is in the air fryer at 350°F for 3-4 minutes. This restores the crispy exterior. Alternatively, reheat in a 350°F oven for 10 minutes, covered with foil to prevent drying. Microwave reheating works in a pinch (1-2 minutes on 50% power) but won’t maintain the crispy texture. Add a splash of chicken broth when microwaving to prevent dryness.
Meal Prep Tips:
Cook a large batch on Sunday and portion into meal prep containers with your favorite sides. The chicken stays delicious all week and makes quick lunches or dinners effortless. Slice leftovers for salads, wraps, sandwiches, or grain bowls.
Frequently Asked Questions
How do I know when thin chicken breast is fully cooked in the air fryer?
Use a meat thermometer to check that the internal temperature reaches 165°F in the thickest part. The chicken should also have clear juices when pierced, and the meat should be white throughout with no pink areas. Cooking time is typically 10-12 minutes at 380°F for 1/2-inch thick breasts.
Why is my air fryer chicken breast dry?
Overcooking is the main culprit. Thin chicken breast cooks quickly, so even an extra 2-3 minutes can dry it out. Always use a meat thermometer and remove chicken at exactly 165°F. Also ensure you’re using enough oil and allowing the chicken to rest before cutting.
Can I cook frozen thin chicken breast in the air fryer?
Yes, but add 5-7 minutes to the cooking time. Brush frozen chicken with oil and season generously. Cook at 360°F, flipping halfway through. Always verify the internal temperature reaches 165°F. However, thawed chicken produces better texture and more even cooking.
Do I need to flip chicken breast in the air fryer?
Yes, flipping ensures even browning and cooking on both sides. Flip once at the halfway point using tongs. This simple step makes a significant difference in achieving that perfectly golden, crispy exterior all around.
What’s the best temperature for air frying thin chicken breast?
The ideal temperature is 375-380°F. This allows the exterior to crisp up beautifully while the interior cooks through without drying out. Lower temperatures take longer and may result in less crispy skin, while higher temperatures can burn the outside before the inside cooks.
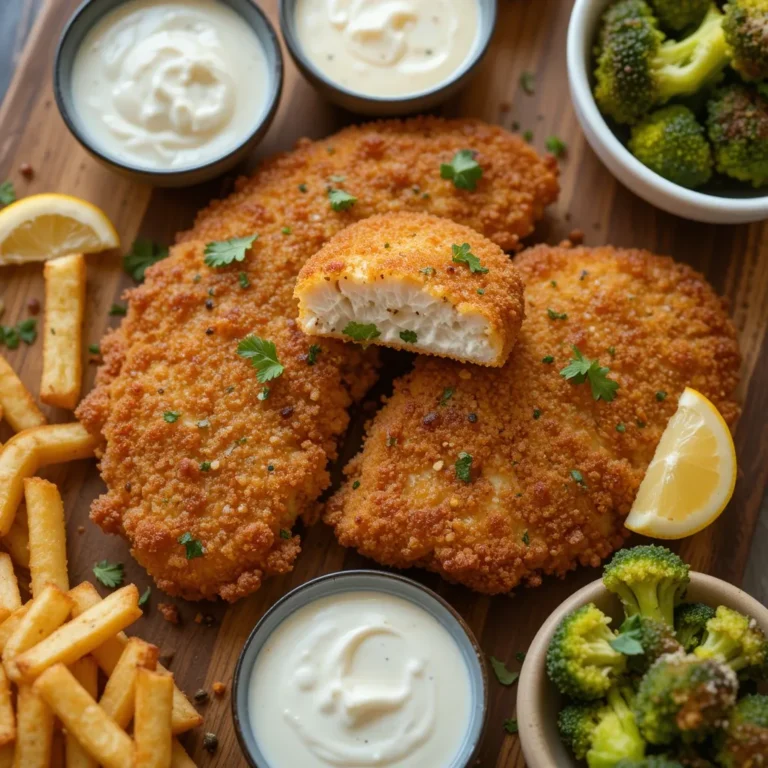
Can I bread thin chicken breast for the air fryer?
Absolutely! For breaded chicken, dip in flour, then beaten egg, then breadcrumbs or panko. Spray generously with cooking spray and air fry at 400°F for 8-10 minutes, flipping once. The result is incredibly crispy, similar to fried chicken without the oil.
How do I prevent chicken from sticking to the air fryer basket?
Always spray the basket with cooking spray before adding chicken. You can also use parchment paper specifically designed for air fryers (with holes for air circulation). Ensure your chicken has enough oil on the surface, and don’t try to flip too early – it will release naturally when ready.
Can I make this recipe dairy-free or gluten-free?
Yes, this recipe is naturally gluten-free and dairy-free as written. All the seasonings and oil are free from these allergens. If adding breadcrumbs, use gluten-free varieties. For dairy-free, skip any butter-based finishing sauces.
Nutrition Information (Per Serving)
| Nutrient | Amount |
|---|---|
| Calories | 185 |
| Protein | 32g |
| Total Fat | 6g |
| Saturated Fat | 1g |
| Carbohydrates | 1g |
| Fiber | 0g |
| Sugar | 0g |
| Sodium | 650mg |
| Cholesterol | 95mg |
Note: Nutrition values are approximate and based on a 5-ounce chicken breast with seasonings. Values may vary based on specific ingredients used.
Pro Tips for Success
Brine for Maximum Juiciness
Consider brining your chicken for 30 minutes before cooking. Mix 1/4 cup salt with 4 cups cold water, submerge the chicken, then rinse and pat dry before seasoning. This optional step adds incredible moisture and flavor.
Let Chicken Come to Room Temperature
Remove chicken from the refrigerator 15-20 minutes before cooking. Room temperature chicken cooks more evenly than cold chicken straight from the fridge. This small step prevents the outside from overcooking while the inside finishes.
Invest in Kitchen Tools
A reliable instant-read thermometer is your best friend. It takes the guesswork out of cooking and guarantees perfect results every time. Also consider getting a meat mallet for easily pounding chicken to uniform thickness.
Create Flavor Variations
Transform this basic recipe into entirely different meals. Try lemon pepper, buffalo sauce coating, honey garlic glaze, teriyaki marinade, or Mediterranean herbs. Each variation feels like a new recipe while using the same simple technique.
Make It a Complete Meal
Cook your vegetables alongside the chicken! Add halved baby potatoes, broccoli florets, or bell pepper strips to the air fryer basket during the last 8 minutes of cooking. Everything finishes together for a one-basket meal.
Why This Recipe Works
The magic of this recipe lies in three key factors working together perfectly.
First, the thin cut ensures rapid, even cooking. Thick chicken breasts have a temperature gradient – the outside overcooks while waiting for the center to reach 165°F. Thin cutlets eliminate this problem entirely.
Second, the air fryer’s convection technology circulates superheated air at high speed. This creates a crispy, browned exterior similar to deep frying but using 95% less oil. The rapid air movement also cooks the chicken faster than conventional ovens.
Third, the simple seasoning blend enhances rather than masks the chicken’s natural flavor. Each spice contributes: paprika adds color, garlic and onion provide savory depth, Italian herbs bring aromatic complexity, and the salt and pepper balance everything perfectly.
Together, these elements create chicken that’s crispy outside, juicy inside, and full of flavor – the trifecta of perfect chicken!
Final Thoughts
This air fryer thin chicken breast recipe proves that simple ingredients and smart technique create extraordinary results. No complicated steps, no exotic ingredients, no hours of prep work – just perfectly cooked chicken that your whole family will request again and again.
The beauty of this recipe extends beyond the dinner table. Use it for meal prep Sundays, quick weeknight dinners, healthy lunch options, or even elegant dinner parties. The versatility is unmatched.
Once you master this basic recipe, you’ll find yourself air frying chicken several times a week. It’s that good, that easy, and that reliable. Say goodbye to dry, disappointing chicken and hello to juicy, flavorful perfection every single time.
Ready to revolutionize your chicken cooking? Grab your air fryer and let’s make the best thin chicken breast you’ve ever tasted! Don’t forget to save this recipe and share it with friends who need this in their lives.
Have you tried this recipe? Leave a comment below and let us know how it turned out! We love hearing from you.