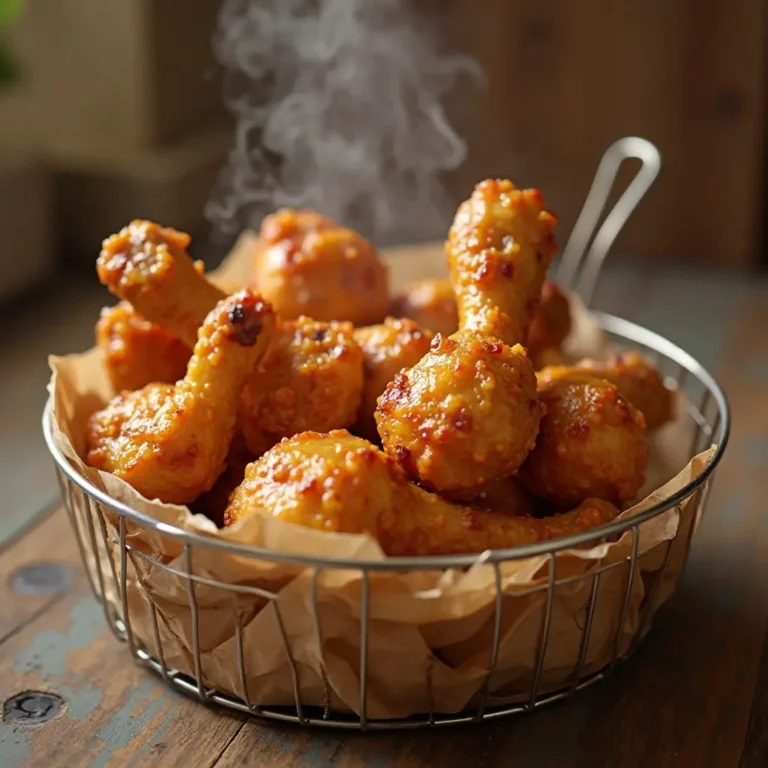
15 Minute Air Fryer Chicken Skin Recipe – Crispy Golden
Imagine biting into perfectly golden, impossibly crispy chicken skin that shatters between your teeth with an audible crunch. That’s exactly what you’ll get with this foolproof air fryer chicken skin recipe! Here’s a fun fact: chicken skin contains natural collagen that transforms into crispy perfection when cooked properly.
This dish is special because it turns what many consider “scraps” into a gourmet snack that rivals expensive restaurant appetizers. The best part?
It takes just 15 minutes and uses simple ingredients you probably already have. Unlike our popular air fryer chicken wings that require marinating time, this recipe delivers instant gratification with minimal prep work.
What is Air Fryer Chicken Skin?
Ever wondered why some people call chicken skin “liquid gold”? Well, it’s because when cooked right, it becomes pure crispy heaven! Air fryer chicken skin is simply seasoned chicken skin cooked until golden and crunchy in your air fryer.
Think of it as nature’s potato chip – but way more flavorful and protein-packed. You know what they say, “the way to a man’s heart is through his stomach,” and nothing says love like transforming kitchen scraps into crispy perfection! Ready to become the crispy skin master in your kitchen?
Why You’ll Love This Air Fryer Chicken Skin
The Ultimate Crispy Texture
This recipe delivers restaurant-quality results with an incredibly satisfying crunch that’s impossible to achieve in a regular oven. The air fryer’s circulating hot air creates the perfect environment for rendering fat while crisping the skin to golden perfection.
Budget-Friendly Kitchen Magic
Instead of throwing away chicken skin when preparing other dishes, you’re transforming “waste” into a gourmet treat. This costs pennies to make but tastes like expensive bar snacks. You’ll save money while impressing family and friends with your culinary creativity.
Customizable Flavor Profiles
From simple salt and pepper to complex spice blends, this recipe adapts to any flavor preference. Try everything from smoky paprika to zesty lemon pepper. Unlike our air fryer chicken thighs that have a set seasoning, these skins become a blank canvas for your creativity.
Ready to turn your kitchen scraps into crispy gold? Let’s dive into this game-changing recipe!
How to Make Air Fryer Chicken Skin
Quick Overview
This incredibly simple recipe transforms chicken skin into crispy, golden perfection in just 15 minutes. The key is proper preparation and the right temperature to render fat while achieving maximum crispiness.
Prep Time: 5 minutes
Cook Time: 12-15 minutes
Total Time: 20 minutes
Servings: 2-3 people
Difficulty: Beginner-friendly
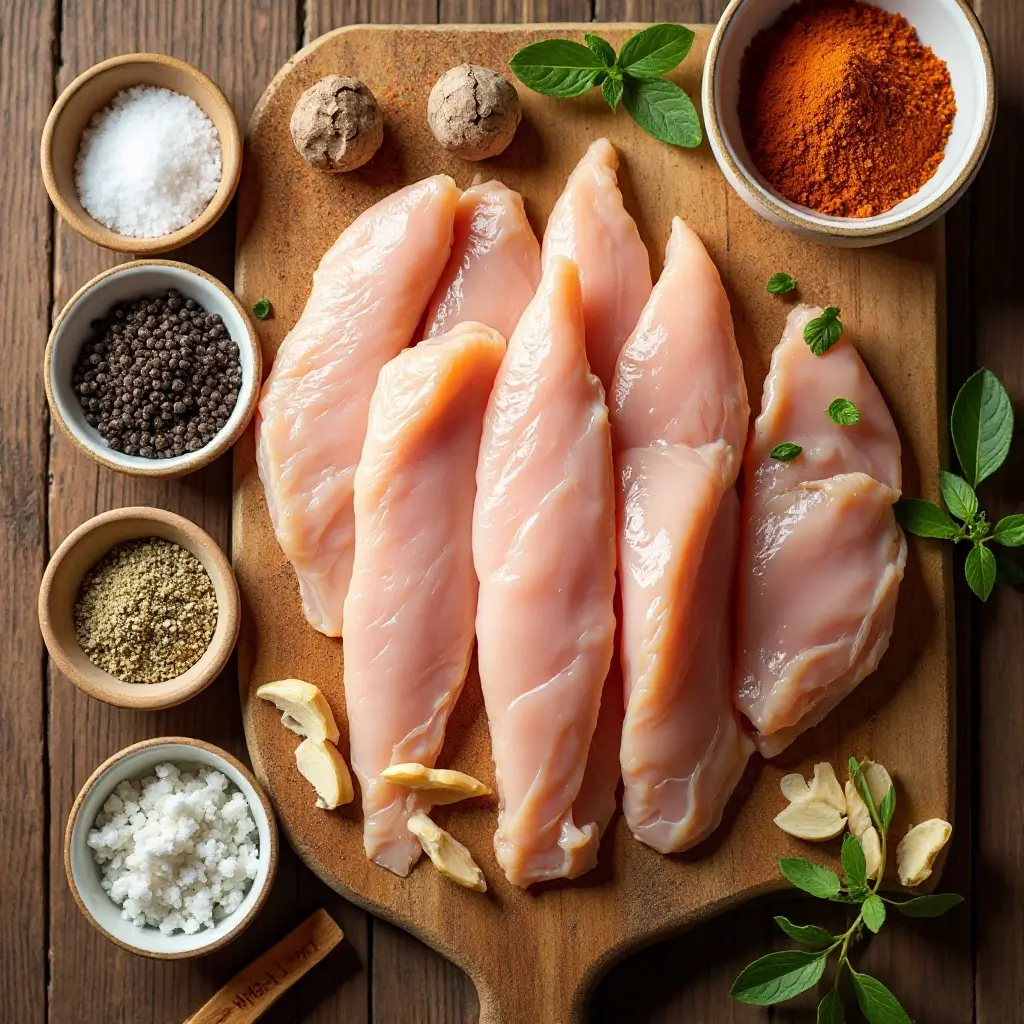
Key Ingredients for Air Fryer Chicken Skin
- Chicken skin (from 4-6 pieces of chicken) – removed and cleaned
- Sea salt (1 teaspoon) – for basic seasoning
- Black pepper (1/2 teaspoon) – freshly ground preferred
- Garlic powder (1/2 teaspoon) – adds depth
- Paprika (1/2 teaspoon) – for color and mild heat
- Optional: Your favorite seasoning blend – customize to taste
Pro tip: Save chicken skins whenever you cook chicken breasts or thighs – they freeze beautifully!
Step-by-Step Instructions
Step 1: Prepare the Chicken Skin
Remove any excess fat or meat from the chicken skin using kitchen shears or a sharp knife. Cut the skin into 2-3 inch pieces for even cooking. Pat completely dry with paper towels – this step is crucial for crispiness.
Step 2: Season Generously
In a bowl, combine salt, pepper, garlic powder, and paprika. Toss the chicken skin pieces with the seasoning mixture, ensuring every piece is well-coated. Let sit for 2-3 minutes to allow flavors to penetrate.
Step 3: Preheat Your Air Fryer
Set your air fryer to 400°F (200°C) and preheat for 3 minutes. This ensures even cooking from the moment the skin hits the basket.
Step 4: Arrange in Single Layer
Place seasoned chicken skin pieces in the air fryer basket in a single layer, skin-side up. Don’t overcrowd – work in batches if necessary for best results.
Step 5: First Cook Cycle
Cook for 8 minutes at 400°F. The skin will start rendering fat and beginning to brown. Don’t flip yet – let the bottom side render properly.
Step 6: Flip and Final Cook
Carefully flip each piece using tongs. Cook for an additional 4-7 minutes until deeply golden and crispy. Cooking time varies based on thickness of skin.
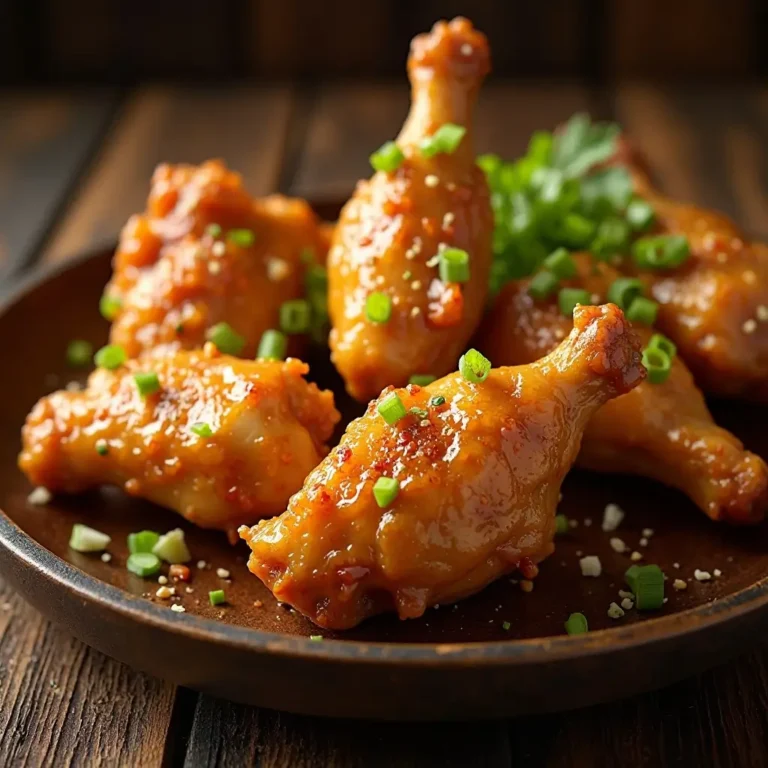
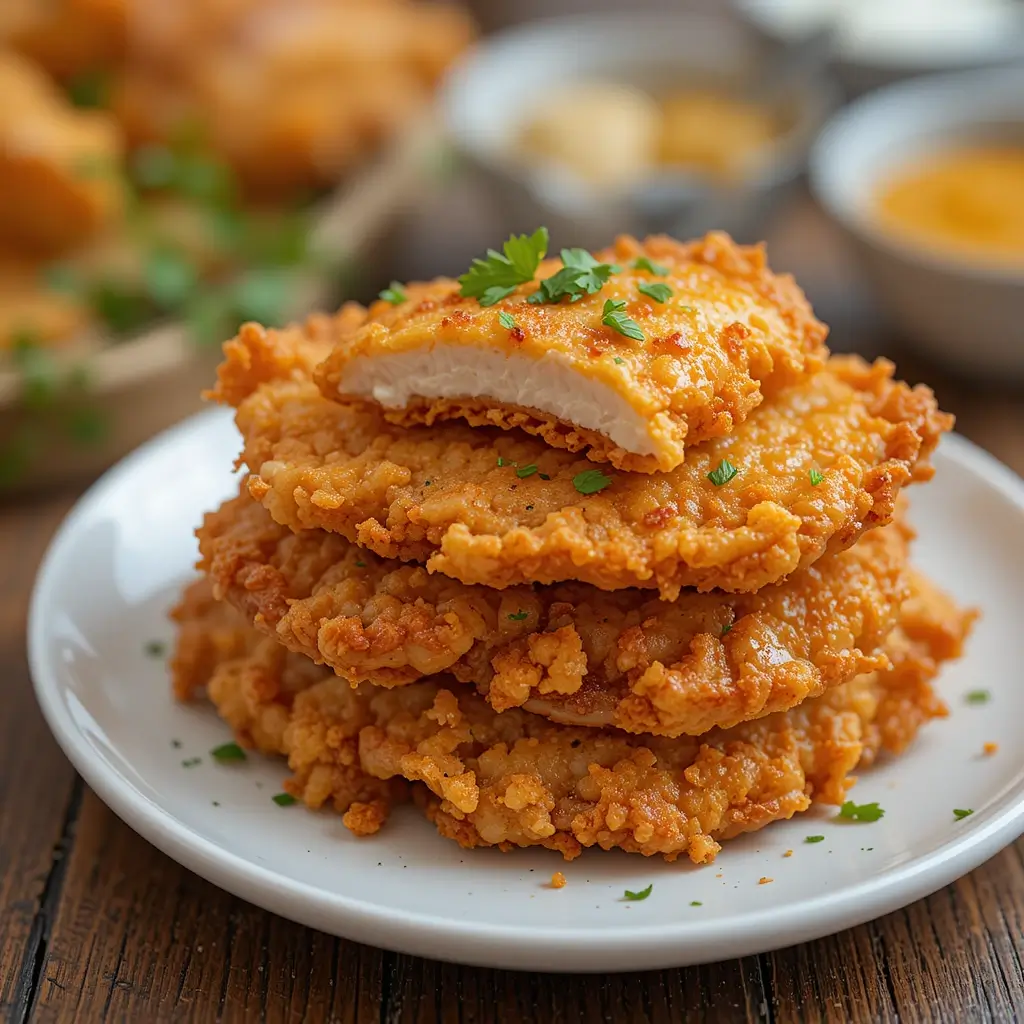
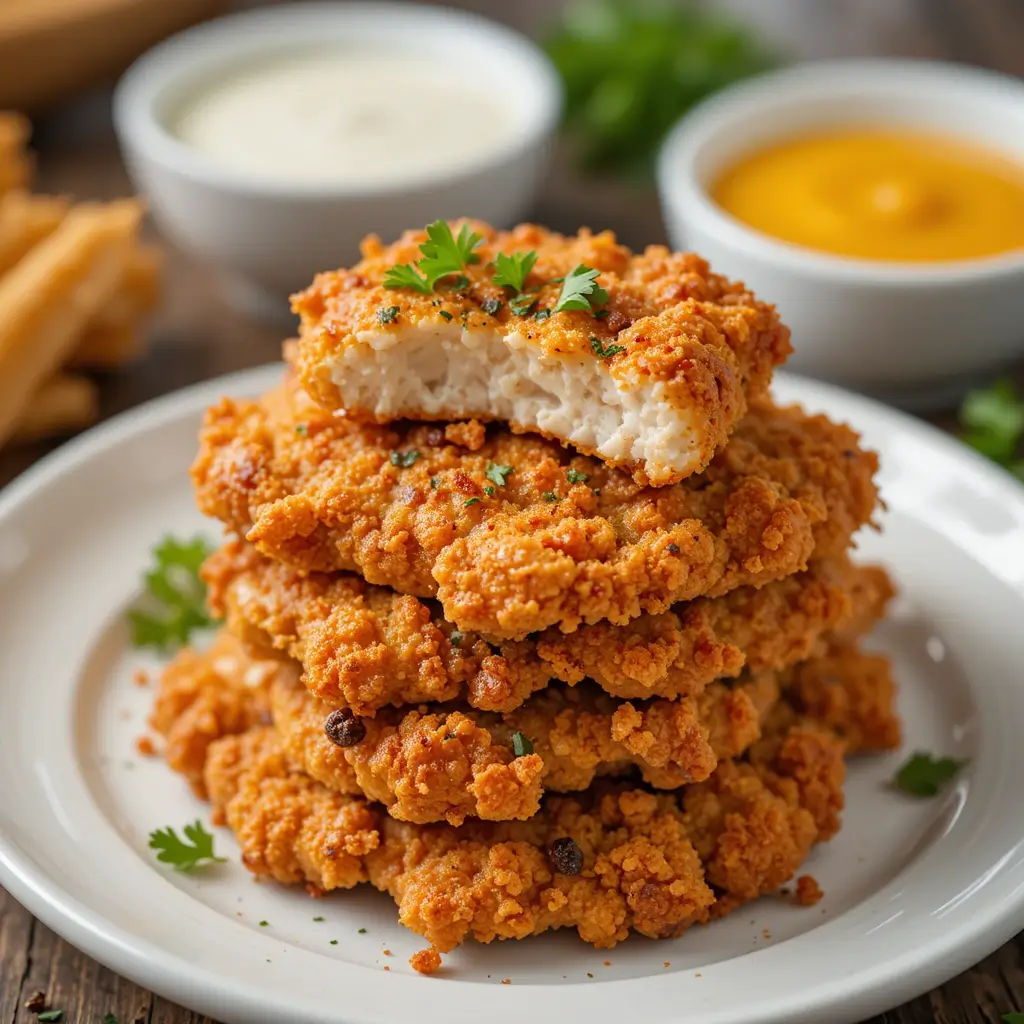
Step 7: Drain and Serve
Remove crispy skins and place on paper towels to drain excess fat for 1-2 minutes. Serve immediately while hot and crunchy.
What to Serve Air Fryer Chicken Skin With
Perfect Dipping Sauces:
- Ranch dressing for classic comfort
- Honey mustard for sweet and tangy contrast
- Buffalo sauce for heat lovers
- Garlic aioli for gourmet flair
Complementary Sides:
- Fresh vegetable crudité for balance
- Coleslaw for cool, creamy contrast
- Pickles for acidic brightness
Meal Integration Ideas:
- Crumble over Caesar salad for extra crunch
- Use as garnish for chicken soup
- Serve alongside air fryer vegetables for a complete meal
Top Tips for Perfecting Air Fryer Chicken Skin
Temperature and Timing Mastery
Always cook at 400°F for optimal fat rendering. Lower temperatures won’t crisp properly, while higher temps can burn the exterior before the interior cooks through.
The Drying Secret
Pat chicken skin completely dry before seasoning. Any moisture will create steam, preventing that coveted crispy texture. Some chefs even air-dry seasoned skins in the refrigerator for 30 minutes before cooking.
Avoid Overcrowding
Cook in single layers only. Overlapping pieces will steam each other, resulting in chewy rather than crispy results. It’s better to cook in batches than compromise texture.
Fat Rendering Indicators
Look for golden-brown color and listen for reduced sizzling sounds. When the intense bubbling subsides, the fat has properly rendered and crispiness is achieved.
Seasoning Substitutions
- Replace garlic powder with onion powder
- Try smoked paprika for deeper flavor
- Add cayenne pepper for heat
- Use herb blends like Italian seasoning for variety
Storing and Reheating Tips
Refrigerator Storage: Store leftover crispy chicken skin in an airtight container in the refrigerator for up to 3 days. Place paper towels in the container to absorb any residual moisture.
Freezing Instructions: Freeze cooked chicken skins for up to 1 month. Arrange in single layers on parchment paper, freeze until solid, then transfer to freezer bags.
Reheating for Optimal Crispiness:
- Air fryer: 350°F for 2-3 minutes
- Oven: 400°F for 3-4 minutes on a wire rack
- Never microwave – this makes them soggy
Raw Skin Storage: Fresh chicken skins can be refrigerated for 1-2 days or frozen for up to 6 months. Thaw completely before seasoning and cooking.
Nutrition Information
| Nutrient | Per Serving (approx.) |
|---|---|
| Calories | 180-220 |
| Protein | 12-15g |
| Fat | 15-18g |
| Carbohydrates | 0g |
| Fiber | 0g |
| Sodium | 400-500mg |
Nutritional values vary based on skin thickness and seasoning amounts used.
Frequently Asked Questions
Can I use skin from any part of the chicken?
Yes! Skin from thighs, drumsticks, breasts, and even whole chickens works perfectly. Thigh skin tends to be fattier and crisps up beautifully, while breast skin is typically thinner and cooks faster.
Why isn’t my chicken skin getting crispy?
The most common culprits are insufficient drying, overcrowding the air fryer basket, or cooking at too low a temperature. Ensure skin is completely dry and cook at 400°F in single layers.
How do I remove chicken skin without tearing it?
Use clean kitchen shears or a very sharp knife. Start at one corner and work slowly, keeping the blade parallel to the meat. Partially frozen chicken is often easier to skin cleanly.
Can I make this recipe oil-free?
Absolutely! Chicken skin contains natural fats that render during cooking, so no additional oil is needed. This makes it naturally keto-friendly and lower in added fats.
What’s the best way to season chicken skin?
Pat dry first, then season generously. The seasoning sticks better to dry surfaces. For deeper flavor, let seasoned skins sit for 10-15 minutes before cooking.
Can I cook frozen chicken skin?
It’s better to thaw first for even cooking and proper seasoning adherence. If cooking from frozen, add 2-3 extra minutes to the cooking time and check for doneness.
How do I prevent grease splatter?
The air fryer design minimizes splatter, but you can place a piece of bread in the bottom of the basket to absorb excess grease. Replace if it gets too saturated.
Is chicken skin healthy?
While high in fat, chicken skin contains beneficial monounsaturated fats and is an excellent source of protein. Enjoyed in moderation, it can be part of a balanced diet.
Bonus Tips for Success
Flavor Variations to Try:
- Asian-inspired: Five-spice powder and sesame oil
- Mexican-style: Chili powder, cumin, and lime zest
- Mediterranean: Herbs de Provence and lemon pepper
- BBQ lover’s: Smoked paprika, brown sugar, and garlic
Texture Troubleshooting: If your chicken skin isn’t as crispy as desired, return to the air fryer for 1-2 minute intervals until perfect. Every air fryer model cooks slightly differently.
Make-Ahead Strategy: Season chicken skins up to 24 hours in advance and store covered in the refrigerator. This allows flavors to penetrate while the air-drying process enhances crispiness.
Chef’s Secret: Professional chefs often score the chicken skin lightly with a knife before cooking. This helps fat render more efficiently and creates extra crispy edges.
This air fryer chicken skin recipe proves that the best dishes often come from the simplest ingredients and techniques. Whether you’re looking for a quick snack, a party appetizer, or a way to reduce food waste, this recipe delivers on all fronts. The combination of minimal prep time, maximum flavor, and that irresistible crunch makes this a recipe you’ll return to again and again.
Remember, cooking is all about experimentation and finding what works best for your taste preferences and equipment. Start with this base recipe and make it your own with different seasonings and serving suggestions. Happy cooking!