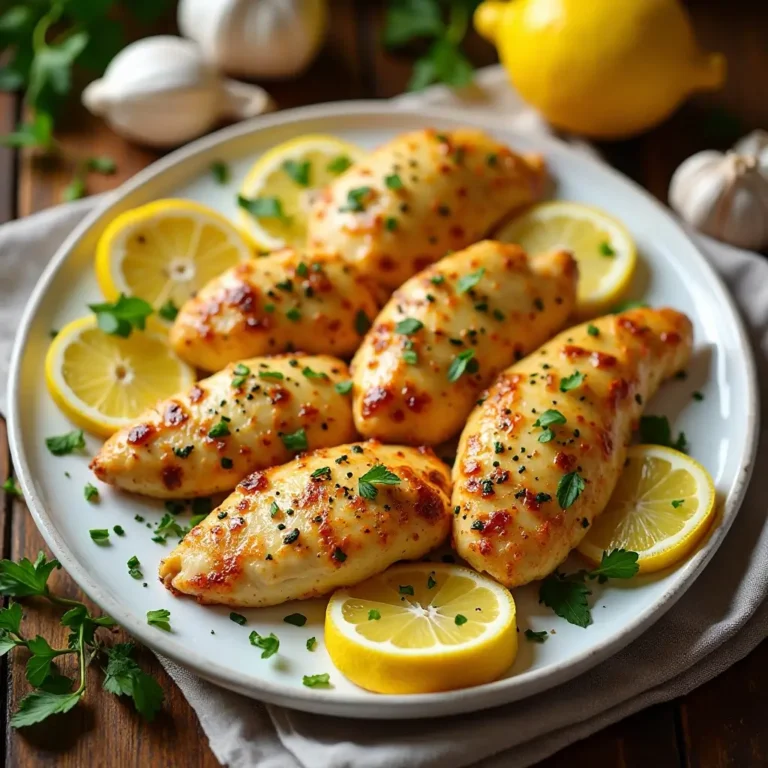
Crispy Air Fryer Chicken Katsu Better Than Takeout
There’s something magical about biting into perfectly crispy chicken katsu with that golden, crunchy coating that shatters at first bite. Making air fryer chicken katsu at home means you get restaurant-quality Japanese comfort food without the deep-frying mess or guilt.
This simplified version delivers all the crunch and flavor you crave in just 25 minutes, making it perfect for busy weeknight dinners when you want something special without the fuss.
What is Air Fryer Chicken Katsu?
Ever wondered why this Japanese favorite has stolen hearts worldwide? Chicken katsu is essentially Japan’s answer to the breaded cutlet, featuring tender chicken coated in panko breadcrumbs and traditionally deep-fried to golden perfection. The air fryer version gives you that same satisfying crunch with a fraction of the oil.
As they say, the way to anyone’s heart is through their stomach, and this crispy, juicy chicken definitely makes the journey delicious! Trust me, once you try making this at home, you’ll never look at frozen chicken tenders the same way again.
Why You’ll Love This Air Fryer Chicken Katsu
The Ultimate Crispy-Tender Combo
This air fryer chicken katsu delivers that coveted restaurant-style crunch without drowning your kitchen in oil. The hot circulating air creates an incredibly crispy panko coating while keeping the chicken breast incredibly moist and tender inside. Every bite offers that perfect textural contrast that makes katsu so addictive.
Budget-Friendly Home Cooking
Restaurant chicken katsu can easily run you $15-20 per plate, but making it at home costs a fraction of that. With simple ingredients you probably already have—chicken breasts, panko, eggs, and basic seasonings—you can feed your whole family for under $10. Plus, you control the quality of ingredients and avoid those mystery oils used in restaurant fryers.
Customizable Flavor Profile
While the classic katsu sauce is wonderfully tangy and sweet, you can personalize your chicken katsu experience with various toppings and accompaniments. Drizzle it with traditional tonkatsu sauce, spicy mayo, or even a squeeze of fresh lemon. Serve it over fluffy rice, tucked into a curry, or sandwich-style between soft white bread. If you loved my [air fryer chicken wings], you’ll absolutely adore this Japanese-inspired dish that’s equally crowd-pleasing but with an elegant twist.
Ready to transform ordinary chicken into something extraordinary? Let’s get cooking!
How to Make Air Fryer Chicken Katsu
Quick Overview
Air fryer chicken katsu is surprisingly straightforward to prepare, making it perfect for both beginners and experienced home cooks. The process involves three simple stations: flour, egg wash, and panko coating.
Once breaded, the chicken cooks in the air fryer for just 12-15 minutes, emerging with a gorgeous golden crust and juicy interior.
Total Time Breakdown:
- Prep Time: 10 minutes
- Cook Time: 15 minutes
- Total Time: 25 minutes
- Servings: 4 people
The hands-on time is minimal, and cleanup is a breeze compared to traditional deep-frying. You’ll have dinner on the table faster than you could drive to a restaurant!
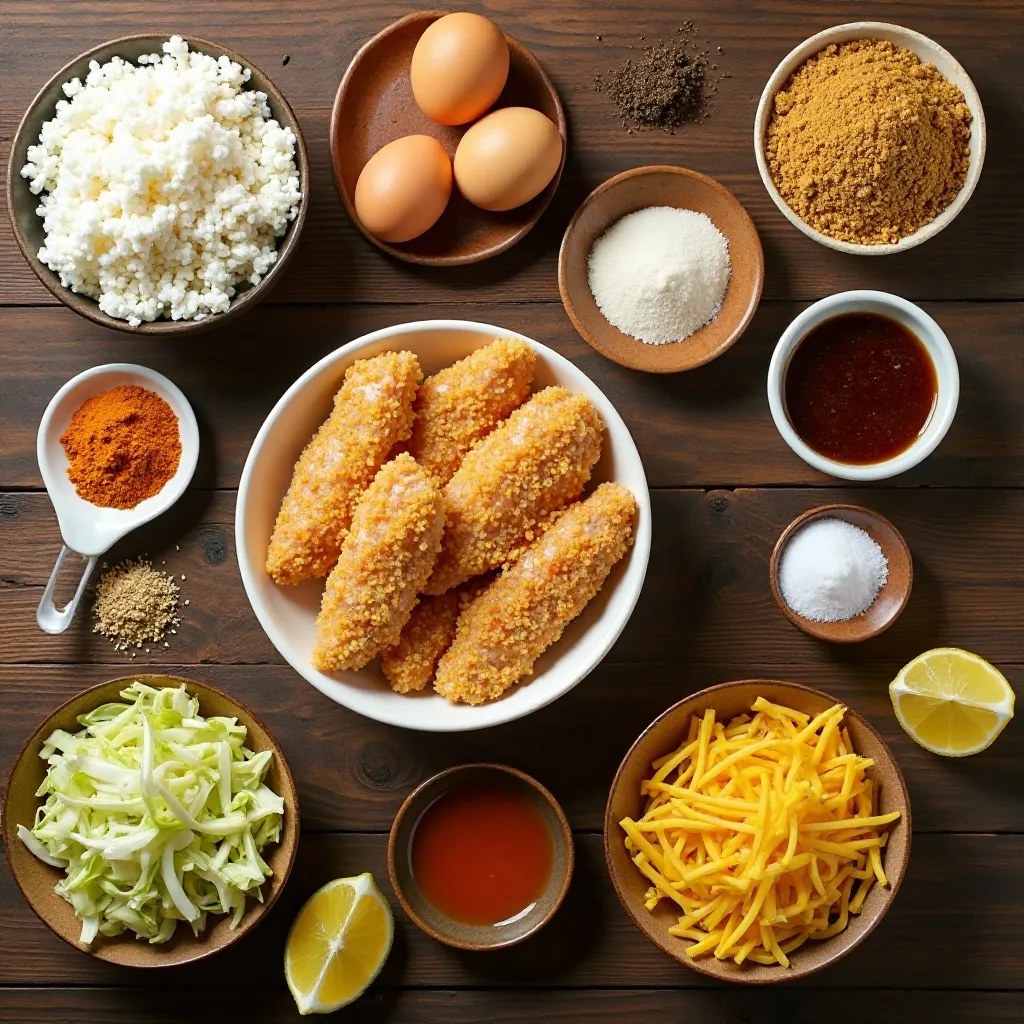
Key Ingredients for Air Fryer Chicken Katsu
For the Chicken:
- 2 large boneless, skinless chicken breasts (about 1.5 lbs total)
- 1 cup all-purpose flour
- 2 large eggs
- 2 cups panko breadcrumbs (Japanese-style)
- 1 teaspoon garlic powder
- 1 teaspoon onion powder
- 1 teaspoon paprika
- Salt and black pepper to taste
- Cooking spray (avocado or olive oil)
For Serving:
- Tonkatsu sauce (or substitute with Worcestershire mixed with ketchup)
- Shredded cabbage
- Steamed white rice
- Lemon wedges
- Japanese mayo (optional)
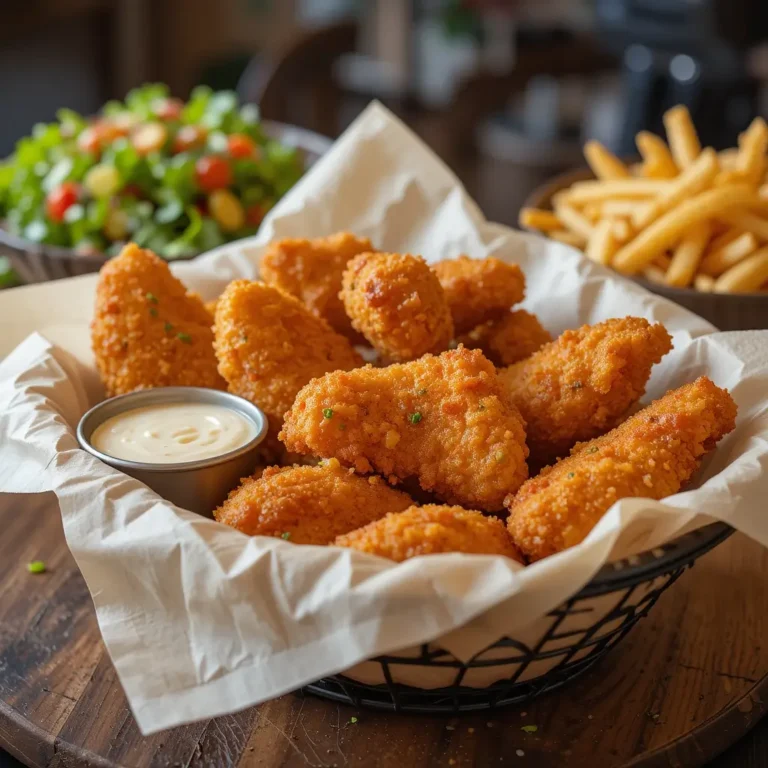
Pro tip: Don’t substitute regular breadcrumbs for panko! The large, flaky texture of panko is what creates that signature crispy coating.
Step-by-Step Instructions
Prepare Your Chicken
Start by butterflying your chicken breasts to create thinner, even cutlets. Place one chicken breast on a cutting board and, using a sharp knife, slice horizontally through the middle, being careful not to cut all the way through. Open it like a book. Repeat with the second breast. This technique ensures even cooking and more surface area for that delicious crispy coating. If your breasts are particularly thick, you can also pound them to about ½-inch thickness using a meat mallet between two sheets of plastic wrap.
Season both sides of the chicken generously with salt and pepper. Don’t be shy here—proper seasoning makes all the difference in the final flavor. Let the chicken sit at room temperature for about 10 minutes while you set up your breading station.
Set Up Your Breading Station
Prepare three shallow bowls or plates for your breading assembly line. In the first bowl, add the all-purpose flour mixed with a pinch of salt and pepper. In the second bowl, whisk together the two eggs with a tablespoon of water until well combined—this helps the egg mixture spread more easily. In the third bowl, combine the panko breadcrumbs with garlic powder, onion powder, paprika, and another pinch of salt and pepper. Mix the seasonings into the panko thoroughly so every bite is flavorful.
Arrange your bowls in order: flour, egg, panko. This traditional left-to-right setup makes the breading process smooth and efficient.
Bread the Chicken
Now for the fun part! Take one chicken cutlet and dredge it completely in the flour, shaking off any excess. This dry layer helps the egg adhere properly. Next, dip the floured chicken into the egg mixture, making sure every surface is coated. Let the excess egg drip off for a moment, then press the chicken firmly into the panko breadcrumbs.
Here’s the secret: really press and pat those breadcrumbs into the chicken on both sides. The more you press, the better they’ll stick and the crispier your katsu will be. Place the breaded cutlet on a clean plate and repeat with the remaining chicken pieces. Once all pieces are breaded, spray the tops generously with cooking spray—this is crucial for achieving that golden-brown color.
Air Fry to Perfection
Preheat your air fryer to 400°F for about 3 minutes. Once hot, place the breaded chicken cutlets in a single layer in the air fryer basket, making sure they don’t overlap. Depending on your air fryer size, you might need to cook in batches. Spray the tops of the chicken once more with cooking spray.
Cook for 7 minutes, then carefully flip each piece using tongs. Spray the other side with cooking spray and continue cooking for another 5-8 minutes, until the chicken reaches an internal temperature of 165°F and the coating is deep golden brown. The exact timing may vary based on your air fryer model and the thickness of your chicken, so keep an eye on it during the last few minutes.
Rest and Serve
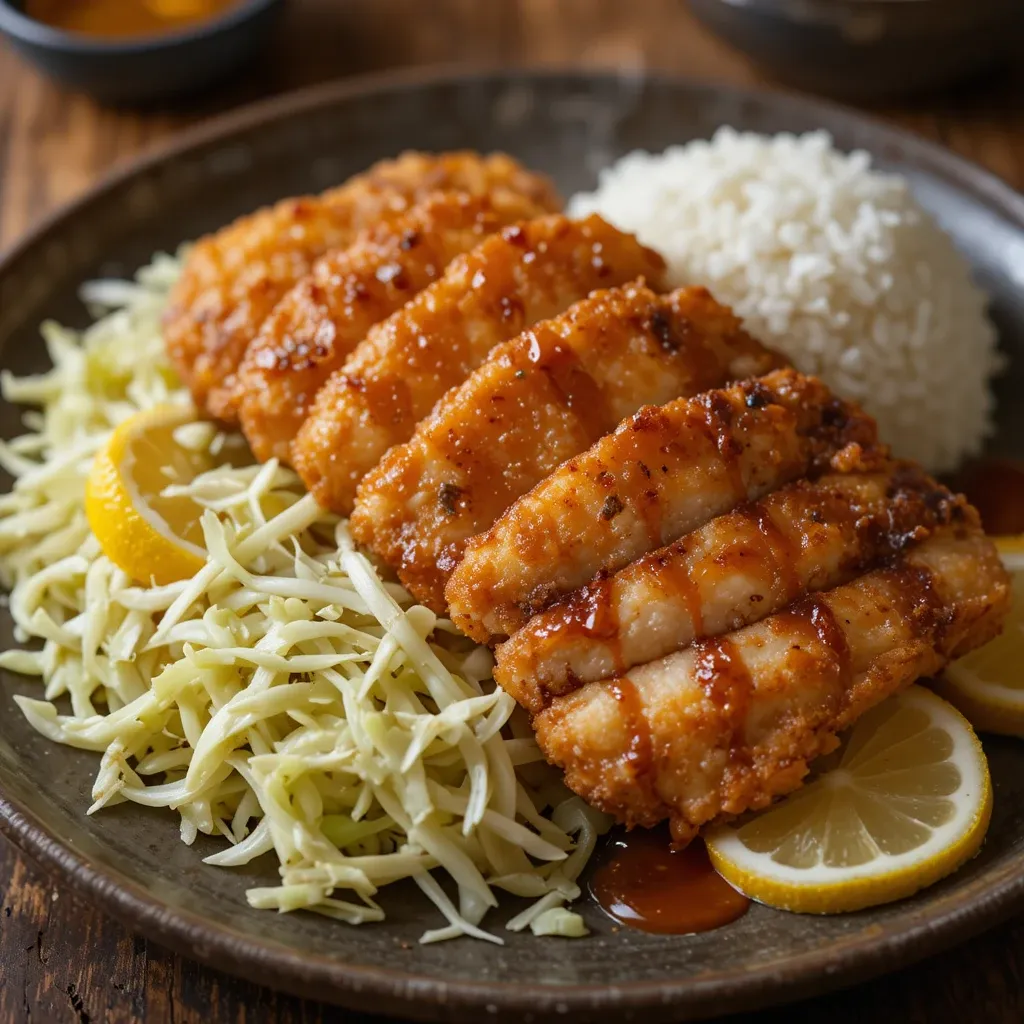
Once cooked, transfer the chicken katsu to a cutting board and let it rest for 3-4 minutes. This allows the juices to redistribute throughout the meat, ensuring every bite is moist and tender. Using a sharp knife, slice the chicken crosswise into strips about ¾-inch wide—this traditional presentation makes it easy to eat and looks beautiful on the plate.
Arrange the sliced chicken over a bed of shredded cabbage and steamed rice. Drizzle generously with tonkatsu sauce and serve with lemon wedges on the side. The slight bitterness of the cabbage perfectly balances the rich, crispy chicken, while the tangy sauce brings everything together in harmony.
What to Serve Air Fryer Chicken Katsu With
Traditional Japanese Sides
The classic way to serve chicken katsu is with fluffy steamed white rice, a mound of finely shredded cabbage, and a drizzle of tonkatsu sauce. The crisp, refreshing cabbage provides a perfect contrast to the rich, fried chicken. You can dress the cabbage with a light sesame dressing if you prefer. Add a bowl of miso soup on the side for an authentic Japanese dining experience.
Make it a Katsu Curry
One of my favorite ways to enjoy chicken katsu is by turning it into katsu curry. Simply pour warm Japanese curry sauce over your rice and top with the sliced crispy chicken. The combination of the sweet, savory curry with the crunchy katsu is absolutely heavenly. You can use store-bought curry roux blocks or make your own from scratch.
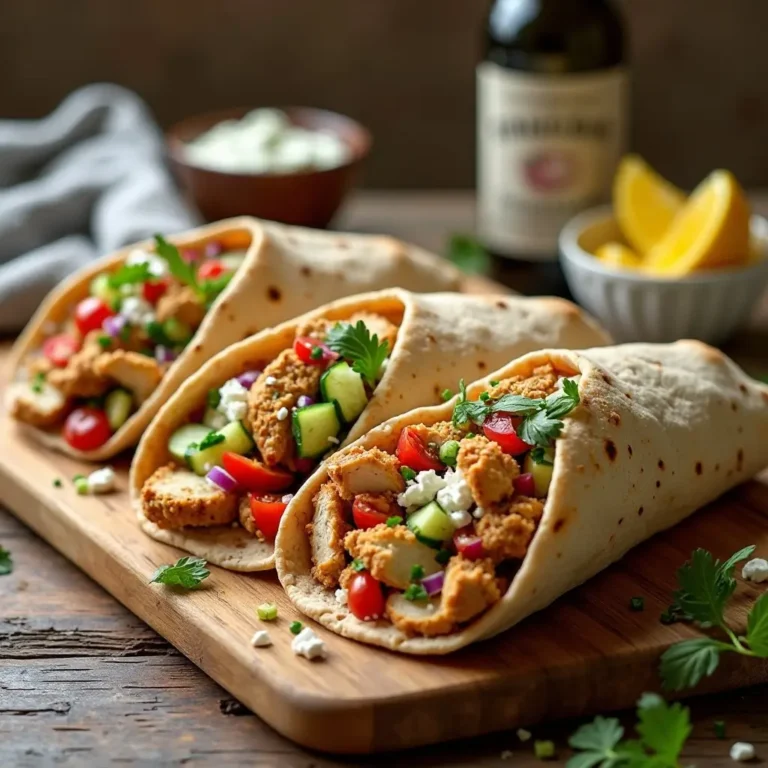
Sandwich Style
Transform your chicken katsu into a delicious Japanese-style sandwich called katsu sando. Place the whole or sliced cutlet between two slices of soft white bread (preferably Japanese milk bread) with tonkatsu sauce and shredded cabbage. Cut off the crusts and slice diagonally for an elegant presentation. It’s perfect for lunch or a light dinner.
Side Dish Ideas
Round out your meal with other complementary sides like cucumber sunomono salad (vinegar-dressed cucumbers), edamame, pickled vegetables, or a simple seaweed salad. For something heartier, serve alongside yakisoba noodles or fried rice.
Top Tips for Perfecting Air Fryer Chicken Katsu
Choose the Right Chicken
For the juiciest results, use chicken breasts that are similar in size so they cook evenly. If you only have thick chicken breasts, butterfly or pound them to an even ½-inch thickness. You can also use chicken thighs for a richer, more forgiving option that stays moist even if slightly overcooked. Thighs take an extra 2-3 minutes in the air fryer.
Don’t Skip the Spray
The cooking spray is absolutely essential for achieving that golden-brown color and crispy texture. Without oil, the breadcrumbs will stay pale and won’t crisp up properly. Be generous with the spray on both sides, but don’t go overboard—too much oil can make the coating soggy rather than crispy.
Let it Rest
I know it’s tempting to cut into that beautiful golden chicken immediately, but patience pays off! Letting the katsu rest for 3-4 minutes allows the juices to settle back into the meat. If you cut too soon, all those delicious juices will run out onto your cutting board instead of staying in the chicken where they belong.
Make Ahead and Freeze
You can bread the chicken cutlets up to 24 hours in advance. Place them on a baking sheet, cover with plastic wrap, and refrigerate until ready to cook. For longer storage, freeze the breaded (but uncooked) cutlets on a baking sheet until solid, then transfer to a freezer bag. Cook directly from frozen, adding 3-4 extra minutes to the cooking time.
Temperature Matters
Always use a meat thermometer to check for doneness. Chicken should reach an internal temperature of 165°F. Overcooking will dry out the meat, while undercooking is unsafe. Checking the temperature takes just seconds and guarantees perfect results every time.
Avoid Breading Mishaps
Keep one hand for dry ingredients and one for wet to avoid building up clumpy “club fingers” during breading. If your breading starts falling off during cooking, you likely didn’t press it firmly enough or skipped the flour layer. The flour creates a dry surface that helps the egg stick, which in turn helps the panko adhere.
Watch Your Air Fryer
Every air fryer cooks slightly differently. The first time you make this recipe, check the chicken at the 10-minute mark. If it’s browning too quickly, reduce the temperature to 375°F. If it’s not browning enough, increase to 425°F or add an extra minute or two of cooking time. Take notes for your specific appliance.
Storing and Reheating Tips
Refrigeration
Store leftover chicken katsu in an airtight container in the refrigerator for up to 3 days. Place parchment paper between layers if stacking to prevent the pieces from sticking together. While the coating will lose some crispiness during storage, proper reheating can help restore much of that texture.
Freezing for Later
Cooked chicken katsu freezes surprisingly well for up to 2 months. Let the chicken cool completely, then wrap each piece individually in plastic wrap followed by aluminum foil. This double wrapping prevents freezer burn and keeps the flavor fresh. Label with the date so you remember when you made it.
Reheating for Best Results
The air fryer is hands-down the best way to reheat chicken katsu. Preheat to 350°F and cook for 3-5 minutes until heated through and crispy again. You can also use a regular oven at 375°F for 8-10 minutes on a wire rack. Avoid the microwave if possible—it will make the coating soft and soggy rather than crispy. If you must microwave, do so for just 30 seconds, then finish in a hot skillet to crisp up the exterior.
Nutrition Information
| Nutrient | Per Serving |
|---|---|
| Calories | 385 |
| Protein | 42g |
| Carbohydrates | 32g |
| Fat | 9g |
| Saturated Fat | 2g |
| Fiber | 2g |
| Sugar | 2g |
| Sodium | 420mg |
Note: Nutritional values are approximate and based on one serving (1/4 of recipe). Values may vary based on specific ingredients used.
Frequently Asked Questions
Can I use regular breadcrumbs instead of panko?
While you technically can, I don’t recommend it. Regular breadcrumbs are much finer and denser, which means they won’t create that signature light, crispy, and airy texture that makes katsu so special. Panko breadcrumbs are larger and flakier, creating more surface area and air pockets that crisp up beautifully in the air fryer. If you can’t find panko in stores, it’s worth ordering online—the texture difference is that noticeable.
Why is my breading falling off in the air fryer?
This frustrating problem usually comes down to three things: not pressing the breadcrumbs firmly enough, skipping the flour coating, or not letting the breaded chicken rest before cooking. Make sure you really press those panko crumbs into the chicken on all sides. The flour layer is essential as it creates a dry surface for the egg to grip. Finally, let the breaded chicken sit for 5 minutes before air frying to help everything set.
What can I substitute for tonkatsu sauce?
No tonkatsu sauce? No problem! Mix equal parts ketchup and Worcestershire sauce with a touch of sugar and soy sauce for a quick homemade version. Other tasty alternatives include sweet chili sauce, teriyaki sauce, or even honey mustard. In a pinch, plain ketchup with a squeeze of lemon works surprisingly well too.
Can I make this recipe gluten-free?
Absolutely! Use gluten-free all-purpose flour for dredging and gluten-free panko breadcrumbs (available at most health food stores or online). Make sure your tonkatsu sauce is also gluten-free, as traditional versions often contain wheat. The texture will be nearly identical to the regular version.
How do I know when the chicken is fully cooked?
The most reliable method is using an instant-read meat thermometer. Insert it into the thickest part of the chicken—it should read 165°F. Visually, the juices should run clear when you pierce the chicken, and the meat should be white throughout with no pink spots. The coating should be deep golden brown and crispy.
Can I cook frozen chicken katsu directly in the air fryer?
Yes! If you’ve frozen breaded raw chicken, you can cook it straight from frozen. Add 3-4 extra minutes to the total cooking time and check that the internal temperature reaches 165°F. You may need to flip it an extra time during cooking to ensure even browning.
What’s the best way to slice chicken for even cooking?
Butterflying is your best friend here. Place the chicken breast flat on a cutting board with your non-knife hand on top. Using a sharp knife parallel to the board, carefully slice through the middle horizontally, stopping about half an inch from the opposite edge. Open the breast like a book. This creates a thinner, more even piece that cooks uniformly.
My chicken katsu is browning too fast but not cooked inside. Help!
This means your air fryer temperature is too high. Reduce it to 375°F and cook for a bit longer. You can also cover the chicken loosely with aluminum foil during the last few minutes to prevent over-browning while the inside finishes cooking.
Common Mistakes to Avoid When Making Air Fryer Chicken Katsu
Overcrowding the Air Fryer Basket
I get it—you want to cook everything at once and get dinner on the table faster. But overcrowding is the enemy of crispiness. When the chicken pieces touch or overlap, they steam instead of frying, resulting in a soggy coating. Always leave space between pieces for air circulation. It’s better to cook in two batches and have perfectly crispy katsu than to rush it and end up disappointed.
Using Wet Chicken
Starting with wet chicken is a recipe for breading disaster. Pat your chicken completely dry with paper towels before beginning the breading process. Any moisture will prevent the flour from adhering properly, which means the egg won’t stick, which means your beautiful panko coating will slide right off during cooking. Dry chicken is happy chicken!
Not Seasoning Each Layer
Seasoning only the chicken or only the breadcrumbs means some bites will be bland. Season the chicken itself first, then add salt and pepper to both the flour and the panko mixture. This layered seasoning approach ensures every component is flavorful and the final dish tastes well-rounded.
Skipping the Preheat
Placing cold chicken into a cold air fryer means it’ll take longer to cook and the breading won’t crisp up as nicely. Always preheat your air fryer for 3-5 minutes before adding the chicken. This creates an immediately hot environment that starts crisping the coating right away.
Flipping Too Often
Resist the urge to constantly check and flip your chicken. Opening the air fryer releases heat and slows down the cooking process. Flip once halfway through and trust the process. Constant flipping can also cause the breading to fall off.
Not Using Enough Oil Spray
While air frying uses less oil than deep frying, you still need some fat for browning and crisping. Be generous with the cooking spray on both sides of the chicken. I know it seems like a lot, but without it, your katsu will be pale and not nearly as crispy as it should be.
Cutting Into Hot Chicken Immediately
This is probably the most common mistake home cooks make with any chicken dish. Cutting immediately after cooking causes all the juices to run out. Just wait 3-4 minutes—I promise it’s worth it. The chicken will be so much juicier and more flavorful.
There you have it—everything you need to make incredible air fryer chicken katsu at home! This recipe has become a weekly staple in my house because it’s just that good. The crispy exterior, tender juicy chicken, and that addictive tangy-sweet sauce create a flavor combination that’s hard to beat.
What I love most is how achievable this restaurant-quality dish is for home cooks of any skill level. No special equipment beyond an air fryer, no complicated techniques, and definitely no messy deep-frying. Just straightforward steps that lead to impressive results every single time.
Have you tried making chicken katsu before? I’d love to hear about your experience in the comments below! And if you make this recipe, please share a photo—I get genuinely excited seeing your recreations. Don’t forget to tag me on social media so I can admire your crispy creations.
Happy cooking, friends! May your katsu always be crispy and your chicken always juicy. 🍗✨